
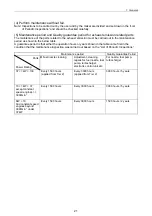
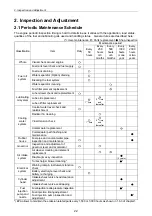


2. Inspection and Adjustment
In early period of use, the engine oil gets dirty rapidly
because of the initial wear of internal parts. Replace
he engine oil earlier.
t
Lube oil filter should also be replaced when the engine
oil is replaced.
The procedure of lube oil and lube oil filter
replacement is as follows.
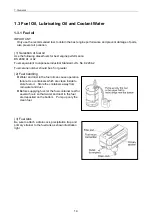
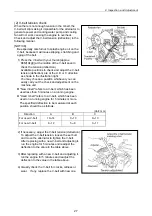
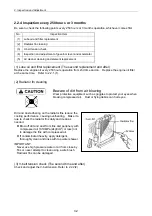
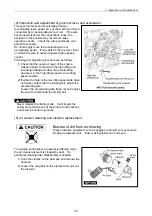
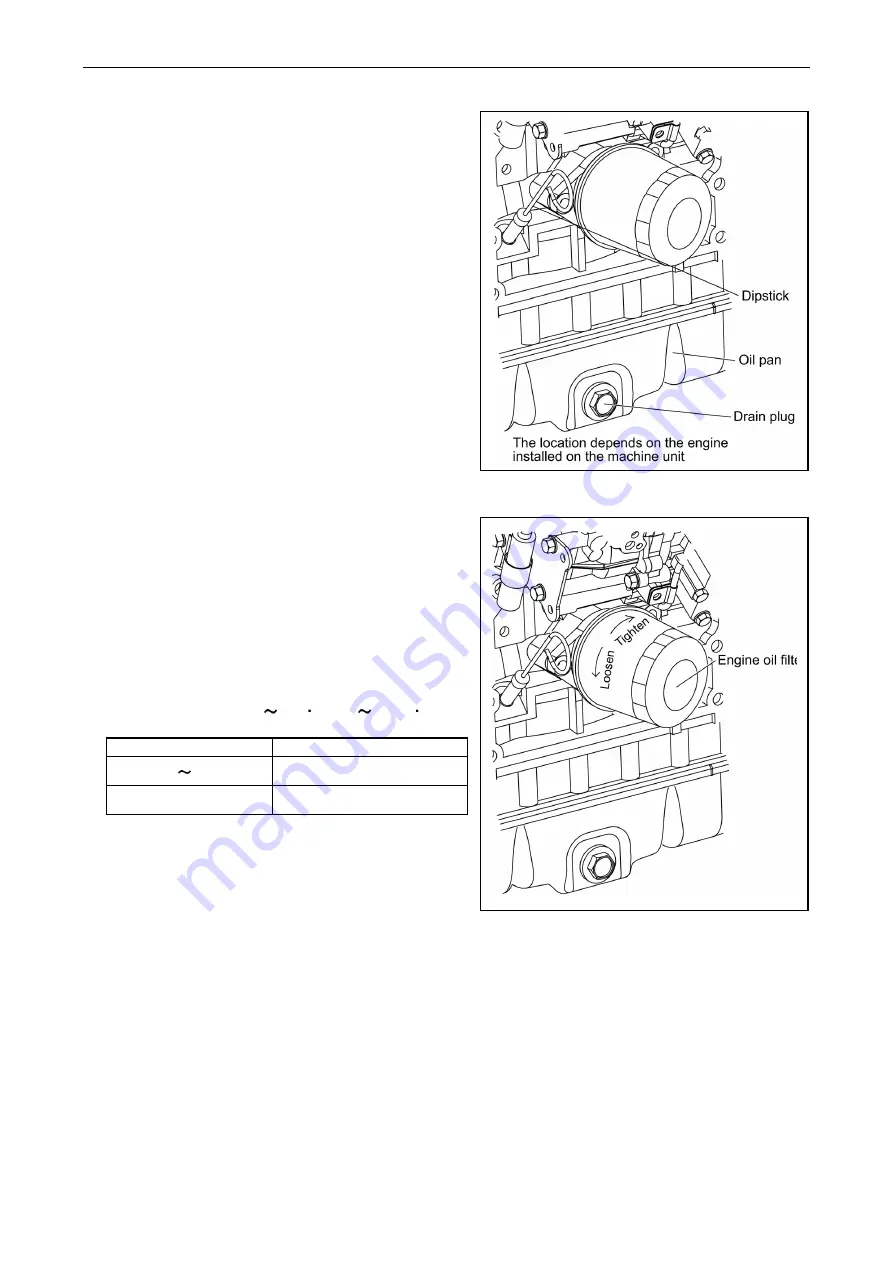
(a) Drain engine oil
Prepare a waste oil container collecting waste oil.
Remove the oil filler cap to drain easily while
draining the lube oil.
Loosen the drain plug using a wrench (customer
procured) to drain the lube oil.
Securely tighten the drain plug after draining the
lube oil.
[NOTICE]
Use a socket wrench or a closed wrench when
removing or tightening a drain plug.
Don’t use a spanner because it has the possibility
that the spanner will slip and it will get hurt.
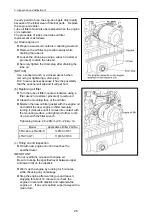
(b) Replacing oil filter
Turn the lube oil filter counter-clockwise using a
filter wrench (customer procured) to remove it.
Clean the mounting face of the oil filter.
Moisten the new oil filter gasket with the engine oil
and install the new engine oil filter manually
turning it clockwise until it comes into contact with
the mounting surface, and tighten it further to 3/4
of a turn with the filter wrench.
Tightening torque: 20 24N m (2.0 2.4kgf m)
Model
Applicable oil filter Part No.
3TNV82A 4TNV98(T)
129150-35151
4TNV106(T) 119005-35100
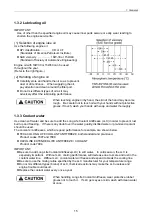
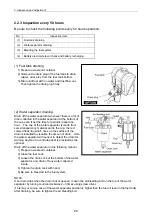
(c) Filling oil and inspection
Fill with new engine oil until it reaches the
specified level.
IMPORTANT:
Do not overfill the oil pan with engine oil.
Be sure to keep the specified level between upper
and lower limit on the dipstick.
Warm up the engine by running for 5 minutes
while checking any oil leakage
Stop the engine after warming up and leave it
stopping for about 10 minute to recheck the
engine oil level with dipstick and replenish the
engine oil. If any oil is spilled, wipe it away with a
clean cloth.
26
Summary of Contents for 3TNV Series
Page 1: ...4TNV106 4TNV106T 4TNV94L 4TNV98 4TNV98T 3TNV82A 3TNV84 T 4TNV84 T 3TNV88 4TNV88 ...
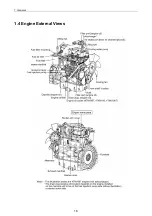
Page 31: ...1 General 1 4 Engine External Views 16 ...
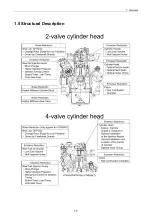
Page 32: ...1 General 1 5 Structural Description 17 ...
Page 156: ...9 Starting Motor 9 1 2 Components 141 ...
Page 157: ...9 Starting Motor 9 1 3 Troubleshooting 142 ...
Page 172: ...9 Starting Motor 9 2 3 Troubleshooting 157 ...
Page 175: ...9 Starting Motor 2 Removal of magnetic switch Remove the M6 bolts 10mm 2 160 ...
Page 185: ...9 Starting Motor 3 Brush 1 Check wear of the brush and the brush spring force 170 ...
Page 194: ...10 Alternator 179 10 1 6 Troubleshooting ...
Page 195: ...11 Electric Wiring 180 11 ELECTRIC WIRING 11 1 Electric Wiring Diagram ...
Page 213: ......


