4. Disassembly, Inspection and Reassembly of Engines
72
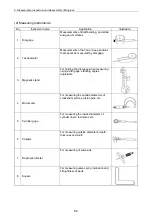
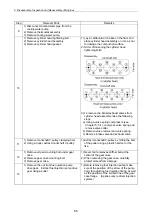
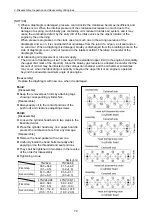
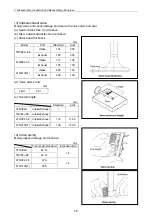
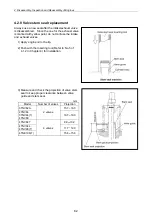
4.2.4 Servicing points
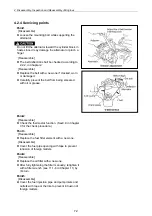
Point1
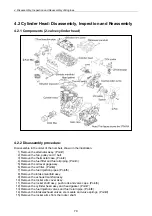
[Disassemble]
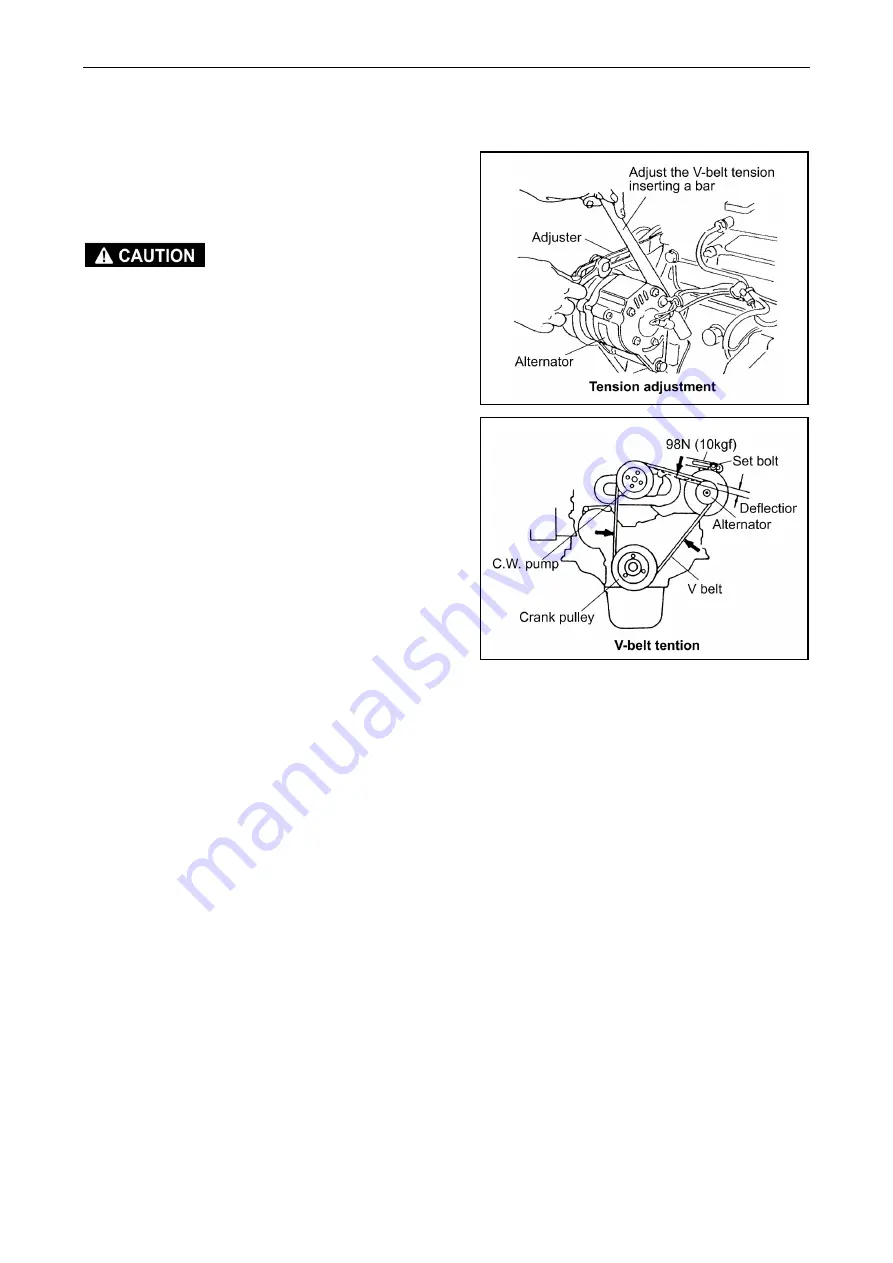
Loosen the mounting bolt while supporting the
alternator.
Do not tilt the alternator toward the cylinder block in
haste since it may damage the alternator or pinch a
finger.
[Reassemble]
The belt deflection shall be checked according to
2.2.2. in Chapter2.
[Reassemble]
Replace the belt with a new one if cracked, worn
or damaged.
Carefully prevent the belt from being smeared
with oil or grease.
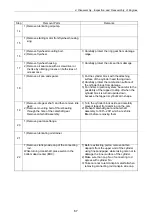
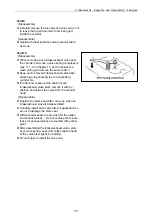
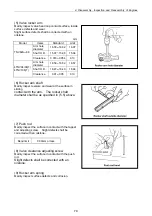
Point2
[Reassemble]
Check the thermostat function. (See3.9 in Chapter
3 for the check procedure.)
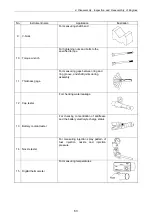
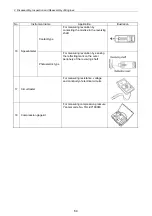
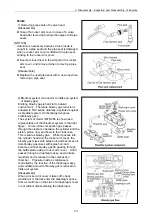
Pont3
[Reassemble]
Replace the fuel filter element with a new one.
[Disassemble]
Cover the fuel pipe opening with tape to prevent
intrusion of foreign matters.
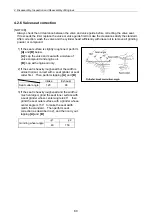
Point4
[Reassemble]
Replace the oil filter with a new one.
After fully tightening the filter manually, retighten it
with a filter wrench (see 11.1-6 in Chapter 11) by
3/4 turn.
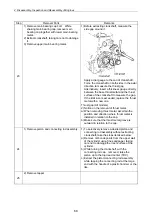
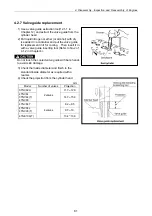
Point5
[Disassemble]
Cover the fuel injection pipe and pump inlets and
outlets with tape or the like to prevent intrusion of
foreign matters.
Summary of Contents for 3TNV Series
Page 1: ...4TNV106 4TNV106T 4TNV94L 4TNV98 4TNV98T 3TNV82A 3TNV84 T 4TNV84 T 3TNV88 4TNV88 ...
Page 31: ...1 General 1 4 Engine External Views 16 ...
Page 32: ...1 General 1 5 Structural Description 17 ...
Page 156: ...9 Starting Motor 9 1 2 Components 141 ...
Page 157: ...9 Starting Motor 9 1 3 Troubleshooting 142 ...
Page 172: ...9 Starting Motor 9 2 3 Troubleshooting 157 ...
Page 175: ...9 Starting Motor 2 Removal of magnetic switch Remove the M6 bolts 10mm 2 160 ...
Page 185: ...9 Starting Motor 3 Brush 1 Check wear of the brush and the brush spring force 170 ...
Page 194: ...10 Alternator 179 10 1 6 Troubleshooting ...
Page 195: ...11 Electric Wiring 180 11 ELECTRIC WIRING 11 1 Electric Wiring Diagram ...
Page 213: ......


