4. Disassembly, Inspection and Reassembly of Engines
73
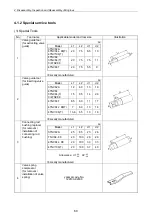
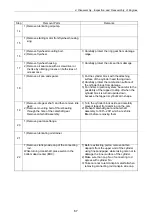
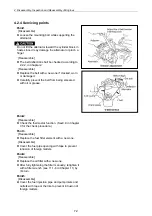
Point6
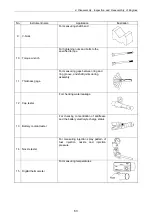
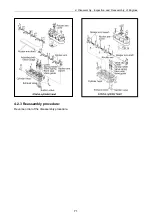
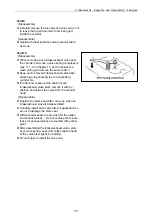
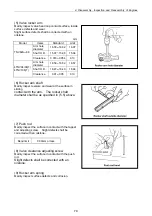
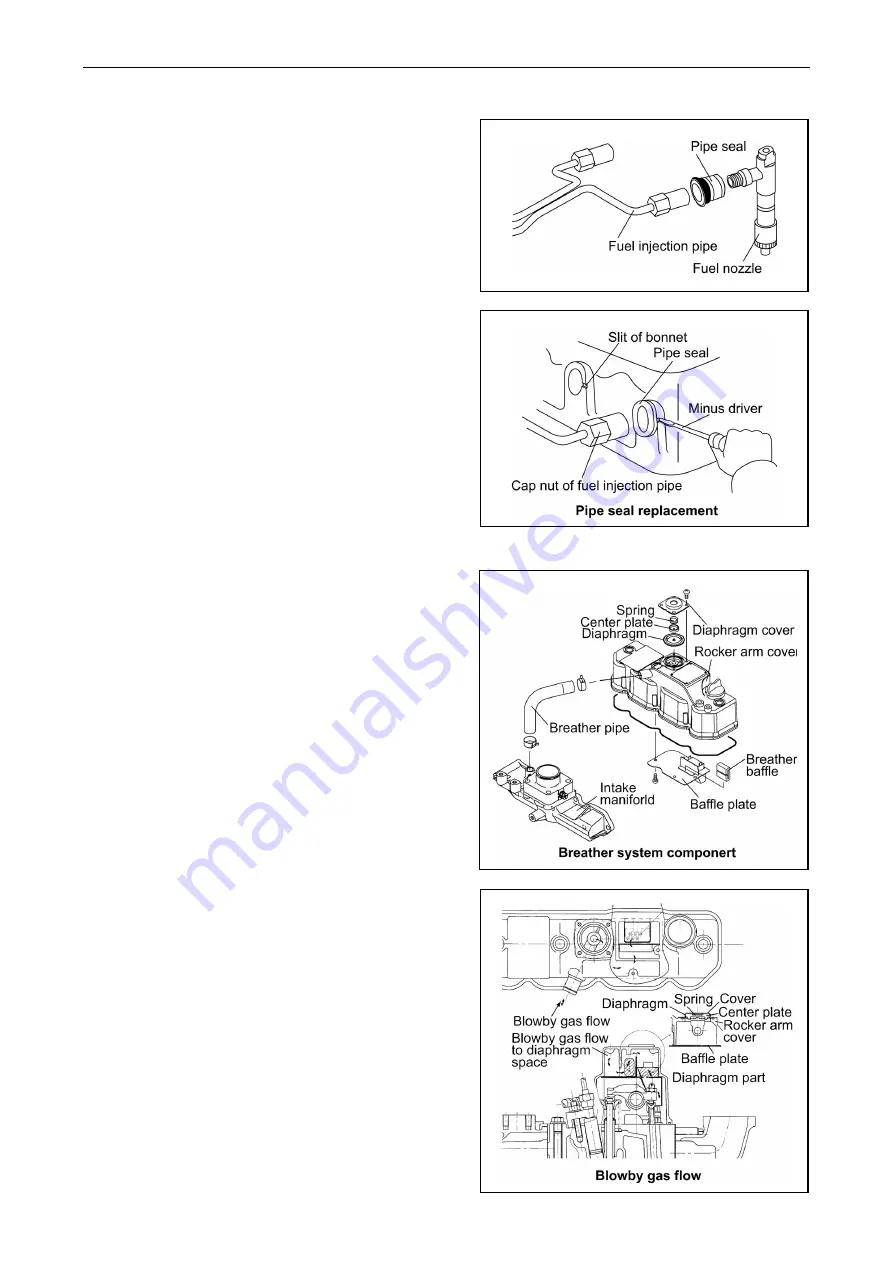
1) Removing pipe seals of 4 valve head.
[Disassemble]
Take off a rocker arm cover in case of 4 valve
head after removing fuel injection pipes and pipe
seals.
[NOTICE]
Attention is necessary because a fuel nozzle is
caught in a pipe seal and the pipe seal is damaged
when a rocker arm cover is lifted with a pipe seal
sticking to the rocker arm cover.
Insert a minus driver in the slit part of the rocker
arm cover, and remove it when removing a pipe
seal.
[Reassemble]
Replace the used pipe seal with a new one when
removing a pipe seal.
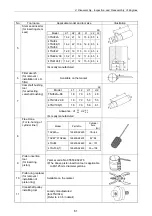
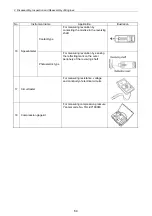
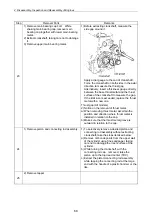
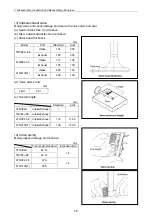
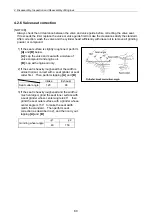
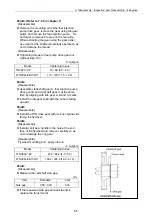
2) Breather system (A reductor to intake air system
of blowby gas)
Emitting blowby gas is harmful to natural
environment. Therefore blowby gas reductor is
adopted to TNV series naturally- aspirated engines
as breather system (Turbocharged engines
emitblowby gas).
The system of model 3/4TNV84 is shown as a
representative of that breather system in the right
figure. Some of the combustion gas passes
through the clearance between the cylinder and the
piston, piston ring, and flows to the crankcase.
This is said as blowby gas. While it passes into
the cylinder head and the rocker arm cover, the
blowby gas mixes with splash oil, and becomes oil
mist-blowby gas mixes with splash oil, and
becomes oil mist-blowby gas ith passing through
the baffle plate inside a rocker arm cover. And it
passes through a diaphragm assy, and a intake
manifold, and is reduced in the combustion
chamber. Pressure inside a crankcase is
controlled by the function of the diaphragm assy,
and suitable amount of blowby gas is reduced in
intake air system.
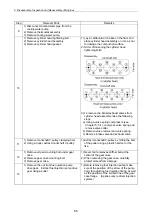
[Disassemble]
When a rocker arm cover is taken off, check
whether oil or the like enter the diaphragm space
from a small hole on the side of a diaphragm cover
or not without disassembling the diaphragm.
Summary of Contents for 3TNV Series
Page 1: ...4TNV106 4TNV106T 4TNV94L 4TNV98 4TNV98T 3TNV82A 3TNV84 T 4TNV84 T 3TNV88 4TNV88 ...
Page 31: ...1 General 1 4 Engine External Views 16 ...
Page 32: ...1 General 1 5 Structural Description 17 ...
Page 156: ...9 Starting Motor 9 1 2 Components 141 ...
Page 157: ...9 Starting Motor 9 1 3 Troubleshooting 142 ...
Page 172: ...9 Starting Motor 9 2 3 Troubleshooting 157 ...
Page 175: ...9 Starting Motor 2 Removal of magnetic switch Remove the M6 bolts 10mm 2 160 ...
Page 185: ...9 Starting Motor 3 Brush 1 Check wear of the brush and the brush spring force 170 ...
Page 194: ...10 Alternator 179 10 1 6 Troubleshooting ...
Page 195: ...11 Electric Wiring 180 11 ELECTRIC WIRING 11 1 Electric Wiring Diagram ...
Page 213: ......


