
4. Disassembly, Inspection and Reassembly of Engines
76
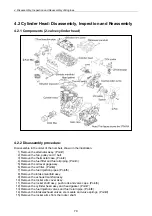
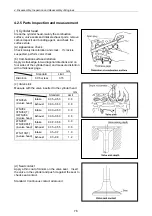
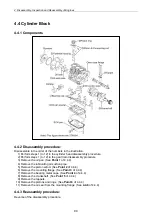
4.2.5 Parts Inspection and measurement
(1) Cylinder head
Clean the cylinder head, mainly the combustion
surface, valve seats and intake/exhaust ports, remove
carbon deposit and bonding agent, and check the
surface state.
(a) Appearance check
Check mainly discoloration and crack. If crack is
suspected, perform color check.
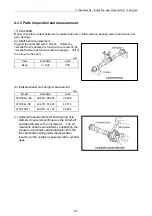
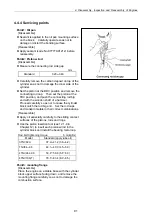
(b) Combustion surface distortion
Apply a strait-edge in two diagonal directions and on
four sides of the cylinder head, and measure distortion
with a thickness gage.
mm
Standard
Limit
Distortion
0.05 or less
0.15
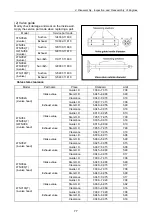
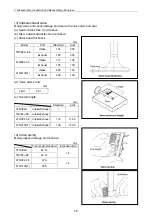
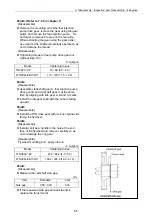
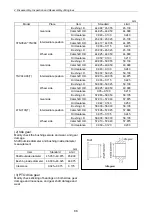
(c) Valve sink
Measure with the valve inserted to the cylinder head.
mm
Standard
Limit
Intake 0.35 0.55 0.8
3TNV82A
(2-valve head) Exhaust 0.30 0.50 0.8
4TNV84
3TNV84(T)
Intake 0.30 0.50 0.8
3/4TNV88
(2-valve head)
Exhaust 0.30 0.50 0.8
Intake 0.36 0.56
0.8
4TNV84T
4TNV94/98(T)
(4-valve head) Exhaust 0.35 0.55 0.8
Intake 0.5 0.7 1.0
4TNV106(T)
(4-valve head) Exhaust 0.7 0.9 1.2
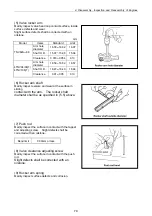
(d) Seat contact
Apply a thin coat of minium on the valve seat. Insert
the valve in the cylinder and push it against the seat to
check seat contact.
Standard: Continuous contact all around
Summary of Contents for 3TNV Series
Page 1: ...4TNV106 4TNV106T 4TNV94L 4TNV98 4TNV98T 3TNV82A 3TNV84 T 4TNV84 T 3TNV88 4TNV88 ...
Page 31: ...1 General 1 4 Engine External Views 16 ...
Page 32: ...1 General 1 5 Structural Description 17 ...
Page 156: ...9 Starting Motor 9 1 2 Components 141 ...
Page 157: ...9 Starting Motor 9 1 3 Troubleshooting 142 ...
Page 172: ...9 Starting Motor 9 2 3 Troubleshooting 157 ...
Page 175: ...9 Starting Motor 2 Removal of magnetic switch Remove the M6 bolts 10mm 2 160 ...
Page 185: ...9 Starting Motor 3 Brush 1 Check wear of the brush and the brush spring force 170 ...
Page 194: ...10 Alternator 179 10 1 6 Troubleshooting ...
Page 195: ...11 Electric Wiring 180 11 ELECTRIC WIRING 11 1 Electric Wiring Diagram ...
Page 213: ......


