

ENGINE
3TNV88F Service Manual
6-39
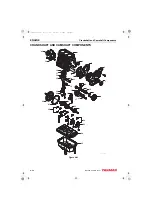
Crankshaft and Camshaft Components
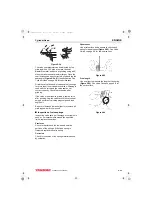
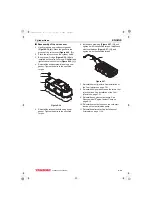
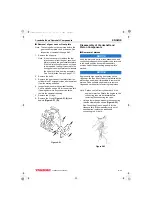
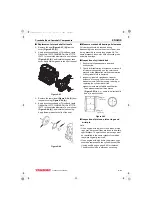
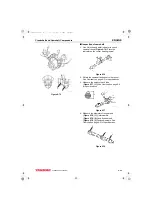
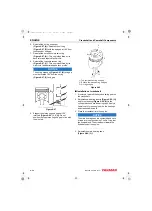
8. Remove the circlips
from the
wrist pin.
9. Remove the wrist pin
and
connecting rod
from the
piston
(Figure 6-55, (9))
.
10. Repeat the steps until all pistons are removed
and dissembled.
■
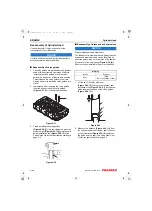
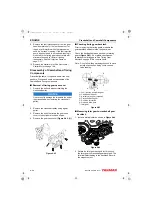
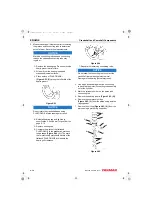
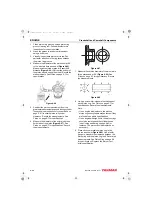
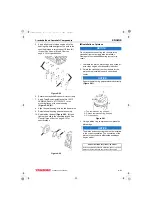
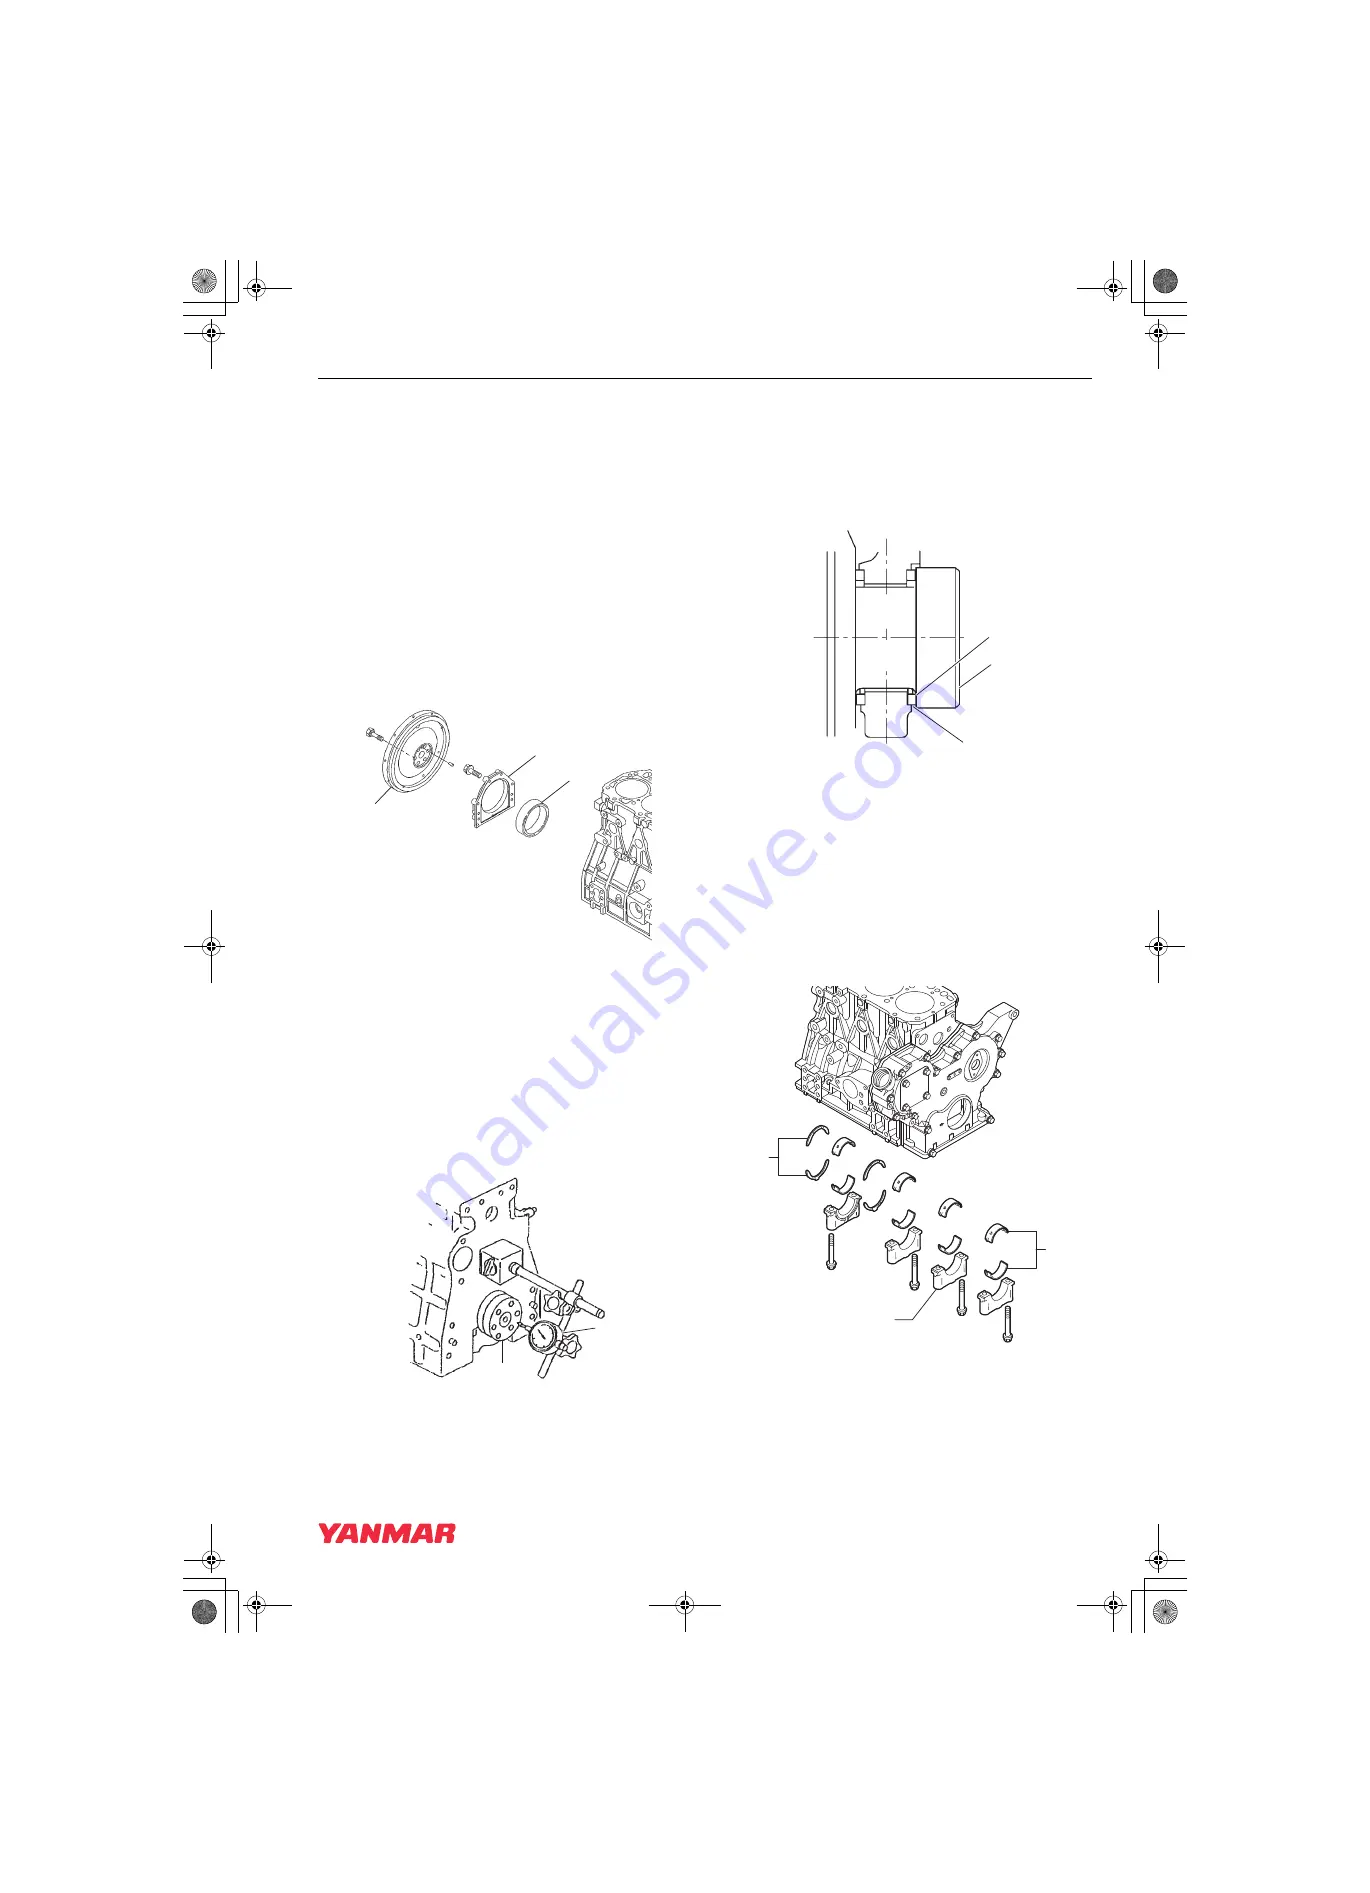
Removal of crankshaft
1. Remove the flywheel
from
the crankshaft.
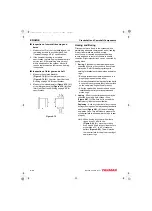
2. Remove the bolts from the rear oil seal
assembly
. Remove the
assembly from the engine.
Figure 6-56
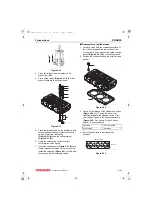
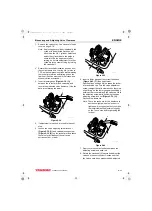
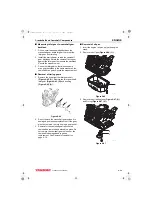
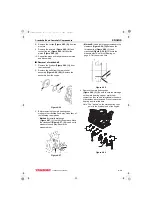
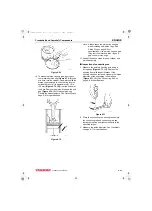
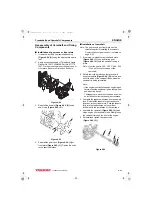
3. Before removing the main bearing caps,
measure the crankshaft end play. Use either of
the following two methods.
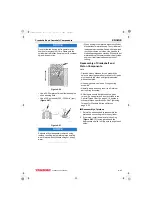
•
Method A:
Install a dial gauge
(Figure 6-57, (1))
on the cylinder block. Move
the crankshaft
(Figure 6-57, (2))
in and out to
measure the end play. Record the
measurement.
Figure 6-57
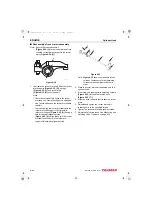
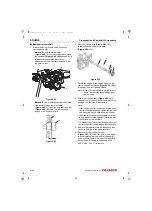
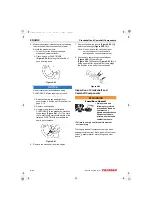
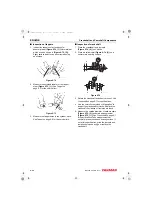
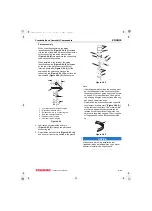
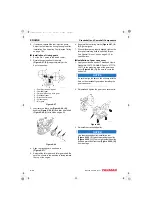
•
Method B:
Use a feeler gauge to measure the
clearance
between the
thrust bearing
and
crankshaft
(Figure 6-58, (2))
. Record the
measurement.
page 6-7 for the service limit.
Figure 6-58
4. Remove the main bearing caps
(Figure 6-59, (3))
. Be sure to note the markings
on the main bearing caps, or mark them
yourself, so they can be reinstalled in the same
order as they were removed. Do not remove the
bearing inserts at this time.
Note: The “arrows” on the main bearing caps
point to the flywheel end of the engine.
Figure 6-59
2
K0001707A
1
3
1
2
K0001961
1
2
3
K0001962
2
1
3
046359-00X00
3TNV88F_SVM_A4.book 39 ページ 2012年7月26日 木曜日 午後6時4分


