FUEL SYSTEM
Repair
12/05
BY Service Manual
6-13
© 2009 Yanmar Marine International
10. Use compressed air to blow debris out of cavity
while covering cavity with cloth to catch debris.
WARNING! Flying Object Hazard. ALWAYS
wear eye protection when servicing the
engine and when using compressed air or
high-pressure water. Dust, flying debris,
compressed air, pressurized water or steam
may injure your eyes.
11. Inspect to ensure sealing surface is clean.
Repeat cleaning if necessary.
12. Use special tool OEM No. 13 5 214 to remove
tip (special tool OEM No. 13 5 215) from bottom
of injector cavity. See Install Fuel Injector on
page 6-13.
13. Install fuel injector and high-pressure line. See
Install Fuel Injector on page 6-13.
14. Run engine and check for fuel leaks.
Install Fuel Injector
1. Make sure that the old gasket is not at the
bottom of the injector seat. Clean the sealing
surfaces of the injector seat. See Clean Fuel
Injector Cavities on page 6-12.
2. Inspect the O-ring and replace as necessary.
Lubricate the O-ring with petroleum jelly.
NOTICE: ALWAYS install new copper gasket
when installing an injector. Make sure all
sealing surfaces are clean.
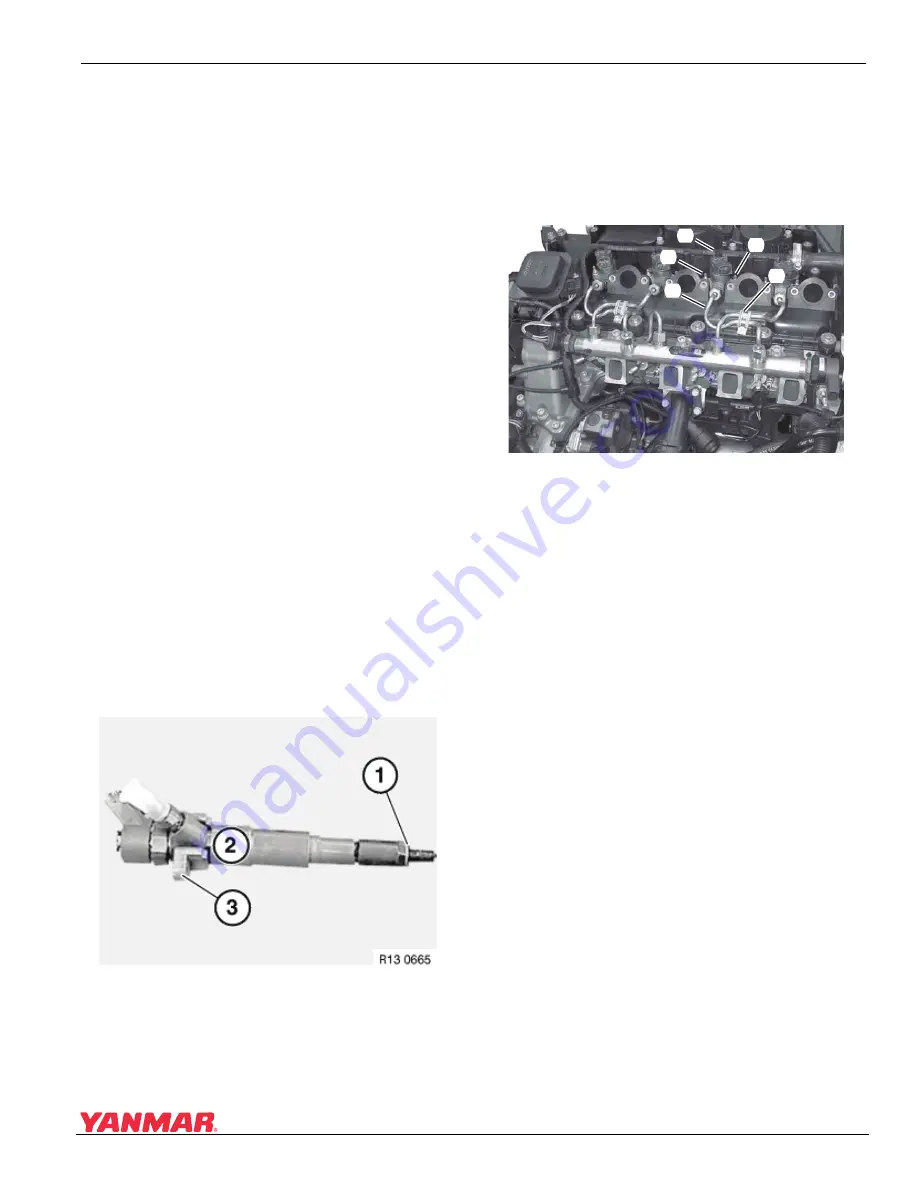
3. Install new gasket (Figure 6-17, (1)) on tip of
injector (Figure 6-17, (2)).
Figure 6-17
Figure 6-17
4. Place the retainer (Figure 6-17, (3)) on the
injector as shown.
Note: If installing used fuel injectors, clean the
stem and nozzle prior to installation.
5. Install the injector and retainer as an assembly.
6. Install the two nuts (Figure 6-18, (1)) and
tighten in steps, first to 3.5 N·m (31 in.-lb) then
to 8 N·m (71 in.-lb).
Figure 6-18
Figure 6-18
7. Install the high-pressure fuel line
(Figure 6-18, (2)). See Remove and Install
High-Pressure Fuel Lines on page 6-14.
8. If removed, install clamp (Figure 6-18, (3)).
9. Install injector return fuel lines
(Figure 6-18, (4)). See Replace Injector Return
Fuel Line on page 6-21.
10. Install intake manifold. See Intake Manifold on
11. Open all fuel supply valves.
12. Connect the battery negative (-) cable.
13. Fill and bleed fuel system. See Bleed the Fuel
14. Start the engine and check for fuel leaks. Allow
the engine to run until it is running smoothly.
WARNING! Piercing Hazard. NEVER check
for a fuel leak with your hands. ALWAYS use
a piece of wood or cardboard.
15. Check and delete any trouble codes that are
registered in the ECU after the work has been
completed.
000
3
677A
(
3
)
(2)
(1)
(4)
(1)


