COOLING SYSTEM
Repair
7-10
BY Service Manual
© 2009 Yanmar Marine International
Drain and Fill Closed Cooling System
1. Disconnect battery negative (-) cable.
2. Remove coolant filler cap from heat exchanger.
WARNING! Burn Hazard. NEVER remove the
coolant filler cap if the engine is hot. Steam
and hot engine coolant will escape and
seriously burn you. Allow the engine to cool
before attempting to remove the filler cap.
3. Remove the heat exchanger to access the
cylinder block drain plug behind it. See Remove
and Install Heat Exchanger on page 7-13.
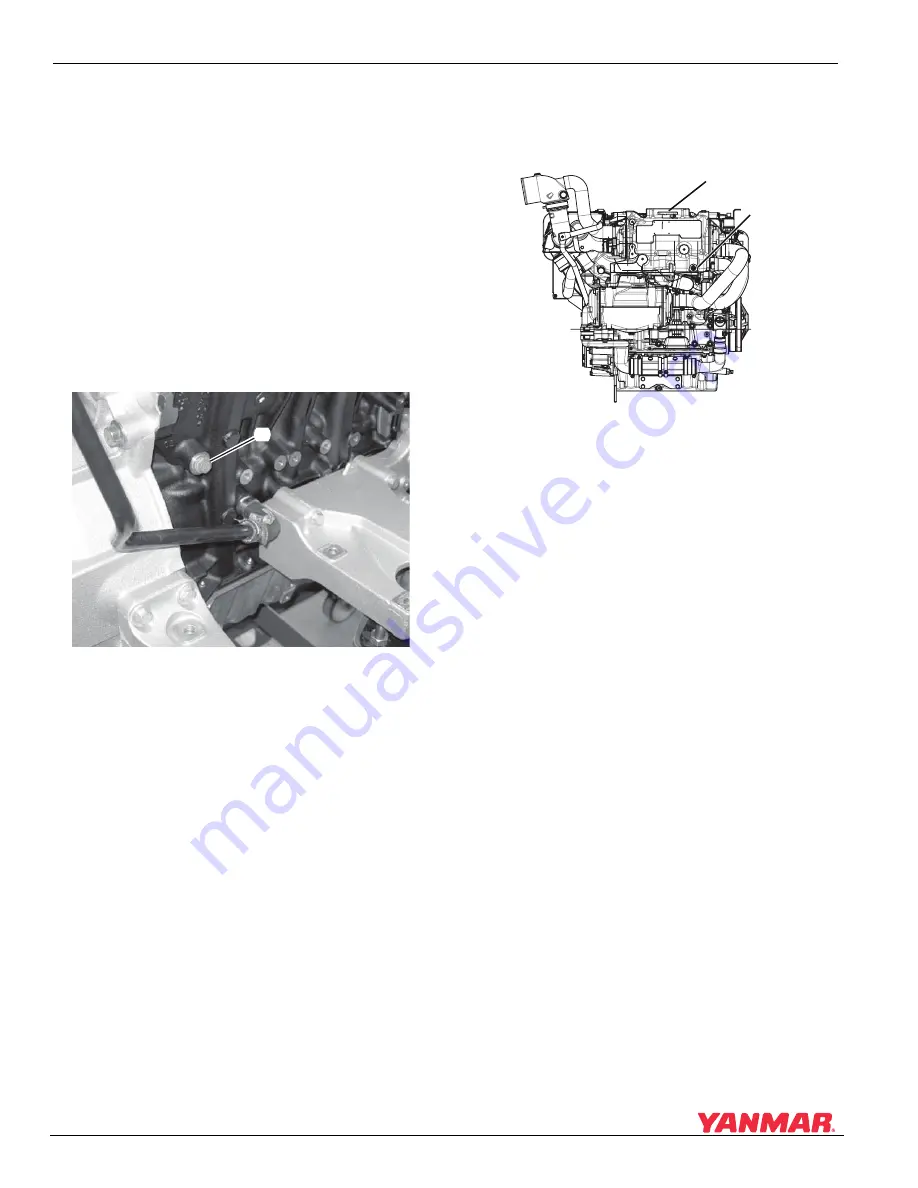
Note: The charge air cooler has been removed
for clarity of photo (Figure 7-7).
Figure 7-7
Figure 7-7
4. Remove drain plug (Figure 7-7, (1)) from the
engine block. Allow coolant to drain into a
container of appropriate size.
5. Install cylinder block drain plug and a new
gasket.
6. Install heat exchanger. See Remove and Install
Heat Exchanger on page 7-13. Ensure the
drain cock (Figure 7-8, (2)) on the heat
exchanger is closed.
Figure 7-8
Figure 7-8
7. If not already done, remove the filler cap
(Figure 7-8, (1)) from the heat exchanger.
8. Inspect the cap gasket and flange on the filler
neck for damage. Replace if necessary.
9. Check the rubber hose connecting the coolant
recovery tank to the heat exchanger. Be sure
the hose is securely connected and there is no
damage.
10. NOTICE: NEVER pour coolant into a hot
engine. Allow engine to cool. Pour coolant mix
slowly into the heat exchanger to prevent the
formation of air pockets. Fill until the heat
exchanger is completely full.
11. Install the filler cap and tighten firmly.
12. Remove the coolant recovery tank cap and fill
with coolant mix to approximately 50 mm (2 in.)
below the full line. Replace cap. Never fill to the
full line.
13. After filling an empty cooling system, test-run
the engine for approximately 5 minutes and
recheck the engine coolant level at the coolant
recovery tank again.
000
3
660
(1)
0006641
(1)
(2)


