10. MOUNT AND DISMOUNT THE BUCKET
CL600 Operator's Manual
10. MOUNT AND DISMOUNT THE BUCKET
■
Mount the Bucket
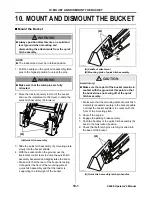
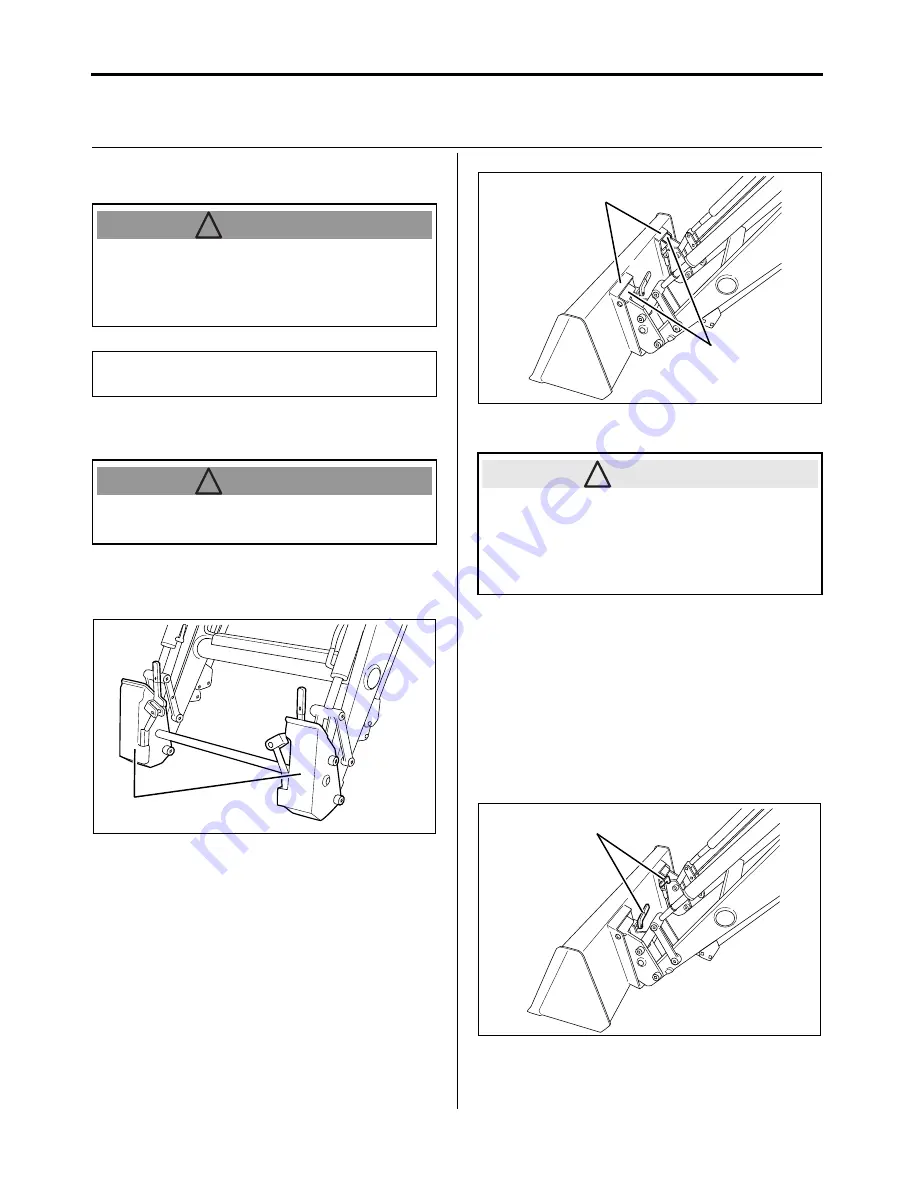
1. Pull the handles on the quick hitch assembly latch
pins to the highest position to unlock the pins
2. Move the tractor squarely in front of the bucket
and use the implement control lever to dump the
quick hitch assembly (A) forward.
(A) Quick hitch assembly
3. Slide the quick hitch assembly (A) mounting plate
slowly into the bucket saddle.
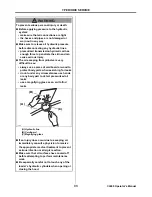
4. With the bucket still on the ground, use the
implement control lever to dump the quick hitch
assembly backward and slightly raise the boom.
• Make sure that the rear of the bucket is resting
flat against the front of the mounting plate of
quick hitch assembly and that the loader is
supporting the full weight of the bucket.
(A) Saddle of attachment
(B) Mounting plate of quick hitch assembly
• Make sure that the mounting plate of quick hitch
assembly is seated securely in the bucket saddle
and that the bucket saddle is in contact with the
front of the mounting plate.
5. Shut off the engine.
6. Engage the parking brake securely.
7. Push the handles of the quick hitch assembly (A)
back to the fully locked position.
8. Check that both latch pins are fully inserted into
the base of the bucket.
(A) Quick hitch assembly latch pin handles
●
Always position attachments on a solid and
level ground when mounting and
dismounting the attachments from the quick
hitch assembly.
NOTE
●
The loader stand must be in folded position.
●
Make sure that the latch pins are fully
retracted.
! WARNING
! WARNING
(A)
P1100791
Avoid injury!
●
Make sure that a part of the bucket remains in
contact with the ground at this point so that
the bucket does not swing off of the quick
hitch assembly.
(B)
P1110263_B
(A)
! CAUTION
(A)
P1110263_A
Summary of Contents for CL Series
Page 46: ...NOTE...

