12
10
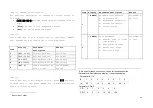
A: Plus or minus scale selection, 0-plus scale;1-minus scale
B: Ahead value auto correction selection,0-no correction;1-correction
C: Not OK range deal selection:0-not deal, continue cycle;1-wait until it
reaches ok range
D:Dot-makeup or not when it’s lack of weight,0-no;1-yes
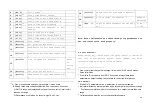
Note: After calibration and these three-group parameters are
set, indicator could work properly.
4.2 Calibration
15
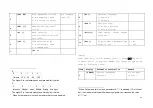
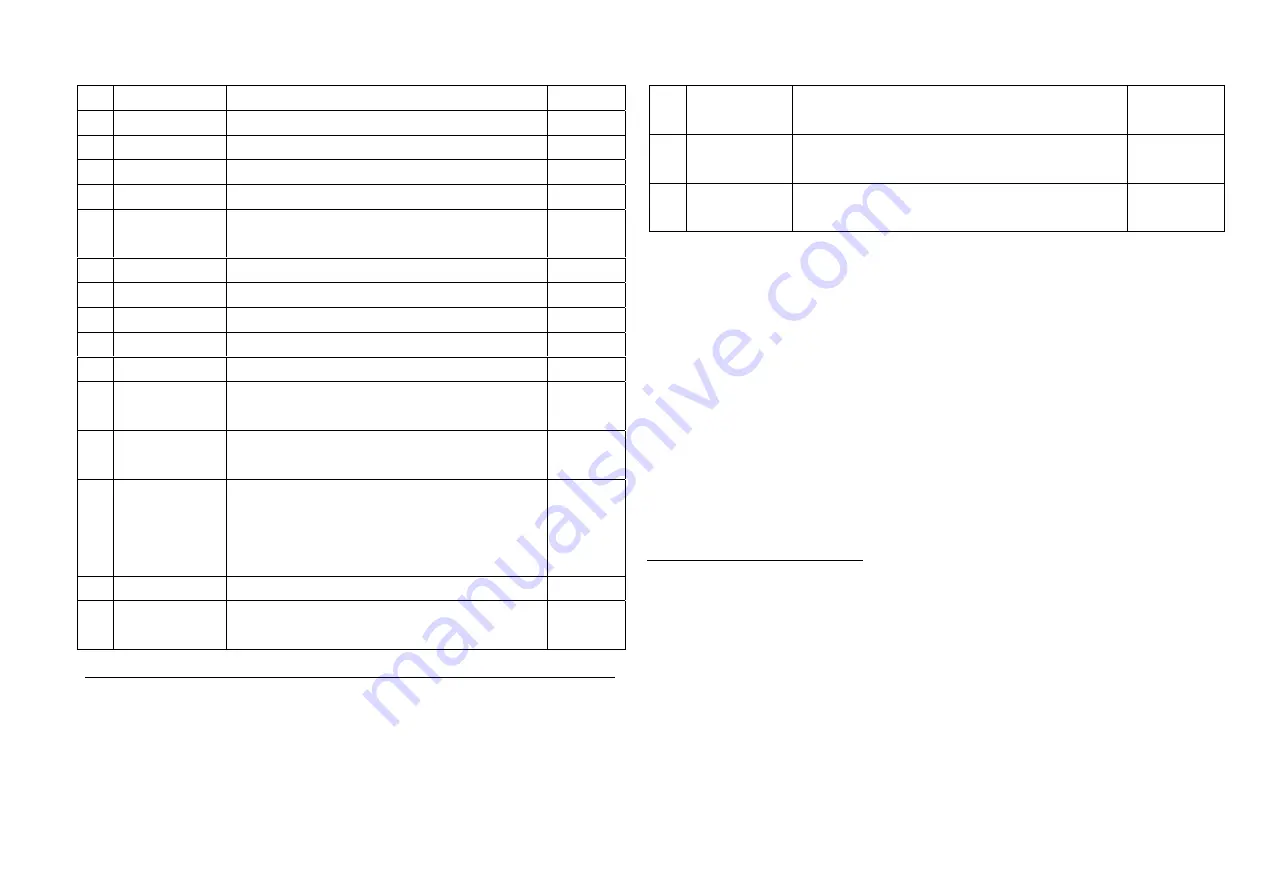
Press [Calib] key, indicator will display [CALIb],it indicates
that it’s at calibration status. Press [ENTER] key, then
calibrate step by step as followed table:
11
One cycle is from charge to discharge, times is from 0~99 while 0 means
times is limitless
12
From t0 to t7, value set is from 0.0~9.9 seconds; always leave these
parameter as default setting, they are time to control the total process
more precisely
13
When D of C parameter set as 0, parameter t3 and t4 are disabled
14
Indicator will treat as discharge finish when tare weight is less than zero range
Print and accumulation will only function when tare weight is more than zero
range
15
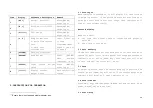
Calibration head must be put on to save calibration data
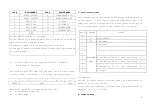
2
[Pt 0]
Cycle times
11
3 [t0
**]
12
Delay time before charge
4 [t1
**]
Delay time at fast feed finish
5 [t2
**]
Delay time at slow feed finish
6 [t3
**]
13
Output time for dot-makeup
7
[t4 **]
Output time for interval of dot-
makeup
8 [t5
**]
Output time for OK range
9 [t6
**]
Delay time at discharge finish
10 [t7
**]
Delay time when next cycle begins
11 [L******]
Zero range
14
12 [A******]
Set point for material 1
13
[b******]
Ahead value for fast feed of material
1
14
[C******]
Ahead value for slow feed of material
1
15
[d******]
Q of ok range for material 1
Refer
to
Footno
te2
16 [P******]
Set point for material 2
17
[q******]
Ahead value for fast feed of material
2
18
[r******]
Ahead value for slow feed of material
2
19
[t******]
Q of ok range for material 2
Refer to
Footnote2
20
[Prt *]
To print above parameter set value or
not
0-
NO
1-
Yes


