24
25
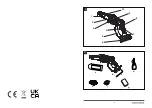
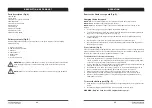
Parts description (Fig. A)
1. Guide bar
2. Saw chain
3. Chain drive cover locking knob
4. On/Off switch
5. Hand Protection guard
6. battery pack
7. Handle grip
8. Saftey lock button
9. Chain drive cover
10. Chain safety guard
Delivery contents (Fig. B)
Carefully unpack the appliance and check that it is complete. Dispose of the packaging
material correctly.
a. Chain cover guard
b. 20V one hand power saw
c. Allen key
d. Lubricating oil
e. Battery pack
f. Charger
g. Instruction manual
WARNING:
If any parts are damaged or missing, do not operate this tool until these
parts are replaced. Failure to heed this warning could result in serious personal
injury.
NOTE:
Always recycle the packaging in accordance with local recycling guidelines.
DESCRIPTION OF PRODUCT
OPERATION
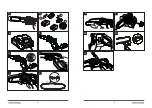
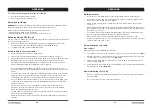
Remove the Chain cover guard (Fig. C)
Charging the battery pack
NOTE:
Remove the battery pack from the charger after it has been fully charged.
NOTE:
Battery should be fully charged before first use.
NOTE:
Make sure the mains voltage is the same as rating label which is located on the
charger.
1. Connect the charger to a power supply. Red LED will light up.
2. To insert the battery pack into the charger, align the raised ribs of the battery pack with
the grooves of the charger then push it in. (Fig. D)
3. The red LED light of the charger will light up and then the green light flashes during
normal charging.
4. After charging is complete, the charger light will turn to a solid green light.
5. Once the battery is fully charged , depress the battery release button and then remove
the battery pack. (Fig. D)
Power indicator (Fig. E)
This Li-Ion battery pack is equipped with a power indicator which is used to show the battery
pack’s remaining charge. Press the power indicator button to check battery charge as picture
showed. The indicator will stay lit for approximately 4 seconds.
To obtain the best life from the battery
1. Never allow the battery to completely discharge before recharging. The battery pack
should be placed on the charger whenever the battery pack is noticeably running down
or the tool no longer performs a task it previously performed.
2. Avoid conducting short charges. Make sure that the battery is fully charged each time by
allowing the charger to complete its full charging cycle.
3. Avoid allowing loose items like screws or nails etc. to be stored with battery packs as
these or similar items can short battery packs and cause a fire or explosion.
4. Always unplug the charger when not in use and store in a dry and secure place.
5. Avoid charging or storing your battery in temperatures below 5°C and above 45°C.
6. After use, allow the battery pack to cool down for approximately 30 minutes before
attempting to recharge.
To insert the battery pack (Fig. F)
1. Align the groove on the battery pack with the corresponding ribs in the receptacle of the
device.
2. Insert the battery pack with moderate force until it was locks in to place.
WARNING: Only use Yard force 20V original battery pack!


