background image

IMPORTANT: READ OPERATOR’S MANUAL THOROUGHLY AND FOLLOW THE SAFE OPERATION PRACTICES WHILE OPERATING THE UNIT.

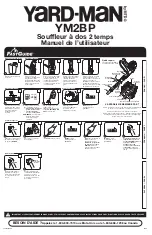
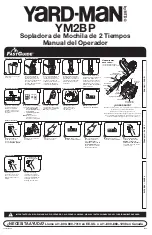
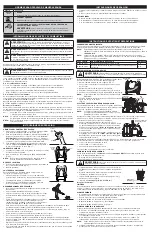
Remove Unit From Carton

Assemble The Unit

Place a hose clamp over 
the end of the Flex Tube 
and slide the end of the 
with the clamp on it over 
the elbow tube. Tighten 
the clamp screw.

Place a hose clamp over 
the other end of Flex Tube 
and slide the end over the 
top end of the upper 
blower tube. Tighten the 
clamp screw.

Assemble The Unit

Loosen the 2 screws on 
the throttle control. Move 
the throttle control to the 
position that provides the 
best grip and tighten.

Mix thoroughly in separate 
fuel can:

  –  3.2 fl. oz. of 2-cycle 

engine oil 

  –  1 gallon of unleaded 

gasoline 

NOTE:

 Do not mix directly 

in fuel tank.

Press

 primer bulb 

10 

times

, or until fuel is 

visible

Move

 choke lever to 

Position 1

.

Press down cruise control 
to 

FAST

 position.

Crouch in starting 
position.

Pull

 rope 

5 times

.

Move

 choke lever to 

Position 2

 .

1

1

2

Remove all contents from 
the carton.

6

7

9

10

3

Insert the upper blower 
tube into the lower blower 
tube and twist the lower 
tube clockwise unit it locks 
into place.

Place unit on a level 
surface and fill fuel tank. 

DO NOT

 overfill.

8

4

Start The Unit

11

12

13

14

10 X

5 X

Starter Rope

Flex Tube

Trigger

On/Off Switch

Lower Blower Tube

Nozzle

DIDN’T START?

Repeat these instructions.

IF

 the engine hesitates, return the choke lever to 

Position 2 and continue the warm-up.

IF

 the engine does not start, go back to step 9.

IF

 the unit fails to start after 2 attempts, move choke 

lever to Position 3 and pull rope until unit starts

Primer

Bulb

Move

 choke lever to 

Position 3

.

Continue to keep the 
cruise control in FAST 
position and warm 

unit for 

an 

additional 60 seconds


to complete warm-up. Unit 
may be used during this 
time.

16

17

Pull

 rope 

3-5 times

 to 

start engine. 

Keep the 

cruise control in FAST 
position and

 allow unit to 

warm up for 30 to 60 
seconds.

15

Primer Bulb

Tools Required-

Phillips Screwdriver
T-20 Torx

®

 Screwdriver 

Insert the lower blower 
tube into the nozzle and 
twist the nozzle clockwise 
until it locks into place. 
Zip tie the throttle cable to 
the elbow tube.       

5

Upper Blower

Tube

Fuel Cap

Choke Lever

Cruise Control

1 Gallon

3.2 oz

40:1

SLOW

FAST

SLOW

FAST

Start The Unit

Spark Plug

Release your hand from 
the trigger or raise the 
cruise control. Allow the 
engine to cool down by 
idling.

Stop The Unit

18

SLOW

FAST

Press the On/Off Switch 
in the OFF (O) position 
and hold until the engine 
comes to a complete 
stop.

19

Trigger

On/Off
Switch

YM2BP

2-Cycle Backpack Blower

Operator’s Manual

769-06206 P00 

10/10

 NEED HELP?


Call 1-800-800-7310 in U.S. or 1–800–668–1238 in Canada

 ENGLISH — P

AGE 1

 FRANÇAIS — P

AGE 5

 ESP

AÑOL — P

AGE 9

Summary of Contents for YM2BP

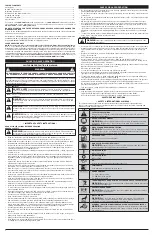
Page 1: ...n Off Switch Lower Blower Tube Nozzle DIDN T START Repeat these instructions IF the engine hesitates return the choke lever to Position 2 and continue the warm up IF the engine does not start go back...

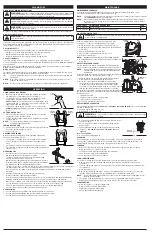
Page 2: ...in place Do not put any object into openings Do not use with any opening blocked keep free of dirt debris and anything that may reduce the air flow Do not touch the engine or muffler These parts get...

Page 3: ...WARNING Add fuel in a clean level and well ventilated outdoor area Wipe up any spilled fuel immediately Avoid creating a source of ignition for spilled fuel Do not start the engine until fuel vapors...

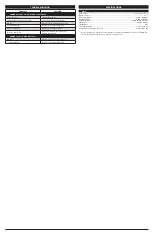
Page 4: ...ments section ENGINE LACKS POWER OR STALLS Old fuel Drain fuel tank and add fresh fuel mix Fouled spark plug Replace or clean the spark plug SPECIFICATIONS Engine Type Air Cooled 2 Cycle Displacement...

Page 5: ...ton marche arr t On Off Tube de soufflage inf rieur Buse L APPAREIL NE D MARRE PAS SI le moteur fait des accrocs remettez le levier d tranglement en position 2 et continuez de chauffer le moteur SI le...

Page 6: ...Il sera plus efficace et vous courrez moins de risques de blessures en l utilisant de fa on ad quate N essayez pas d atteindre des branches trop loign es et vitez de vous tenir sur des surfaces trop i...

Page 7: ...onque lorsqu il fonctionne Tenez toujours l appareil bien en main lorsque vous l utilisez Pour r duire le risque d une perte auditive cause du niveau sonore de l appareil portez syst matiquement une p...

Page 8: ...e au ralenti 3 200 4 400 t min R gime de fonctionnement 6 900 7 200 t min cartement de bougie 0 635 mm 0 025 po Rapport essence huile 40 1 Capacit du r servoir d essence 591 ml 20 oz Poids approximati...

Page 9: ...Gatillo Interruptor de Encendido Apagado Tubo inferior de la sopladora Boquilla NO ARRANC SI el motor falla vuelva a colocar la palanca del obturador en la posici n 2 y contin e calent ndolo SI el mot...

Page 10: ...a esta unidad a alguien pr stele tambi n estas instrucciones Nunca arranque ni opere la unidad dentro de una habitaci n o edificio cerrado Respirar los vapores de escape puede ocasionarle la muerte Op...

Page 11: ...ra de modo que la corriente de aire pueda trabajar cerca del suelo INSTRUCCIONES DE OPERACI N Fig 4 Fig 3 Hebillas de las correas Limpie bien las sopladoras y los dem s equipos despu s de usarlos Elim...

Page 12: ...n la secci n de Ajustes de Velocidad para marcha en vac o EL MOTOR NO TIENE POTENCIA O SE AHOGA Combustible viejo Drene el tanque de gasolina y a ada combustible fresco Buj a sucia Reemplace o limpie...

Page 13: ...13 NOTES...

Page 14: ...14 NOTES...

Page 15: ...15 NOTES...

Page 16: ...ie de valeur marchande ou d adaptation une fin particuli re ne s applique apr s la p riode applicable de garantie expresse crite ci dessus concernant les pi ces qui sont identifi es Aucune autre garan...

Reviews: