2
M8×75
(×2)
Guide Bracket
1
Upper Handle
This rear tine tiller was partially assembled at the factory. To assemble your machine follow the below instructions.
ASSEMblY
OPERATION HANDLE
THROTTLE CONTROL
SHIFT LEVER
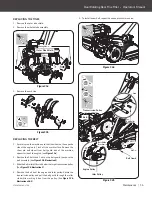
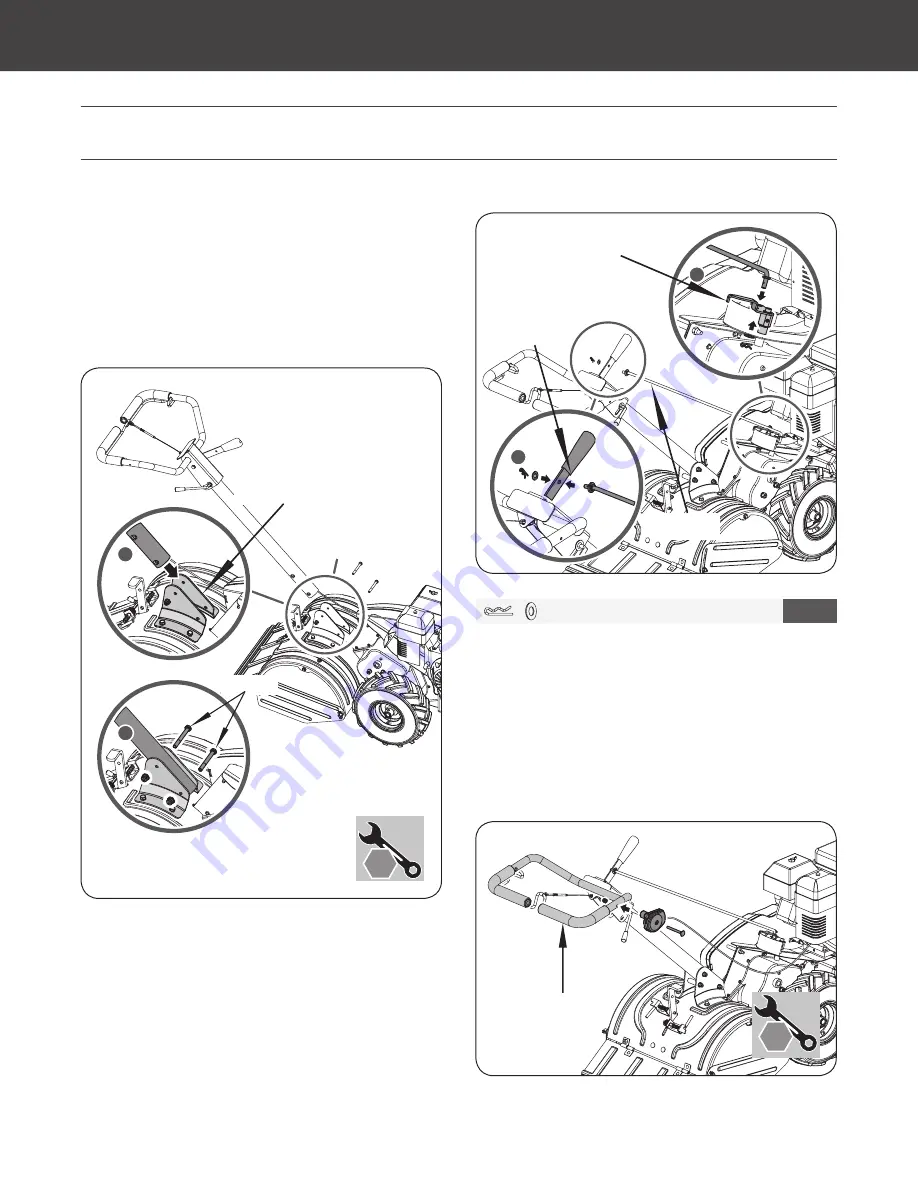
The M8×75 bolts and nuts have been fixed in the guide bracket for
shipping. First, remove the M8x75 bolts and nuts from the guide
bracket.
Then, align the holes in the operation handle shaft with the holes
in the guide bracket and re-insert the M8x75 bolts and screw nuts
to tighten. (See
Figure 2
)
The M6×60 bolt and nut have been fixed in the throttle for
shipping. First, remove the M6×60 bolt and nut from the throttle.
Then, align the hole in throttle control and the hole in the upper
handle. (See
Figure 4
) Insert the M6×60 bolt and screw the nut to
tighten. Pay attention to the degree of tightness, and make sure
the throttle lever can be moved normally.
1. Insert lower end of shift rod into hole of shift lever indicator.
Fasten with bridge clip and washer.
(see
Figure 3, Illustration 1
)
2. Insert the upper end of shift rod into hole of shift lever. Fasten
with bridge clip and washer.
(see
Figure 3, Illustration 2
)
× 2
1
Figure 2
Figure 3
Figure 4
2
1
Shift Lever
Shift Rod
Shift Lever Indicator
17
mm
18
mm
30
mm
13
mm
11
mm
× 2
12
mm
10
mm
8
Dual Rotating Rear Tine Tiller
»
Operator’s Manual
YT4565PM02 - 1704
Assembly
|
32850US25M102.indd 8
2017/3/27 10:22:00


