background image

TRANSPORTING 

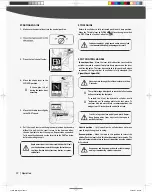
MOVING BY HANDS 

� 

The  log  splitter 

is 

heavy. It can crush and cause 

Lil 

serious injury if it rolls out of control or tips over. 

Follow the instructions below 

for 

safely moving the log splitter.

1.

Make 

sure the log splitter is locked in the horizontal position

with latch rod 

before 

moving.

�  Make sure the log splitter engine 

is 

off, Never move 

Lil 

the log splitter with its engine running. 

2. Turn the fuel shut-off 

valve 

to the OFF position. This prevents

carburetor flooding and reduces the chance of fuel leakage.

Refer to the engine manual 

for 

fuel 

valve 

location.

3. Lock the support leg in the DOWN position 

before 

you 

move 

the log splitter.

4. 

Move 

the log splitter by hand to desired work site.

Do not move the log splitter up or down hills by hand. 

Never allow anyone to sit or ride on the log splitter. 

Never transport cargo or wood on the log splitter. 

TOWING BY VEHICLE 

1. Turn the fuel shut-off 

valve 

off.

This prevents fuel 

from 

flooding 

the engine. 

2. Check the tires to ensure they 

are 

fully inflated to 30 PSI 

for 

proper functionality.

�  Do not overinflate tires. Serious injury can occur if 

Lll 

tire explodes. 

� 

When seating a bead after repair, do not exceed 30

Lil 

PSI. Pressures higher than 30 PSI can cause the tire 
and wheel to rupture and explode. 

21 

I  Transporting 

65916US25M104_GB.indd  21 

3. Make sure hitch is in good working 

order. 

4. Check  safety  chains. Two  safety  chains  must  be used  while

towing. 

Cross 

safety chains under the coupler, allowing only

enough slack 

for 

vehicle turns.

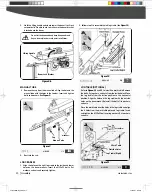
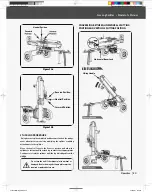
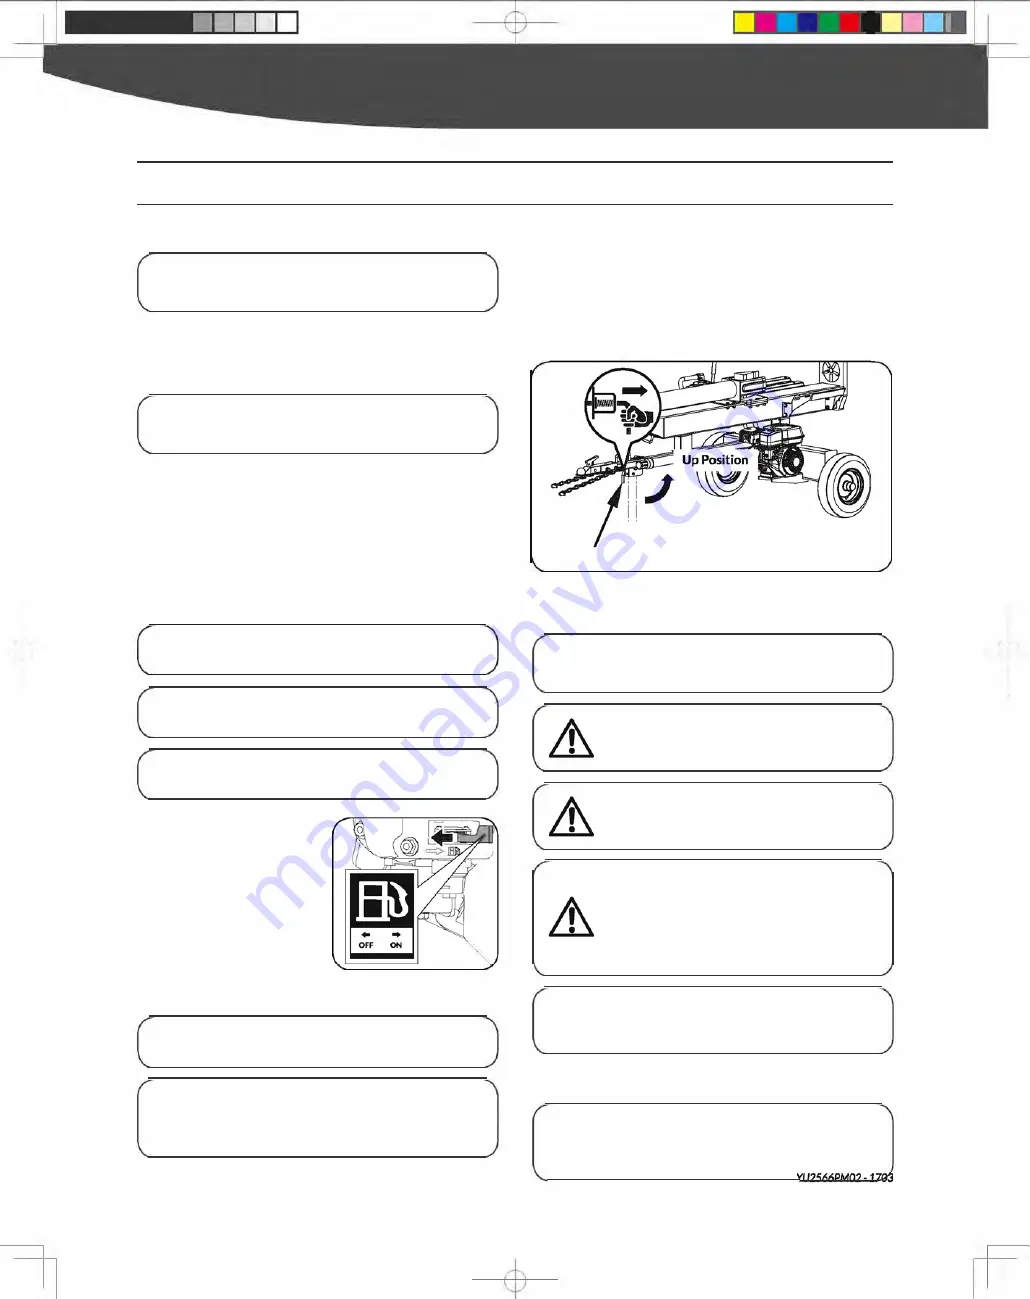
5. Pull out the lock 

lever 

and put the support leg in the UP position,

then release the 

lever 

and make sure the leg is secured.

l.L 

Down Position

Support Leg lock 

Figure 13 

6. Tow the log splitter carefully to desired work site.

Be aware of the added length of the splitter.

Never  tow  this log  splitter over 

45 

mph. Faster 

speeds may result in loss of control. 

Drive slowly and take extra caution when traveling 
over rough terrain. 

If towing on a public road, make sure to comply with 
all local, state, and federal towing requirements. It 
is the sole responsibility of the purchaser to obtain 
licensing, trailer lights, safety chains, or signage as 
needed to comply. 

� 

Turn off the towing vehicle before leaving the splitter 

Lil 

unattended. 

7. Lock the support leg in the 

DOWN 

position and disconnect

from 

vehicle.

�  Never operate the log splitter while it is attached to 

Lil 

the vehicle. 

2020/3/27  14:09:04 

+

Summary of Contents for YU2566

Page 1: ...YU3066 YU3566 SERIAL NUMBER I I PURCHASE DATE I I Both model number and serial number may be found on the main label You should record both of them in a safe place for future use FOR YOUR SAFETY READ...

Page 2: ...e right at the right price YARDMAX delivers the perfect combination of performance and practicality YARDMAX has a solution that s right for you MAX Performance MAX Value MAX Support that s YARDMAX J B...

Page 3: ...Engine exhaust some of its constituents and certain product components contain or emit chemicals known to the state of California to cause cancer and birth defects or otherreproductive harm Formore i...

Page 4: ...plitting Force 25ton 28ton Log Capacity 26 26 Engine Briggs Stratton Displacement 208cc Gross Torque 2600 rpm 9 5ft lb Fuel Capacity 0 80Gallon Engine Oil Capacity 0 16Gallon Starting System Recoil YU...

Page 5: ...n Filter Suction Screen Hoses High pressure w wire braid Coil wrapped Beam Heavy duty U shape formed construction Wedge Size 7 50 Wedge Style 2 way Rear Wheels 4 80 8 DOT Approved 16 O D Road Tires Hi...

Page 6: ...ch is off before transporting the machine or performing any maintenance Keep hands and fingers away from all pinch points cp Never remove partially split wood from the wedge with your hands Fingers ma...

Page 7: ...m the unit Always wear safety goggles or safety glasses with sideshieldswhen operating YU2566PM02 1703 65916US25M104_GB indd 6 Wear appropriate hearing protection Always keep hands and feet away from...

Page 8: ...container capssecurely andwipeup spilled fuel Never operate the unit without the fuel cap securely in place 7 I Safety Avoid creating asource of ignition for spilled fuel If fuel is spilled do not att...

Page 9: ...r when more than one person operatesthe log splitter The adult who loads and stabilizes the log must be the person who operates the control handle HORIZONTAL OPERATING POSITION 65916US25M104_GB indd 8...

Page 10: ...ngandaftertowing50miles Never transport cargo on the log splitter 9 I Safety Never allow anyone to ride or sit on the log splitter Always stop the engine lock the beam in the horizontal position and c...

Page 11: ...and hammer to open all the side locks Remove all the polywood plates Remove all the loose parts on the bottom pallets Use scissors or a knife to cut all the straps See Figure 1a YU2566PM02 1703 65916U...

Page 12: ...th Cylinder 14 Hardware Kit Including 2 Reservoir with Engine f M22 X2 I 3 Beam Lock Bracket 4XS0 X2 4 Pivot Bracket X2 5 Log Cradle Left 00 1 11 6 Log Cradle Right M12X90 X2 7 Wheels p l M10X25 X4 8...

Page 13: ...b YU2566PM02 1703 65916US25M104_GB indd 12 3 Assistant holds the engine while the other person assembles the wheel opposite of the engine first Cotter Pin x1 Anti dust Washenx11 Figure2c M22 4XSO X2 1...

Page 14: ...the beam and stand the beam on the end plate in the vertical position 13 I Assembly Figure3b 65916US25M104_GB indd 13 TOWBAR After the beam and cylinder assembly is in the vertical position a helper...

Page 15: ...wn in fisure7a I I I I I I I I I I Figure7a YU2566PM02 1703 65916US25M104_GB indd 14 2 Align the pivot bracket on the beam assembly to the pivot mount on the tank weldment and insert the beam pivot pi...

Page 16: ...nts Insert the M12x3S bolts flat washers and nuts and securely tighten 15 I Assembly 65916US25M104_GB indd 15 2 Follow step 1 to assemble the leftlog cradle SeeFigure 10 Figure10 M12X35 xa M LOG TABLE...

Page 17: ...Foot Plate 2 Position log Cradle G iWD M UrtI MiI ttflk Qj H IMftffl ttflii Mttffl f WtttMrttl I l M 1Miiti I 44iij0tffl Beam Lock Bracket Beam Assembly Support Leg j fflii HAMMUff t f 3M Hydraulic P...

Page 18: ...everse See the operation n section for instruction MANUAL TUBE Keep manuals safely in the tube BEAM LOCK BRACKET The beam lock bracket is used to secure the beam in the horizontal position 17 I KnowYo...

Page 19: ...916US25M104_GB indd 18 ADD GASOLINE TO ENGINE Gasoline is highly flammable and explosive You can be burned or seriously injured when handling fuel Use extreme care when handling gasoline Fill the fuel...

Page 20: ...result SPLIT CONTROL HANDLE Forward position Move the lever in this direction to extend the cylindertoward the spinnerfoot plate Keeppressureon thelever until the log splits The lever does not lockin...

Page 21: ...allow the cylinder to retract until the stuck log contacts the stripper plates Continue to retract the cylinder until the log is dislodged from the wedge 65916US25M104_GB indd 20 Do not use the unit...

Page 22: ...ry can occur if Lll tire explodes When seating a bead after repair do not exceed 30 Lil PSI Pressures higher than 30 PSI can cause the tire and wheel to rupture andexplode 21 I Transporting 65916US25M...

Page 23: ...as a precaution to future problems After oil has been completely drained from the machine reinstall drain plug Oil drain plug Figure 14 YU2566PM02 1703 65916US25M104_GB indd 22 ADD HYDRAULIC OIL TO O...

Page 24: ...t is stored less than 30 days add a fuel stabilizer to keep the fuel fresh Turn the fuel valve lever to the of position If fuel is stored over 30 days then drain the fuel tank as stated in the engine...

Page 25: ...or retract 3 Low hydraulic oil 3 Check oil level and add as needed Wedge does not auto 1 Low hydraulic oil 1 Check oil level and add as needed return 2 Faulty control valve 2 Contact customer service...

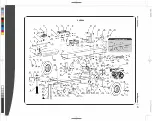
Page 26: ..._________ 2 13 14 73 74 72 66 1Q _ _if n 7 8 i 6 r Jy li io Wi ol 6J20 6 8 l J l J Bn 14 1 32 39 40 49 Ii 52 L r 4 59 61 L __ 1Ql m 37 4 l 5 4 57 I __ 100 69 lo r _ 36 R z a c i 37 36 24 I 33 ii 45 47...

Page 27: ...12 14 52 Key3x25 1 88 2 Ball Coupler Hitch 1 17 BoltM10x35 4 53 Gear Pump ConnectorLeft 1 89 Pipe Plug 1 18 Washer10 14 54 Gear Pump ConnectorRight 1 90 Discontinued N A 19 1 Discontinued N A 55 Screw...

Page 28: ...YU3066 93 106 Parts List on page 30 r N...

Page 29: ...Key3x25 1 89 PipePlug 1 17 BoltM10x35 4 53 GearPump ConnectorLeft 1 90 Discontinued N A 18 Washer10 18 54 GearPumpConnectorRight 1 91 LatchRod 1 19 1 Discontinued N A 55 ScrewM8x10 2 92 Circlip34 1 20...

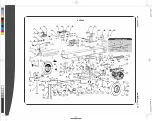
Page 30: ...1 7 i O O L CJ L r 1 I 13 14 a Ho 73 14 12 66 109 4M 161 1 __ L Ain_i 4 4 0 ll J 68 i r J 38 40 49 sf L I J 59 4 4 39 _ 102 37 4 53 1 1 1 b oO 57 F Q T T 1 c o0 62 I 33 36 R 48 _ mc z 37 36 24 II 5556...

Page 31: ...inued N A 17 BoltM10x35 4 56 Bolt5 16 24UNF 4 95 BoltM10x85 1 18 Washer10 18 57 Key1 4x50 1 96 Washer6 7 19 1 Discontinued N A 58 Pivot Bracket 1 97 NutM10 1 20 Discontinued N A 59 SpringWasher5 4 98...

Page 32: ...I 7 yardmax com Tame the Great Outdoors 847 327 0566 or 844 YARDMAX I info yardmax com 65916US25M104_GB indd 31...

Reviews: