background image

3

model no.  060-3714-0 |  contact us: 1.866.523.5218

Kno

w Y

our Thr

ow

er

KNOW YOUR THROWER

• 

Carefully remove the product and any accessories from the box. Make sure that all 

items listed in the packing list are included.

• 

Inspect the product carefully to make sure no breakage or damage occurred during 

shipping.

• 

Do not discard the packing material until you have carefully inspected and 

satisfactorily operated the product.

• 

If any parts are damaged or missing, please call 1.866.523.5218 for assistance.


 WARNING: 

If any parts are damaged or missing, do not 

operate this product until the parts are replaced. Using 

a product with damaged or missing parts could result in 

serious personal injury.


 WARNING: 

Do not attempt to modify this product or create 

accessories not recommended for use with this product. 

Any such alteration or modification is misuse and could 

result in a hazardous condition leading to possible serious 

personal injury.

!

!

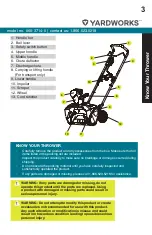
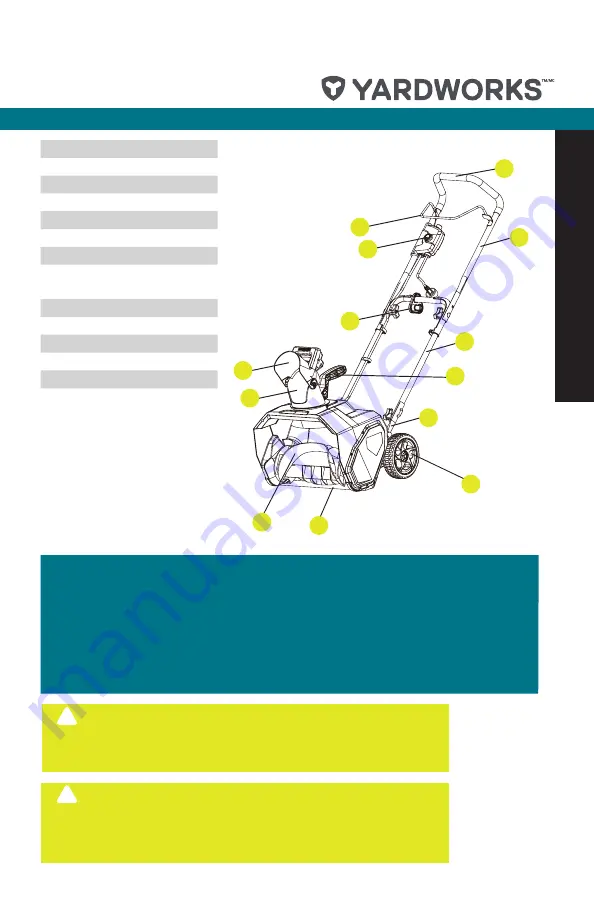
1.  Handle bar
2.  Bail lever
3.  Safety switch button
4.  Upper handle
5.  Middle handle
6.  Chute deflector
7.  Discharge chute
8.  Carrying or lifting handle 

(For transport only)

9. Lower handle
10. Impeller
11. Scraper
12. Wheel
13. Cord retainer 

10

11

12

13

1

2

3

4

5

6

7

8

9

Summary of Contents for 060-3714-0

Page 1: ...model number 060 3714 0 contact us 1 866 523 5218 IMPORTANT Read and follow all safety rules and operating instructions before using this product Operator s Manual Snowthrower...

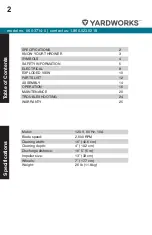
Page 2: ...h 16 40 6 cm Clearing depth 4 10 2 cm Discharge distance 16 5 5 m Impeller size 13 33 cm Wheels 7 17 7 cm Weight 26 lb 11 8 kg SPECIFICATIONS 2 KNOW YOUR THROWER 3 SYMBOLS 4 SAFETY INFORMATION 5 ELECT...

Page 3: ...e WARNING If any parts are damaged or missing do not operate this product until the parts are replaced Using a product with damaged or missing parts could result in serious personal injury WARNING Do...

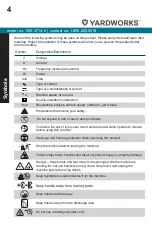
Page 4: ...e Precautions that involve your safety Do not expose to rain or use in damp locations To reduce the risk of injury user must read and understand operator s manual before using this product Wear eye an...

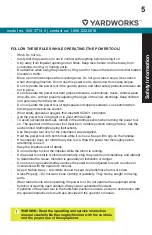
Page 5: ...Z87 1 standards Use the power tool in daylight or in good artificial light To avoid accidental start ups remain in the starting position when turning the power tool on The operator and the power tool...

Page 6: ...could lead to serious injury to the user or damage the power tool and will void the warranty Do not pick up the power tool while it is running The power tool is designed to travel along the ground Nev...

Page 7: ...his manual for more information If the labels on the power tool become defaced or start to lift off contact the toll free helpline at 1 866 523 5218 Keep these instructions in a safe place for future...

Page 8: ...Do not operate this product on direct current DC A substantial voltage drop will cause a loss of power and the motor will overheat If the product does not operate when plugged into an outlet double c...

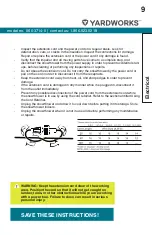
Page 9: ...extension cord away from heat oil and sharp edges in order to prevent damage If the extension cord is damaged in any manner while it is plugged in disconnect it from the outlet immediately Prevent any...

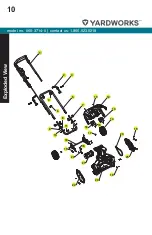
Page 10: ...model no 060 3714 0 contact us 1 866 523 5218 Exploded View 10 1 4 2 5 7 9 3 6 12 15 17 18 13 11 21 24 25 22 23 19 19 19 19 19 8 9 16 14 20 10...

Page 11: ...l no 060 3714 0 contact us 1 866 523 5218 11 23 1 23 2 23 5 23 10 23 11 23 6 23 7 23 8 23 3 23 4 23 3 23 9 23 12 23 13 23 14 23 15 23 16 23 17 23 18 23 19 23 21 23 23 23 22 23 20 23 24 23 3 Exploded V...

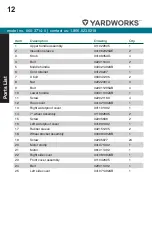
Page 12: ...22011205AB 4 10 Lower handle 333011492AB 1 11 Screw 322021163 4 12 Rear cover 341021492AB 1 13 Right waterproof cover 341101492 1 14 7 wheel assembly 311092605 2 15 Screw 32205836 2 16 Left waterproof...

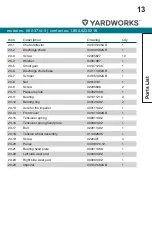
Page 13: ...23 9 Screw 32205836 2 23 10 Pressure plate 333021468 1 23 11 Bearing 321011216 3 23 12 Bearing ring 333101492 2 23 13 Axle for the impeller 333111492 1 23 14 Front cover 341011492AB 1 23 15 Tensioner...

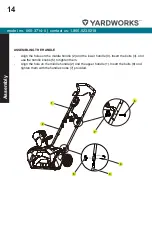
Page 14: ...the holes on the middle handle 2 and the lower handle 3 Insert the bolts 4 and use the handle knobs 5 to tighten them Align the hole on the middle handle 2 and the upper handle 1 Insert the bolts 6 an...

Page 15: ...us 1 866 523 5218 ASSEMBLING THE DISCHARGE CHUTE Push the chute deflector 1 until the latching tabs 2 on both sides click into the slots 3 and the posts 4 on both sides click into the keyed holes 5 5...

Page 16: ...r can only be started by pressing the safety switch button first followed by squeezing the ON OFF switch bar lever doing these operations in reverse will not start the machine To power off release you...

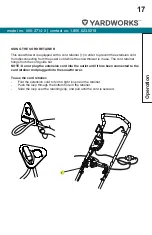
Page 17: ...is in use The cord retainer hangs from the cord guide bar NOTE Do not plug the extension cord into the outlet until it has been connected to the cord retainer and plugged into the snowthrower To use t...

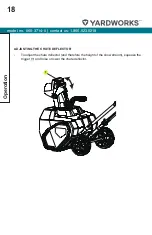
Page 18: ...3714 0 contact us 1 866 523 5218 ADJUSTING THE CHUTE DEFLECTOR To adjust the chute deflector and therefore the height of the snow stream squeeze the trigger 1 and raise or lower the chute deflector 1...

Page 19: ...all moving parts Do not pull sharply on the cord or abuse it in any manner Inspect the extension cord on a regular basis for damage that may result in an electric shock If the extension cord becomes...

Page 20: ...any snow that may be left on the snowthrower Wipe the snowthrower off with a dry cloth before storage This will help prevent ice building up on the unit and parts freezing Inspect the snowthrower thor...

Page 21: ...er the machine that secure the scraper to the machine Remove and discard the old scraper Install the new scraper and fasten it securely with the screws that you previously removed WARNING If the exten...

Page 22: ...to the frame of the snowthrower Remove the side cover Remove the old belt 4 from the small pulley 6 and large pulley 5 Loop one end of the new belt over the small pulley Rotate the impeller with the...

Page 23: ...the left side plate to the frame of the snowthrower Remove the side cover 4 Remove the belt 5 Using a socket wrench remove the the large pulley 6 Remove the screws that secure the left side plate and...

Page 24: ...laced by an authorized service centre The extension cord is not connected to the plug Connect the plug on the snowthrower to the extension cord The extension cord is not connected to the power source...

Page 25: ...d workmanship for a period of one hundred twenty 120 days from the date of retail purchase How to Obtain Service Warranty service is available by calling the toll free helpline at 1 866 523 5218 The f...

Reviews: