N
um
be
r of
the
d
ef
ect
L
oc
at
ion o
f
th
e p
ic
tu
re
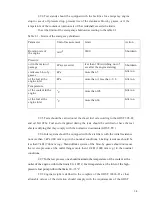
Possible defect
Way for defect
detection and means
of control
Dimension and parameter, mm
Conclusion
nominal
maximum allowable
without repair
for repair
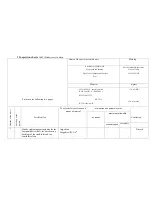
3
В
Wear or scuffing on the
internal surface of the
cylinder liner
Inspection.
Inside gauge
НИ100-160-1
See the table
3
-
-
To reject
4
А
Handling or compression
marks on the backing
ledge
Inspection.
Magnifier ЛП-1-4х
-
-
Scuffing
is not
allowed
To process the
bearing surfaces for
the elimination of the
defect within the
nominal
dimension of the
backing ledge
Table 3 – Dimensional grades of the cylinder liner according to the inside diameter
Number
of the defect
Name of the dimension
Repair dimensions, mm
1
2
3
Inside diameter of the cylinder liner
from 130.00 to 130.02
from 130.02 to 130.04
from 130.04 to 130.06
A
Б
Ж
Technical requirements for the repaired part
Number of the defect
1
Circular runout tolerance of the surface B relatively to the holeБ 0.7 mm
-----------------------------------------------------------
2
Summary of Contents for ???-236
Page 25: ...26...
Page 26: ...27 2...
Page 40: ......
Page 41: ......
Page 53: ......
Page 56: ......
Page 59: ......
Page 64: ...236 238 1003014 3 236 238 1003014 4 236 238 1003014...
Page 65: ......
Page 70: ......
Page 73: ......
Page 81: ......
Page 85: ......
Page 92: ......
Page 95: ......
Page 101: ......
Page 113: ......
Page 119: ......
Page 122: ......
Page 125: ......
Page 128: ......
Page 142: ......
Page 144: ......
Page 150: ......
Page 155: ......
Page 158: ......
Page 160: ......
Page 165: ......
Page 193: ...N u M a r Method defect detection and Dimension and parameter mm...
Page 201: ...4 Thread stripping M16 1 5 6H no more than two threads Inspection To calibrate the thread...

