3
Deployment Panel PC
3.1 Installation
The Panel PC is suitable for the installation in operating tables and control cabinet fronts.
The installation happens via the back. The Panel PC is provided with a fixing technique
with not losable screws that allows an easy connection with a crosstip screwdriver. A fast
and easy device change is possible. It is also possible to install the Panel PC in a VESA
holder (VESA 75/100).
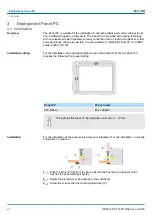
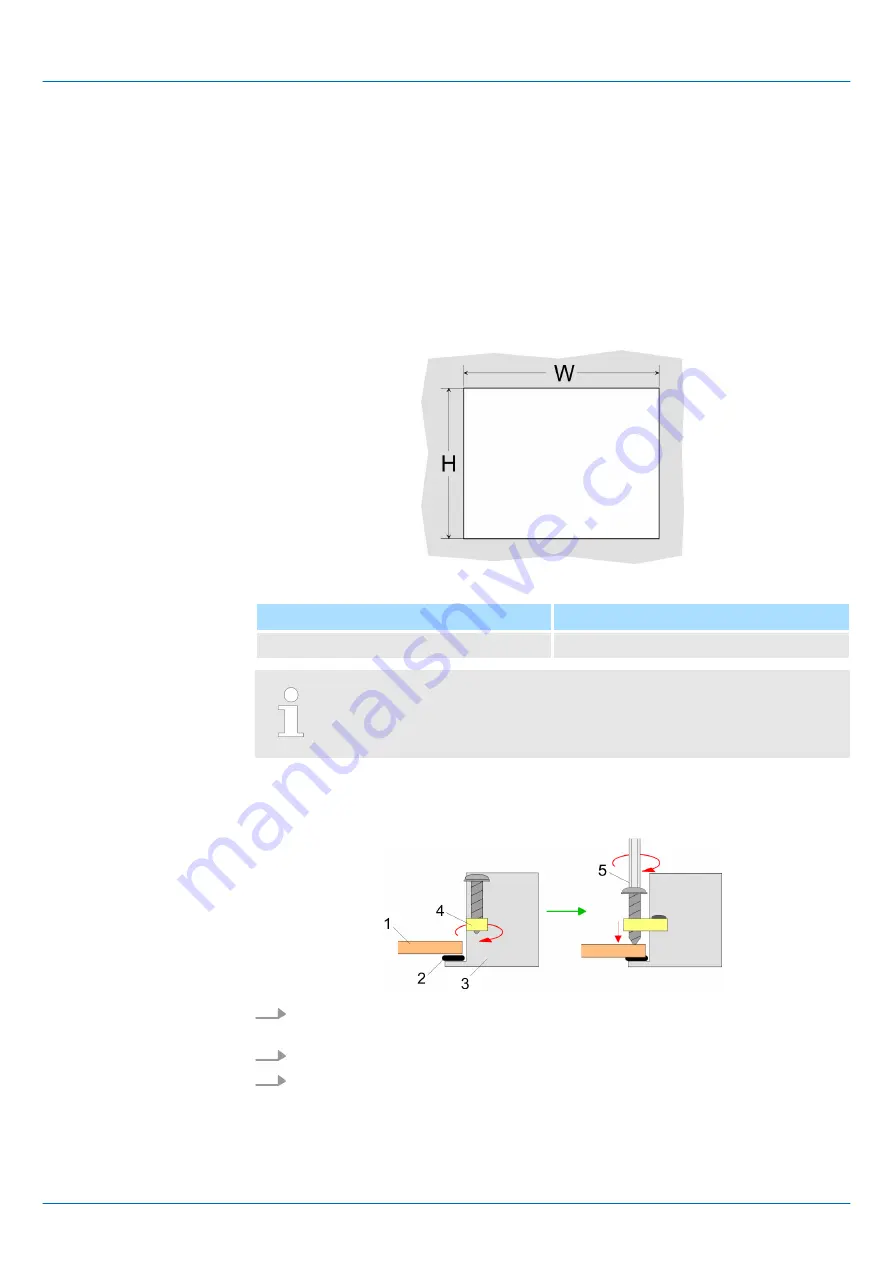
For the installation into a operating tableau and control cabinet fronts, the Panel PC
requires the following front panel cutting:
Panel PC
W x H in mm
67P-RSL0-...
401 x 296mm
The material thickness of the installation cut-out is 3 ... 12mm.
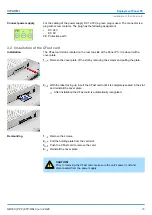
For the installation of the panel pivoted lever are integrated. For the installation, a crosstip
screwdriver is required.
1.
Push the Panel PC [3] from the front side into the front panel cutting [1] until it
touches the panel with the seal [2].
2.
Rotate the pivoted lever 90 degrees to the outside [4].
3.
Screw the screws with the crosstip screwdriver [5].
Overview
Installation cutting
Installation
VIPA HMI
Deployment Panel PC
Installation
HB160 | PPC | 67P-RSL0 | en | 20-20
24
Summary of Contents for 67P-RSL0
Page 1: ...PPC 67P RSL0 Manual HB160 PPC 67P RSL0 en 20 20 VIPA HMI Panel PC PPC015 ES...
Page 13: ...VIPA HMI Hardware description Structure Interfaces HB160 PPC 67P RSL0 en 20 20 13...
Page 67: ...Appendix VIPA HMI Appendix HB160 PPC 67P RSL0 en 20 20 67...
Page 68: ...Content A History of changes 69 VIPA HMI Appendix HB160 PPC 67P RSL0 en 20 20 68...

