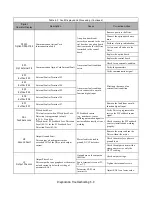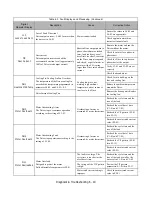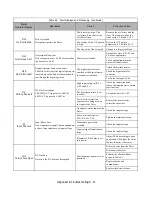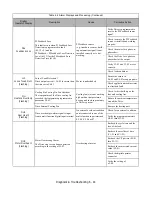
Diagnostic & Troubleshooting 6 - 4
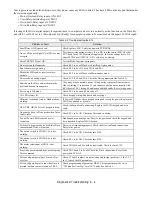
Four inputs are excluded from this process, they do not cause any LEDs to blink. They have LEDs on the keypad that monitor
the status independently:
• Motor-Overload-Relay input at CN109/5
• User-Safety-Interlock input at TB1/1
• Drive-Fault-Relay input at CN102/2
• Drive-Run-Relay input at CN102/3
If testing of the Drive digital outputs is required, these two outputs can be set to a normally active function on the Drive key-
pad (H2-01 or H2-02 set to 1 (Zero Speed) or 6 (Ready) for example) in order to be monitored on the bypass H/O/A keypad.
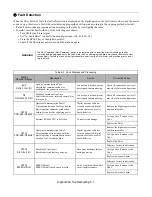
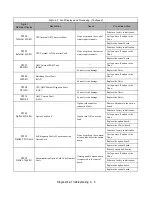
Table 6.2 Troubleshooting the E7L
Problem or Fault
Solution
Panel/Drive ON, Bypass dead.
Check the fuse F101. Verify the power to PCB LEDs.
Any or all the user digital I/O at TB1 are not
accepted.
Test the user-side wiring/circuitry. If it is OK, test the control PCB. Check J1,
S2/7-8 and fuse F102. If external supply used, check the voltage levels. All
either 24VDC or all 120VAC, ±10% safe area, no mixing.
Drive TB3/TB5 I/O not OK.
Test the Drive functions/wiring only.
No motor-run in Hand mode.
Check S4-3 to be off. Maybe in Start/Stop Option mode.
Runs the motor at power up.
Check S2-2 to be off. Check TB1-2 and S2-1.
Blinks the LEDs and/or recycles relays/
outputs.
Check S2-3 to be off. Maybe in Maintenance mode.
Drive reads no analog signal.
Check S1-2, S1-3 and S1-4. Check the Drive parameters (see Table 5.2).
Shuts down the Drive and/or the motor by
itself and does not run anymore.
Very noisy area or unstable power. If long wiring is present from customer
side, try setting J1 to position 2-3 and supply control power externally. Add
RC filters to TB1-1 through 6 and/or use shielded cables. Recycle the power.
Powers up to Off mode.
Check S2-2 to be on and S4-4 to be off.
All LEDs always lit.
Check keypad wiring. Bad board and/or voltage.
Off mode locked and Auto or Hand mode not
working.
If Power LED blinks, check keypad wiring and recycle the power. Replace the
H/O/A keypad and/or its cable.
D56 (VKP_OK) LED is off, keypad is dead.
Check the keypad cable and wiring. Replace the H/O/A keypad and/or its
cable.
Does not go back to Drive mode when Drive
fault is reset.
Check S2-1 to be ON. Check the Drive and its wiring.
Control Power LED blinks and motor
cannot run.
Bad keypad or unstable power. Recycle the power and check the keypad and
its connection. Replace H/O/A keypad.
Switches to bypass mode by itself after Drive
run command. Drive will not run.
Drive is not responding properly. Check the drive, cable and connections.
Recycle the power.
The options wired to CN104/1-3 are not
working.
Check S4-3 to be ON. Check the fuse F102.
The options wired to CN104/4-6 are not
working.
Check S4-1 to be ON. Check the fuse F102.
The motor select input at TB1-6 is not
working.
Check CN104/4 and 5 to both be inactivated. Check the fuse F102.
Stays in bypass mode and does not accept any
Drive command.
Check TB1-4 and 5 to be off. Check the Drive connections. Recycle the
power, bad PCB A2.
Drive analog outputs always at max, off or
very low.
Check J2 and J3 jumpers are not missing and in right position (1-2 for I, 2-3
for V), check the H4 parameters.
Drive or Bypass begins to run when Auto is
pressed; with no contact closure at TB1-2.
Check programming of parameter H2-02. This parameter must be set to
“3B: Run Src Com/Opt” for all E7L units. See Table 5.1.
Summary of Contents for E7LBA002
Page 1: ...E7L Drive Bypass Technical Manual Model E7L Document Number TM E7L 01 ...
Page 8: ...Introduction vi Notes ...
Page 12: ...Table of Contents x Notes ...
Page 54: ...Electrical Installation 2 22 Wiring Diagram ...
Page 55: ...Electrical Installation 2 23 ...
Page 87: ...Start Up and Operation 4 9 Notes ...
Page 202: ...Diagnostic Troubleshooting 6 30 Notes ...
Page 248: ...Capacity Related Parameters B 6 Notes ...
Page 279: ...Communications D 27 Note ...
Page 280: ...Communications D 28 ...
Page 292: ...Spare Parts F 6 ...
Page 304: ...Index 12 ...
Page 305: ......

