Start Up and Operation 4 - 7
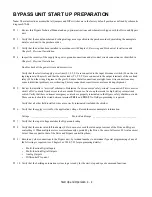
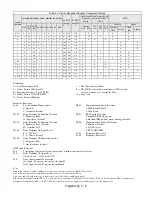
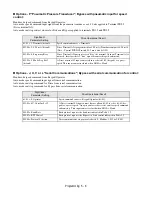
Table 1 is also used to document parameters that have been factory set to typical values for fan and pump
applications. These parameters [b1-07, b1-08, b8-01, L4-05, L5-01, L5-03, o1-02, o2-03 and o3-02] may be
changed to meet the needs of the specific application.
4.
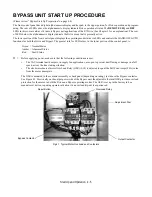
From the ADV/PRGM menu, press DATA/ENTER, go to parameter E1-01 and enter the nominal input voltage that
the Drive will receive in this specific application. The overall voltage classification of the Drive cannot be changed by
this parameter. However, the input voltage should be adjusted within the range available for the given voltage “class”
of the Drive to match the input voltage level normally found on the jobsite. For example, 480 VAC class Drives may
be employed on nominal three phase voltage distribution systems of: 380, 400, 415, 440, 460 or 480 VAC. The factory
default values may need to be changed to meet the needs of the application distribution voltage.
5.
From parameter E1-01, use the ESC,
and DATA/ENTER keys as necessary, to go to parameter E2-01 and enter
the Motor Rated Current. Set this parameter to the motor rated Full Load Amps (FLA) shown on the motor nameplate.
This is essential for proper Drive operation and motor overload protection. [Note: Do not include the “service factor”
amps.]
6.
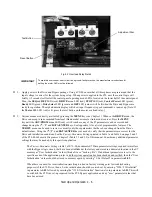
Press the MENU key to return to the DRIVE menu and the same operational status LED configuration described in
step 2 above. The alpha/numeric display will now be the speed command frequency.
To start the motor in Drive mode, press the HAND key. The DRIVE Run LEDs (red and green) and the HAND LED
(amber) will light and the Drive output will ramp up to “6 HZ.” Verify that motor rotation is correct.
If the direction of motor rotation is wrong, press the OFF key and turn the Power OFF! Wait for the red CHARGE
LED (near the Drive power terminals) to go out. When it does, swap the wires for T1 & T2 on the output terminals
of the motor Overload Relay. Tighten the terminal lugs, reapply the power, press the HAND key and re-check the
rotation direction.
7.
With correct motor rotation, press the MENU key, if necessary, to return to the DRIVE menu. Press DATA/ENTER
(as needed to get “F” flashing) then using the
and
keys, manually run the Drive throughout its entire speed
range, while observing operation. If excessive vibration of the driven load is noted at specific frequencies (speeds), the
Jump Frequency function may be used to eliminate this vibration, by programming d3-01 through d3-04. Press the
OFF key.
8.
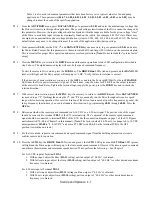
Determine whether the remote speed command is a 0-10 VDC or a 4-20 mA signal. The positive side of the signal
should be connected to terminal TB3-3 of the E7L terminal strip. The “common” of the remote speed command
signal should be connected to terminal TB3-1 of the E7L. See the connection diagram on page 1 of the E7L Bypass
unit schematic E7L-00 (or Chapter 5 in this manual). [Note: The factory default is 4-20 mA, to change to 0 to 10 VDC
adjust parameter H3-08 to “0: 0-10VDC” and move E7L DIP switch S1-2, on the terminal PCB to the OFF
position (toward the unit rear).]
9.
For the Auto mode, request a run command and speed command signal from the building automation system to
confirm remote (auto) operation.
10. Press the AUTO key, the DRIVE Run LEDs (red and green), the AUTO LED (green) and AUTO Run LED (green)
will light and the Drive output will ramp up to the Auto mode speed command. Observe if the remote speed command
can achieve the minimum and maximum speeds desired. If not, perform the following: - See Chapter 5.
For 0-10 VDC input at Terminal TB3-3
1.
With no input, adjust the Bias (H3-11 setting) until an output of “0.0 Hz” is obtained.
2.
With full scale input, adjust the Gain (H3-10 setting) until an output of “60.0 Hz” (or other desired maximum
frequency) is obtained.
For 4-20 mA input at Terminal TB3-3
1.
With 4 mA input, adjust Bias (H3-11 setting) until an output of “0.0 Hz” is obtained.
2.
With 20 mA input, adjust Gain (H3-10 setting) until an output of “60.0 Hz” (or other desired maximum
frequency) is obtained.
Summary of Contents for E7LBA002
Page 1: ...E7L Drive Bypass Technical Manual Model E7L Document Number TM E7L 01 ...
Page 8: ...Introduction vi Notes ...
Page 12: ...Table of Contents x Notes ...
Page 54: ...Electrical Installation 2 22 Wiring Diagram ...
Page 55: ...Electrical Installation 2 23 ...
Page 87: ...Start Up and Operation 4 9 Notes ...
Page 202: ...Diagnostic Troubleshooting 6 30 Notes ...
Page 248: ...Capacity Related Parameters B 6 Notes ...
Page 279: ...Communications D 27 Note ...
Page 280: ...Communications D 28 ...
Page 292: ...Spare Parts F 6 ...
Page 304: ...Index 12 ...
Page 305: ......

