6
Disassembly and Reassembly of the Speed Reducer
6.3
Disassembly and Reassembly of the U-Axis Speed Reducer
6-8
HW1484673
HW1484673
6.3
Disassembly and Reassembly of the U-Axis Speed
Reducer
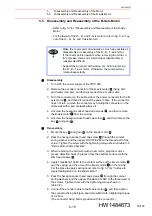
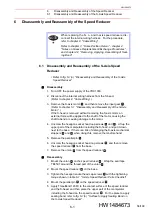
• Refer to
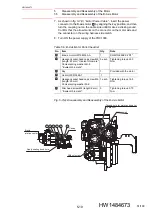
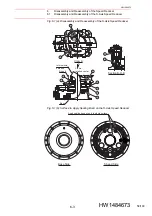
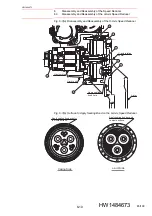
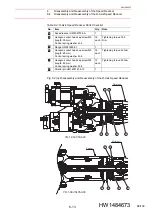
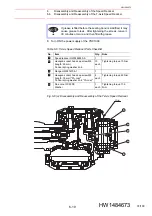
fig. 6-3(a) “Disassembly and Reassembly of the U-Axis
Disassembly
1. Turn OFF the power supply of the YRC1000.
2. Disconnect the internal wire harness in the top of the U-arm.
(Refer to
.)
3. In order to prevent the U-arm unit from falling, the U-arm unit must be
supported by using a chain block, etc. before separating the L-arm and
U-arm unit.
4. Unscrew hexagon socket head cap screws
and
, and then lower
the U-arm unit.
5. Remove the U-axis motor
, and then remove the input gear
.
(Refer to
chapter 5.3 “Disassembly and Reassembly of the U-Axis
If the speed reducer
is removed without removing the U-axis motor,
an external force will be applied to the shaft of the motor, causing the
shaft to bend or causing damage to the motor.
6. Unscrew the hexagon socket head cap screws
, and then remove
the speed reducer
and O-ring
.
Reassembly
1. Mount the O-ring
on the speed reducer
.
2. Apply ThreeBond 1206C to the contact surface of the speed reducer
and the U-arm unit, and then mount the speed reducer
on the U-
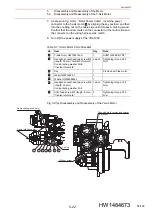
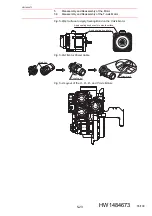
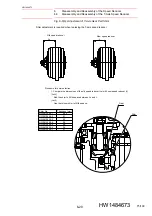
arm unit. For the place to apply sealing bond, refer to
“Surface to Apply Sealing Bond on the U-Axis Speed Reducer”
. At
this time, be careful so that the O-ring
does not come off.
3. Tighten the hexagon socket head cap screws
with the tightening
torque shown in
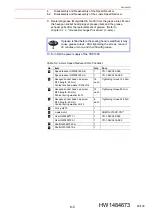
table 6-3 “U-Axis Speed Reducer Parts Checklist”
.
4. Reassemble and mount the U-axis motor.
(Refer to
chapter 5.3 “Disassembly and Reassembly of the U-Axis
(When replacing the speed reducer, replace the input gear, too.)
5. Apply ThreeBond 1206C to the contact surface of the speed reducer
and the L-arm, and then mount the U-arm unit with the mounted speed
reducer
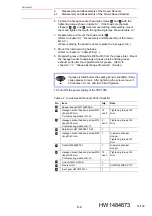
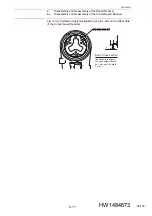
on the L-arm. For the place to apply sealing bond, refer to
and
fig. 6-3(c) “Surface to Apply Sealing Bond on the L-Arm
on the Other Side of the U-Axis Speed Reducer”
.
6. Tighten the hexagon socket head cap screws
with the tightening
torque shown in
.
7. Tighten the hexagon socket head cap screws
with the tightening
torque shown in
.
8. Mount the internal wiring harness.
(Refer to
.)
2
3
6
7
1
4
1
5
5
1
1
1
15
4
1
2
3
63/109


