9
Battery Pack Replacement
9-3
HW1484673
HW1484673
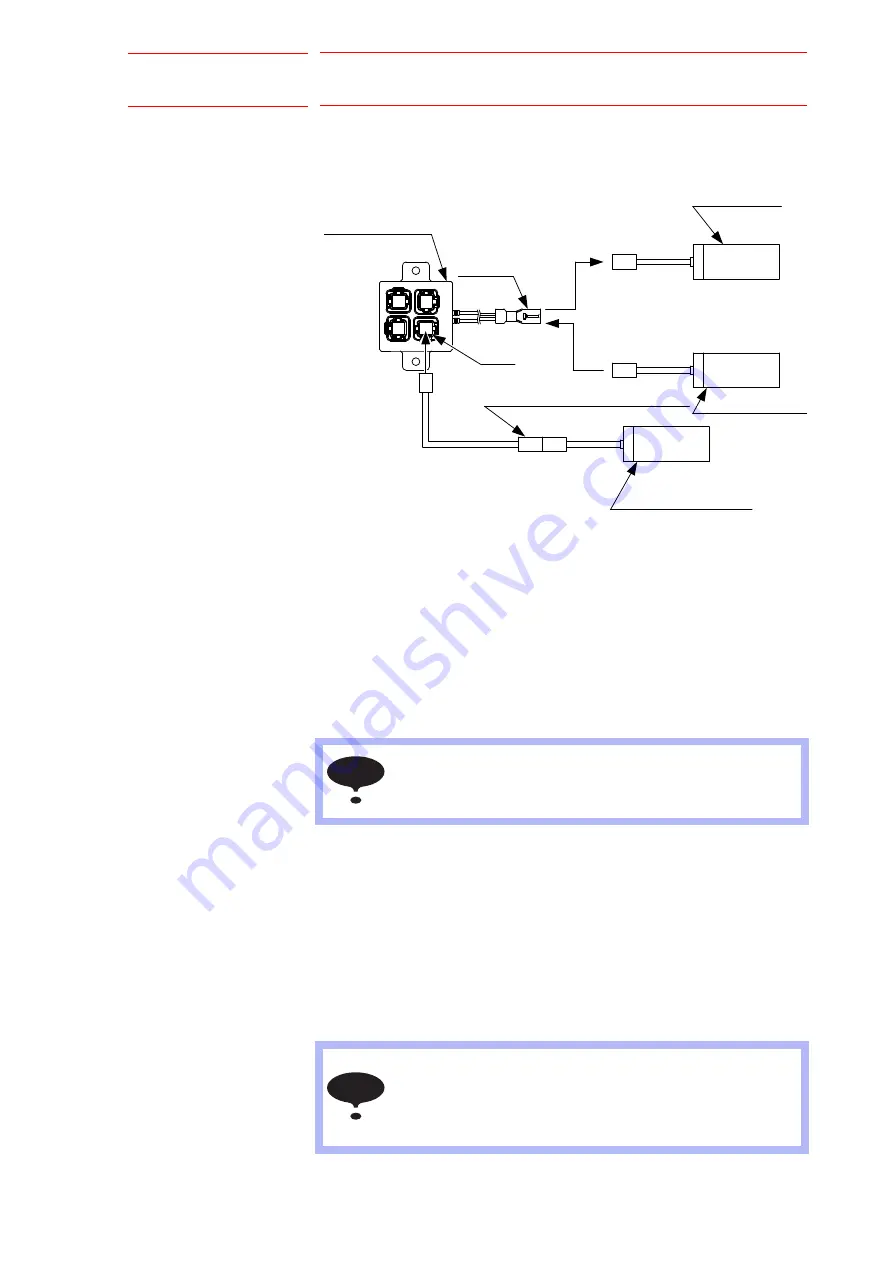
When the Power Supply of the YRC1000 Cannot Be Turned ON
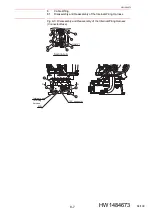
Fig. 9-3: Battery Connection (the power supply of the YRC1000 cannot be
turned ON)
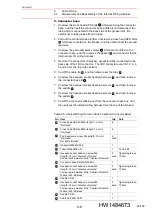
1. Prepare lead wires for battery replacement and a battery pack for
backup. (Apart from the new battery pack for replacement, prepare a
battery pack for backup)
2. Loosen the cover mounting bolts and remove the cover.
3. Remove the connector from the “IN” or “Y” port of the multi-port
connector.
Connect the lead wires for battery replacement to the “IN” or “Y” port of
the multi-port connector.
4. Connect the battery pack for backup to the lead wires for battery
replacement.
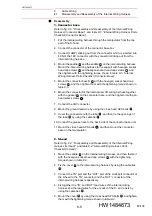
5. The old battery pack is fixed by using the cable tie. Cut the cable tie
(1 place) to remove the old battery pack from the protective tube.
6. The connector is in the protective tube. Cut the cable ties (2 places)
fixing the protective tube, and take out the connector.
7. Remove the old battery pack from the multi-port connector and mount
the new battery pack.
8. Remove the lead wires for battery replacement and the battery pack
for backup from the multi-port connector, connect the connector which
has been removed at step 3 of this procedure to the “IN” or “Y” port
again.
9. Fix the new battery pack by using the cable tie T50R-HSW.
NOTE
Before removing the old battery pack, make sure to connect
the battery pack for backup to prevent the encoder absolute
data from disappearing.
NOTE
If the battery pack for backup remains connected,
an electric current flows from the new battery to the backup
battery and which may result in the voltage drop in the new
battery. Remove the battery pack for backup immediately
after connecting the new battery.
Multi-port connector
Connector
Old battery pack
New battery pack
(HW1483880-A)
IN
Battery pack for back-up
(HW1483880-A)
Lead wires for battery replacement
(HW1471281-A)
or “Y”
89/109

