6-14
183523-1CD
183523-1CD
6
Maintenance and Troubleshooting
6.11 Positioner Home Position
RM2-755-RDR Postioner
6.11.2 Setting the Tooling Axis (S2 & S3) to Home (Zero) Position
1. Using the Programming Pendant, place the robotic system into
MANAGEMENT mode.
2. Jog the S1 axis into the Positioner hard stop with S3 tooling at robot,
and S3 tooling side up and level in the horizontal plane.
3. Slowly rotate the tooling plate until the homing pin hole in the tooling
plate is accessible.
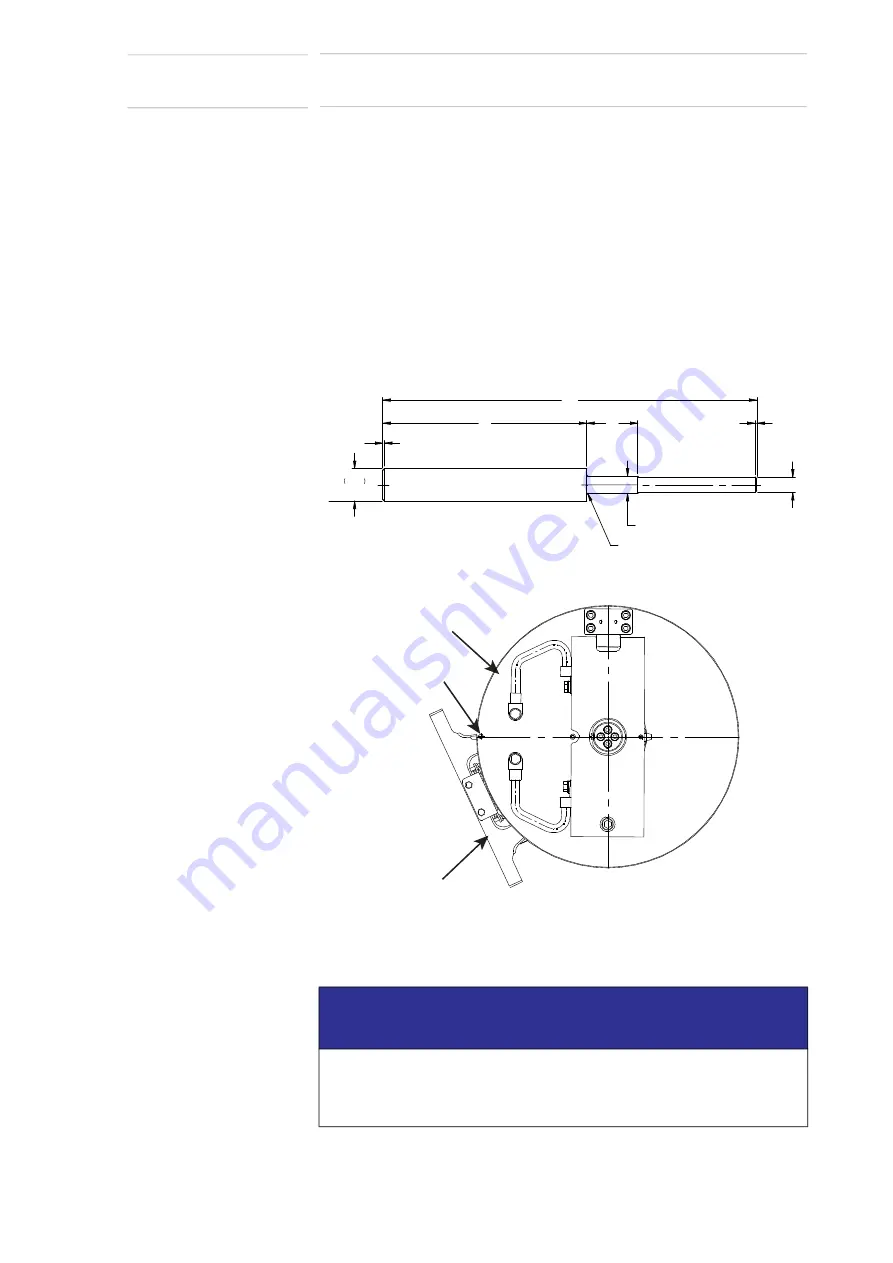
4. Install the plastic homing pin (see
) into
the homing pin hole in the tooling plate (see
).
Fig. 6
-
8: Homing Pin Details
Fig. 6
-
9: Tooling Plate Home (Zero) Position
5. Slowly jog the tooling plate in the direction indicated in
homing pin just contacts casting finished surface.
NOTICE
If you go too far with the tooling plate rotation, the plastic alignment pin
will bend and result in an inaccurate adjustment. If this happens, slowly
reverse the tooling plate rotation until the pin returns to a straight
position.
0.5 x 45
v
60
15
110
0.5 x 45
v
4.5
O
4.987
+0.0
-0.05
O
R 0.5
9.525
3/8"
Part Number 145896-6
TOOLING PLATE
HEADSTOCK
DRIVE ASSY
HOMING PIN
58 of 104


