6 Utility Functions (Fn
)
6-34
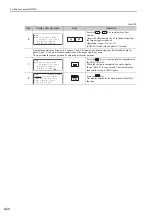
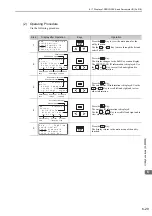
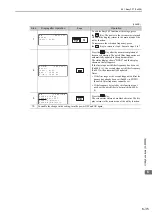
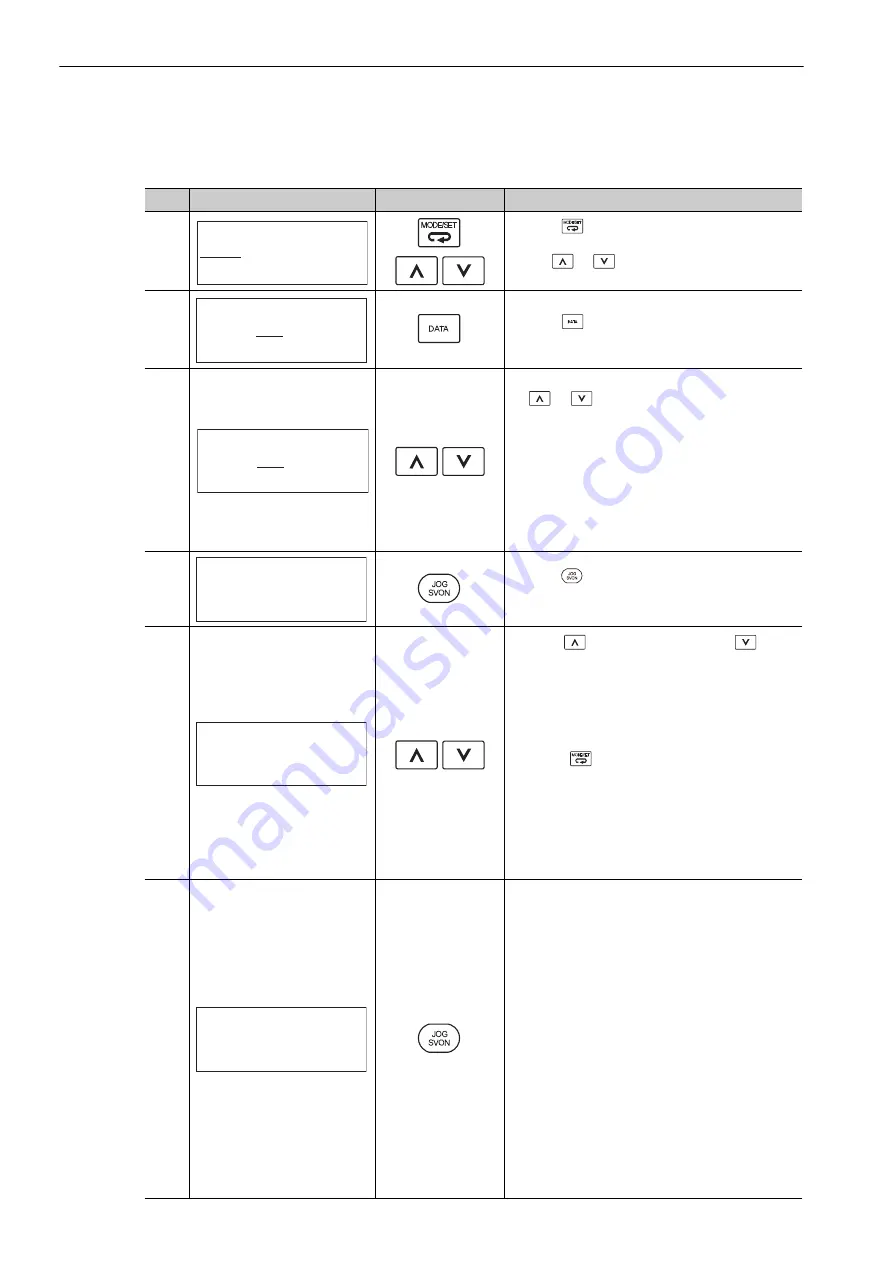
(2) Operating Procedure
Use the following procedure.
Step
Display after Operation
Keys
Operation
1
Press the
Key to view the main menu for the
utility function.
Use the
or
Key to move through the list and
select Fn206.
2
Press the
Key. The display changes to the Fn206
execution display.
3
The cursor is on the setting of "Input." Press
the
or
Key to set the sweep torque refer-
ence amplitude (Pn456)
Setting range: 1 to 800.
Note: When making the initial settings for EasyFFT,
do not change the setting for the reference
amplitude. Start with the original value of 15.
Increasing reference amplitude increases the
detection accuracy, but the vibration and noise
from the machine will increase. Increase the
amplitude value little by little.
4
Press the
Key to turn the servomotor power ON.
The display "BB" and "Setting" changes to "RUN"
and "Ready."
5
Press the
(forward run start) Key or
(reverse run start) Key to run the servomotor and start
the frequency measurement. "Measure" is displayed
during the measurement.
Within a quarter turn, the servomotor will move for-
ward and then in reverse several times.
Notes:
• Press the
Key to cancel the measurement. The
servomotor stops moving and the power turns OFF.
The detection of the resonance frequency is not
completed.
• The actions of the servomotor are very minute in
this operation. Also at the same time, the servomo-
tor emits a noise. To ensure safety, do not enter the
working envelope of the motor.
6
When the detection processing is successfully com-
pleted, "Measure" stops flashing and the results and
the notch filter value to be set are displayed. If the
processing was not completed, "No Measure" is dis-
played. To check the results, go to step 8.
< Important >
If two seconds or more are required for the operation
although detection was successfully completed, the
detection accuracy might be insufficient. Increasing
reference amplitude more than 15 increases the detec-
tion accuracy, but the vibration and noise from the
machine will increase. Increase the amplitude value
little by little.
Notes:
• If a notch filter has been set and is being used, "
∗
"
is displayed on the second line.
• If the first stage notch filter has been set, the sec-
ond stage notch filter value is displayed. If the first
and second stage notch filters have been set, only
the result of frequency detection is displayed.
B B
−
F U N C T I O N
−
F n 2 0 5 : V i b S u p
F n 2 0 6 : E a s y F F T
F n 2 0 7 : V - M o n i t o r
F n 0 0 0 : A l m H i s t o r y
B B
−
E a s y F F T
−
S e t t i n g
I n p u t = 0 1 5 %
B B
−
E a s y F F T
−
S e t t i n g
I n p u t = 0 1 5 %
R U N
−
E a s y F F T
−
R e a d y
I n p u t = 0 1 5 %
R U N
−
E a s y F F T
−
M e a s u r e
I n p u t = 0 1 5 %
B B
−
E a s y F F T
−
R e s u l t
I n p u t = 0 1 5 %
R e s = 1 2 5 0 H z
F i l t e r 1 1 2 5 0 H z

