n
Exit
n
Back
In [Settings] the system settings like brightness and contrast of the
display can be preset or the display can be re-calibrated. Here the
MPI/DP slave interface may also be configured. Further you get here
the Touch Panel information: product number, serial number and
licenses.
To execute the firmware update press the button [Info/Update]. After
clicking on [Info/Update] the current image is displayed under "image
version" with panel name, creation date and version number.
With [Make Screen Shot] you can make a screen shot of the panel
information and select a destination for its storage.
With [Search Image] a list of all the firmware images is shown, which
are available on the panel and connected storage media. These
images will be listed with create data and version number. Choose
your new image.
If the select image is not suited for your panel, an error massage
appears. If the image is suited for your panel, in the following mes-
sage the current installed image version and the new selected image
version are listed.
1.
Click on [Make Image Update] to execute the update. This can
take a few seconds.
2.
In the following window click on [Finish] to end the update.
ð
Then the display gets dark.
3.
Switch the power supply off the panel off and on.
ð
After the restart the calibration window is opened.
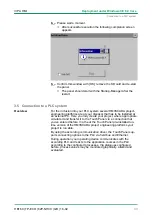
4.
Re-calibrate your panel as described. After calibration tap any-
where at the screen.
ð
The calibration window is closed.
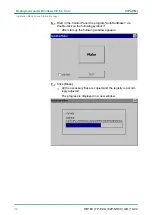
5.
Via
‘Start
è
Settings
è
Control Panel’
start the program
AutoR-
unMaker
Chapter 3.4 ‘Installation Movicon and Startup-Man-
With [Autostart] you define which runtime and which project will be
started automatically together with the panel startup.
Settings
Info/Update (firmware)
Autostart
VIPA HMI
Deployment under Windows CE 6.0 Core
Commissioning> VIPA Startup-Manager
HB160 | TP-ECO | 62P-NHC0 | GB | 16-02
29


