A
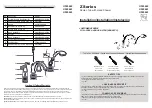
Installation
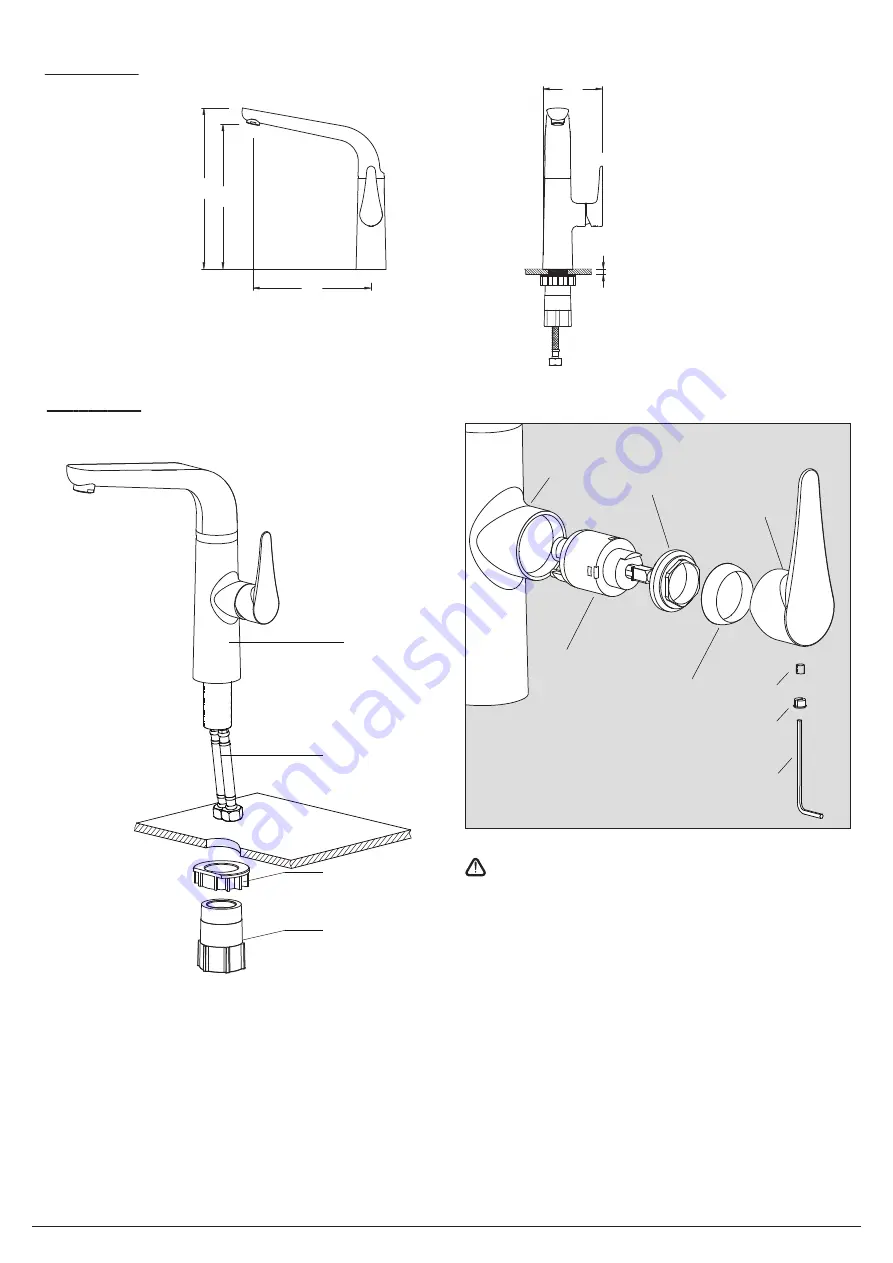
Dimension
2 - 2
To remove the cartridge.
First shut off the water supply to the tap.
1: Pull out the cap from the handle.
2: Loosen the grub screw in handle, but do not remove it.
3: Take off the handle, unscrew the cartridge cover.
4: Using a correct size spanner unscrew the retaining nut.
5: Pull the cartridge and wash it with clean running water.
6: Dry and lightly grease the seals (only use silicone grease)
7: Replace them in turn.
ma
x3
0
217
26
6
29
6
109
HOSE
FIXING NUT
PLASTIC WASHER
MIXER BODY
MIXER BODY
CARTRIDGE
RETAINING
NUT
CARTRIDGE
COVER
HANDLE
GRUB
SCREW
CAP
ALLEN
KEY
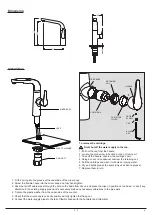
1: Fit the O-ring into the groove at the underside of the mixer body.
2: Screw the
fl
exible hoses into the mixer body, and fully hand tighten.
3: Pass the tail of
fl
exible pipes through the hole on the basin from above, and place the mixer in position on the basin, to see if any
alteration to the existing supply pipe work is necessary, make any necessary alterations to the pipe work.
4: Tighten the plastic washer from the under-side of the counter.
5: Check that the mixer body is correctly positioned, fully tighten the ffixing nut.
6:
Connect the water supply pipes to the tail of flexible hoses with the hot water and cold water.