11
GB
O R I G I N A L I N S T R U C T I O N S
Switching the device on and o
ff
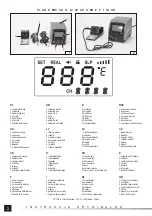
Switch the device on by moving the power switch to the on position – I.
The display backlight switches on and after approx. 3 seconds the previous (factory) temperature setting will be displayed.
If it is necessary to switch o
ff
the device, move the power switch to the o
ff
position – O.
Parameter setting
The parameters are set using a knob. Turning the knob allows you to set the value of the parameter, and a light press of the knob
allows you to select the parameter which value can be changed.
Temperature setting
Turning the knob allows you to select the tip temperature. The setting is visible on the display. The soldering iron has a sensor
that continuously measures and regulates the tip’s temperature so that it corresponds as much as possible to the selected setting.
The device can be programmed and store three temperature values. Pressing the knob allows for entering the programmed
setting selection mode; it is indicated by
fl
ashing of CH1, CH2, or CH3 symbol. The setting is selected by turning the knob and
pressing it con
fi
rms the selection.
Caution! The device needs time to change the tip temperature, especially to lower it. It is forbidden to accelerate the cooling of
the tip.
Menu
Press and hold the knob for approx. 3 seconds to enter the menu. The
fi
rst function is the temperature (TEMP); the successive
functions are available in the following order TEMP, UNIT, SLP, BEEP, LIGH, CODE, EXIT. Function selection is made by turning
the knob; pressing the knob con
fi
rms the selection.
TEMP – temperature setting programming
Select and con
fi
rm the TEMP function. Select one of the temperature setting CH1, CH2, or CH3 by pressing and turning the knob.
The symbol of the selected setting will
fl
ash on the display. Turn the knob to set the temperature value. Select the RET setting to
enter the value to the memory, then use the selector to select EXIT to exit the menu.
UNIT – temperature unit
Select and con
fi
rm the UNIT function. Turn the knob to select symbol C for degrees Celsius or F for degrees Fahrenheit. Press
the knob to con
fi
rm the selection, then use the selector to select EXIT to exit the menu.
SLP - automatic sleep time (timer)
Select and con
fi
rm SLP function. Turn the knob to select the time value in minutes that will elapse between the station switching
on and its automatic sleep. It is possible to set the time from 1 to 240 minutes or to select the OFF setting function that switches
o
ff
the timer. After setting, use the selector to select EXIT to exit the menu.
Caution! When in sleep mode, the tip temperature decreases to 200
O
C; to restore the station operation press or turn the knob; the
temperature will automatically return to the previously set value.
BEEP – audible signal
Select and con
fi
rm the BEEP function. Turn the knob to select ON option to activate the audible signal or OFF to deactivate it.
Con
fi
rm the selection by pressing the knob. After setting, use the selector to select EXIT to exit the menu.
LIGH – display backlight adjustment
Select and con
fi
rm the LIGH function. Turn the knob to select one of the display backlight levels (01-09). Con
fi
rm the selection
by pressing the knob.
After setting, use the selector to select EXIT to exit the menu.
CODE – coding temperature settings
This feature allows you to block temperature changes without providing a code. This feature is useful in a workplace where mul-
tiple users use one station.
Select and con
fi
rm the CODE function. Turn the knob to set the current code or the default code (000) if no code has been entered
before. Con
fi
rm the selection by pressing the knob. Enter a new code, con
fi
rm the selection, then re-enter the new code, and
con
fi
rm it. After setting, use the selector to select EXIT to exit the menu.
To unlock the temperature settings, press and hold the knob for approx. 3 seconds, and then rotate the selector to enter the
previously set code. If it is necessary to delete the code, perform the same operations as when setting the new code; you need to
set the 000 code, which is a factory code.
If the password is lost, before starting the station, press and hold the knob in this position, and then turn the switch to the on posi-
tion - I without releasing the pressure on the knob. After start-up, the station will automatically go into ADMI mode and the display
will show “---”. Set the dial to “888”, which will unlock the station and remove the password.


