10
EN
O R I G I N A L I N S T R U C T I O N S
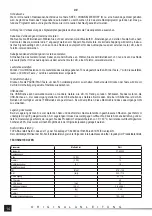
the mains socket. Disconnect the power adapter from the wall socket
fi
rst and then from the device.
Activating the radio
When the power is connected, the LCD screen will be illuminated for about 8 seconds and then the backlight will go o
ff
. The device
is switched on after pressing the on switch. Press the button again to turn the device o
ff
.
Caution! The device will switch o
ff
automatically if the power level of the battery is low. After that, replace the battery with a fully
charged one, connect the power adapter, and then press the switch twice to start the device.
Setting the clock
Switch o
ff
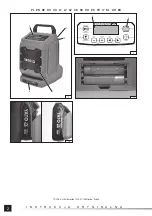
the device, press and hold the SOURCE button until the clock starts
fl
ashing on the display. Use the HOUR button to
set the hour, and the MINUTES button to set the minutes. Then press the SOURCE button to save the setting. The display will
show, in addition to the hours and minutes, the following symbols: AM – for morning hours and PM – for afternoon hours. It is not
possible to change to a 24-hour clock.
Caution! If the batteries that supply the clock are not installed, the clock will reset each time the power is disconnected.
Operation mode selection
Switch on the device, press the SOURCE button to select the operating mode. The selection is con
fi
rmed by a symbol on the
display.
FM – for the reception of the ultra-short wave bands,
AM – for the reception of the long wave band,
BT – for the reception of the signal emitted using Bluetooth ® technology,
AUX – for receiving signals from the source connected to the AUX port.
The AUX mode will only be available if a cable is connected to the AUX socket. Regardless of the operating mode selected, the
device will automatically switch to AUX mode after connecting the plug to the AUX socket. The device will automatically return to
the previous operating mode after disconnecting the cable from the AUX socket.
The AUX mode can be used to connect e.g. the phone via a headphone cable, which turns the device into a speaker for the audio
signal emitted from the device.
Bluetooth ® is a registered trademark of Bluetooth SIG.
Automatic radio station search
Switch on the device, select the AM or FM band, press and hold the AUTO MEMORY button until the radio starts searching
through the radio band. Found stations are automatically saved in the device. After saving 10 radio stations, the device will stop
searching and start playing the signal of the
fi
rst station found.
The volume buttons can be used to control the volume of the sound being played. The “+” button increases the volume and the
“-” button decreases it.
Manual radio station search
Switch on the device, select the AM or FM band, press one of the SEEK/CHANNEL MEMORY buttons to start searching through
the band. Each press of the button will change the frequency. Once the station is found, the radio will begin to play sound. Press
and hold the CHANNEL MEMORY button to save the radio station found. The display will show “MEM + X” where X can be set
from 0 to 9. Using the SEEK/CHANNEL MEMORY buttons, select the memory bank number to save the setting to.
Quick search
If, in the manual radio search mode, the SEEK/CHANNEL MEMORY button is pressed for approx. one second The radio will start
to search the band automatically until the
fi
rst radio station is found. The station found can be saved in the same way as in the
manual search mode.
Caution! In order to improve the radio signal reception extend the telescopic antenna.
Wireless connection to external devices
Select BT operating mode. On the external device, select the Bluetooth ® settings and start searching for the device, which should
be visible as “worksite radio 1”. Pair the devices, the correct pairing will be con
fi
rmed by a sound. From now on, the radio can be
used as a speaker for sound signal from an external device, e.g. a telephone.
Wired connection mode to external devices
Connect the device using the cable with an AUX socket. Select the AUX operation mode. From now on, the radio can be used as
a speaker for sound signal from an external device, e.g. a telephone.
Summary of Contents for YT-82940
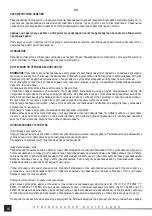
Page 16: ...16 RU 80 AAA II Li Ion YATO 18 V YT 82842 YT 82843 YT 82844 YT 82845 YATO YT 82848 YT 82849...
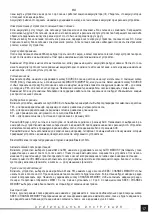
Page 19: ...19 UA 80 AAA II Li Ion YATO 18 YT 82842 YT 82843 YT 82844 YT 82845 YATO YT 82848 YT 82849...
Page 52: ...52 GR 80 II Li Ion YATO 18 V YT 82842 YT 82843 YT 82844 YT 82845 YATO YT 82848 YT 82849...
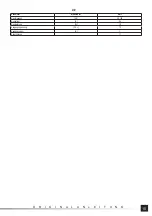
Page 55: ...55 GR V 100 240 Hz 50 60 A 0 4 W 12 V d c 12 A 1 II...


