background image

English

-

43

MAINTENANCE

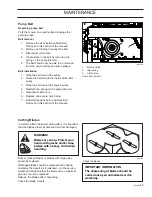
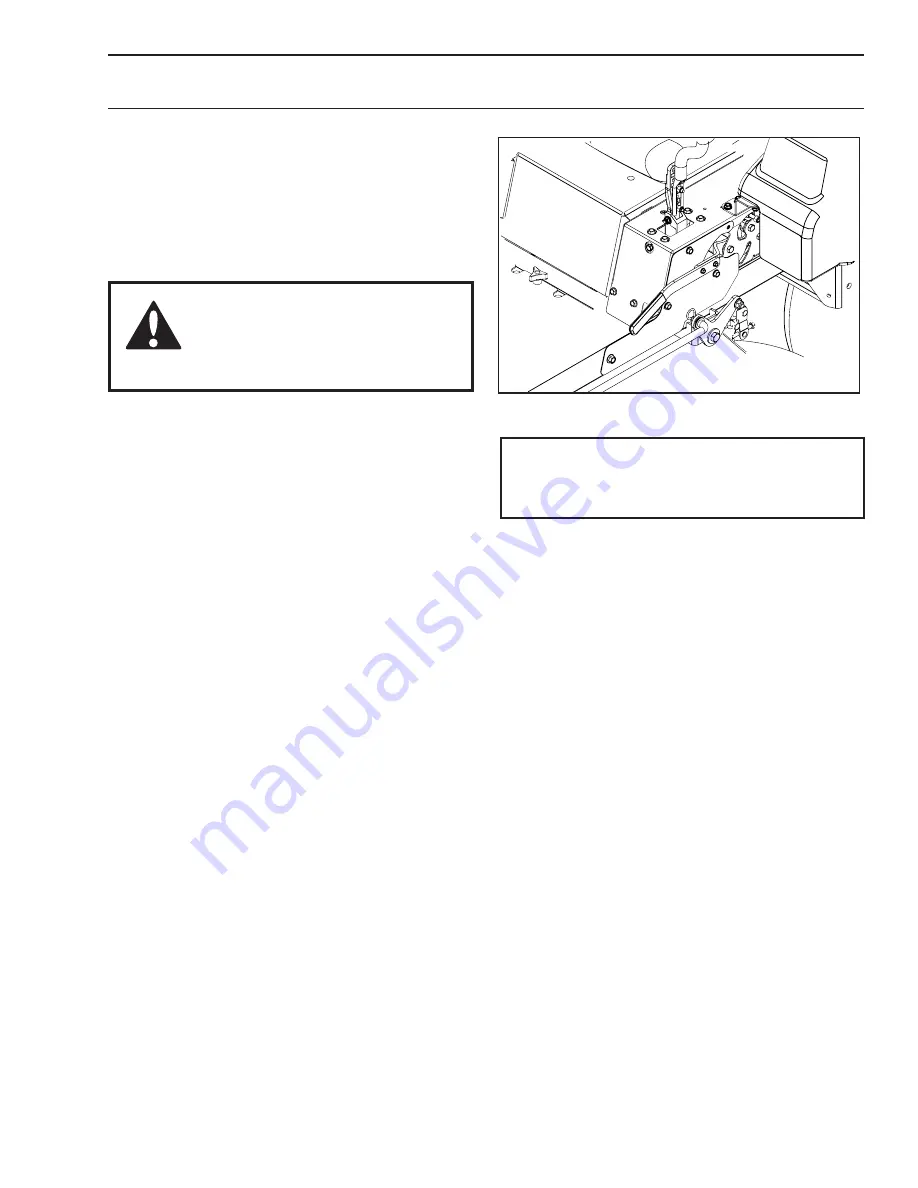
Parking Brake

Visually check that no damage is found on the lever, 

links, or switch belonging to the parking brake. 

Perform a standstill test and check that there is 

sufficient braking action.

To adjust the parking brake, contact the yazoo/Kees 

service workshop.

WARNING!
Faulty adjustment result in 

reduced braking ability and can 

cause an accident.

V-belts

Check every 100 hours of operation. Check for severe 

cracking and large nicks. 
NOTE: The belt will show some small cracks in normal 

operation.
The belts are not adjustable. Replace belts if they 

begin to slip from wear.

IMPORTANT INFORMATION
The machine must be absolutely standing 

still when applying the parking brake.

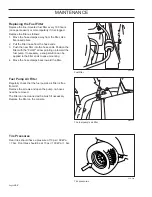
8061-019a 

Parking brake

Summary of Contents for ZELKH52250

Page 1: ...glish Operator s Manual ZELKH52250 968999727 ZELKH61250 968999728 ZELKH72270 968999729 Please read the operator s manual carefully and make sure you understand the instructions before using the machin...

Page 2: ...2008 HTC All rights reserved Beatrice NE Printed in U S A...

Page 3: ...38 Ignition System 39 Safety System 39 Engine Cooling Air Intake 40 Throttle Cable 40 Choke Cable 40 Air Filter Maintenance 41 Replacing Air Filter 41 Servicing Precleaner 41 Servicing Paper Element 4...

Page 4: ...d mind and body and must not be under the influence of any mind altering substance WARNING Engine exhaust some of its constituents and certain vehicle components contain or emit chemicals known to the...

Page 5: ...road traffic regulations before transporting on public roads If the machine is transported you must always use approved fastening equipment and ensure that the machine is well anchored DO NOT operate...

Page 6: ...Number The machine s manufacturing number can be found on the printed plate affixed to the left in the engine compartment Stated on the plate from the top are The machine s type designation I D The m...

Page 7: ...ial for misuse or misassembly WARNING Xxxx xxxxxx xxxxx xxxx xxxxxxxxx xxxxxx xxxxxxxxx xx xxxxxxxx xxxx xxxxxx IMPORTANT INFORMATION Xxxx xxxxxx xxxxx xxxx xxxxxxxxx xxxxxx xxxxxxxxx xx xxxxxxxx xxxx...

Page 8: ...from no greater Manual performing any the machine than 10 maintenance or repair work Whole body Severing of fingers Do not open or Careful backing up Careful going exposure to and toes remove safety w...

Page 9: ...machine is only intended for use by one person Do not mow in reverse unless absolutely necessary Always look down and behind before and while backing Never direct discharged material toward anyone Avo...

Page 10: ...eye protection when operating machine Data indicates that operators age 60 years and above are involved in a large percentage of riding mower related injuries These operators should evaluate their ab...

Page 11: ...can result in severe injury or death Operation on all slopes requires extra caution If you cannot back up the slope or if you feel uneasy on it do not mow it Mow up and down slopes 10 degrees maximum...

Page 12: ...wing activity Never assume that children will remain where you last saw them Keep children out of the mowing area and in the watchful care of a responsible adult other than the operator Be alert and t...

Page 13: ...he ground If this is not possible refuel such equipment with a portable container rather than from a gasoline dispenser nozzle Keep the nozzle in contact with the rim of the fuel tank or container ope...

Page 14: ...replace with manufacturer s recommended parts when necessary Mower blades are sharp Wrap the blade or wear gloves and use extra caution when servicing them Check brake operation frequently Adjust and...

Page 15: ...rotective goggles Ensure that the fuel filler cap is mounted tightly and no flammable substances are stored in an open vessel Never work with the starter circuit if there is spilled fuel Disconnect th...

Page 16: ...g grass leaves and other debris that may have accumulated on the machine Allow the machine to cool before putting it in storage Regularly clean deck and underside of deck avoid spraying engine and ele...

Page 17: ...thly no jerky turns starts or stops When mower is stopped set brakes securely and use park brake If any part of ROPS is damaged the entire ROPS must be replaced Check all bolts including seat belt for...

Page 18: ...rake 2 Throttle control 3 Blade switch 4 Ignition switch 5 Choke control 6 Fuses 7 1 2 3 4 5 6 8 9 10 12 7 11 Fuel tank cap 8 Fuel shut off valve 9 Deck lift 10 Seat adjustment lever 11 Hour meter 12...

Page 19: ...y In order for example to turn right while moving forward move the right control towards the neutral position The rotation of the right wheel is reduced and the machine turns to the right Zero turn ca...

Page 20: ...trol The throttle control regulates the engine speed and thereby the rate of rotation of the blades assuming the blade switch is pulled out see Engaging the Mower Deck In order to increase or decrease...

Page 21: ...ing the seat forward They are flat pin fuses of the same type used in automobiles There are two fuses with ratings and functions 20 A Primary fuse 7 5 A Mower deck coupling 8061 023 Ignition switch 80...

Page 22: ...ust system to cool at least two 2 minutes before refueling WARNING Fill to bottom of filler neck Do not overfill Wipe off any spilled oil or fuel Do not store spill or use gasoline near an open flame...

Page 23: ...osition into the preferred cutting height position To set the cutting height pull out the detent ring and place it in the desired height s corresponding hole To lower the deck from the transport posit...

Page 24: ...ically The hour meter cannot be manually reset 8061 023 Hour meter 13 Tracking Adjustment If the mower is not tracking straight check the air pressure in both rear tires Recommended air pressure is 10...

Page 25: ...ould push mower see Moving by Hand in the Operation section to an open flat area without other people or vehicles obstacles nearby In order to move unit under its own power the operator must be in the...

Page 26: ...position The following conditions must be fulfilled before the engine can be started The blade switch for engaging the mower blades must be depressed The parking brake must be on Both steering control...

Page 27: ...blade switch downwards Move the steering controls outward to the locked outer neutral position Move the throttle to the middle position 8061 023 Press the control for disengaging the mower deck 8061 0...

Page 28: ...oke control Open the fuel valve 8011 438 Fuel valve in the OPEN position Press in and turn the ignition key to the start position 8061 023 Turn to START position IMPORTANT INFORMATION Do not run the s...

Page 29: ...oderate speed half throttle for 3 5 minutes before loading it to heavily USE FULL THROTTLE WHEN MOWING no choke 8061 001 Set the engine speed WARNING Engine exhaust and certain vehicle components cont...

Page 30: ...ak to start the engine it should be recharged See Battery in the Maintenance Section If jumper cables are used for emergency starting follow this procedure To attach jumper cables Connect each end of...

Page 31: ...desired hole Release foot pedal latch and lower deck to set cutting height Make sure the work area is free from objects 4 that could be thrown by the rotating blades Engage the mower deck by pulling...

Page 32: ...or changing speed on hills If stopping is absolutely necessary pull drive levers into the neutral position and push to the outside of the unit and engage the parking brake To restart movement release...

Page 33: ...best with a high engine speed the blades rotate rapidly and low speed the rider moves slowly If the grass is not too long and dense the driving speed can be increased without negatively affecting the...

Page 34: ...isengage the mower deck and move throttle to minimum 8061 011a Cut height selection Raise the mower deck by pressing the foot pedal forward to the transport position When the machine is standing still...

Page 35: ...rear of the pump They are used to release the system so the machine may be moved by hand when not running Tilt seat forward to gain access to the pump The rear bypass valve sits directly opposite the...

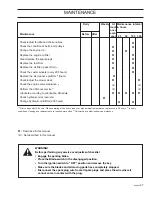
Page 36: ...ice weekly 4 Performed by authorized service workshop Described in this manual Not described in this manual Maintenance Before After Daily Weekly At least once each year Maintenance interval in hours...

Page 37: ...ubrication Schedule Check hydraulic oil at reservoir Change hydraulic oil filter 200 hours 1 First change after 5 8 hours When operating with a heavy load or at high ambient temperatures replace every...

Page 38: ...D battery cable 4 Using a 7 16 wrench remove the bolts on either side of the terminal guard and lift off guard 5 Carefully remove the battery from the mower 6 Install new battery with terminals in the...

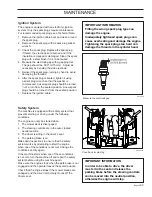
Page 39: ...ugs can cause overheating and damage the engine Tightening the spark plugs too hard can damage the threads in the cylinder head 8011 054 Measure the electrode gap Safety System The machine is equipped...

Page 40: ...e position 2 Check that the throttle cable is mounted in the correct hole in the lower lever see illustration 3 Push the throttle cable s outer casing as far to the right as possible and tighten the c...

Page 41: ...Open the door on the blower housing 1 to access the air cleaner element and precleaner Unhook the latch and remove the precleaner 2 from the air cleaner element or remove as an assembly for servicing...

Page 42: ...up toward the fuel pump If necessary a soap solution can be applied to the filter ends to ease mounting 4 Move the hose clamps back toward the filter 8011 468 Fuel filter 8009 147 The fuel pump s air...

Page 43: ...o Kees service workshop WARNING Faulty adjustment result in reduced braking ability and can cause an accident V belts Check every 100 hours of operation Check for severe cracking and large nicks NOTE...

Page 44: ...e shaft The belt can now be removed 6 Deck belt installation NOTE For ease in installing the deck belt refer to the routing decal on bottom of seat Wrap the deck belt around the electric clutch 1 pull...

Page 45: ...ervice workshop 8011 604 Check the blades Pump Belt Replacing pump belt Park the mower on a level surface Engage the parking brake Belt removal Remove the deck belt see Deck Belt 1 Removal in this sec...

Page 46: ...lign with star on cutter housing Install new or re sharpened blade with stamped GRASS SIDE facing towards ground grass down or THIS SIDE UP facing deck and cutter housing Install and tighten blade bol...

Page 47: ...is on a level surface Make sure the tires are inflated to the correct pressure See Technical Data under Transmission If tires are under or over inflated you cannot properly adjust your deck Four slots...

Page 48: ...Anti scalp rollers The anti scalp rollers can be set in three positions Upper position 1 to 3 38 to 76 mm grass Middle position 3 to 4 76 to 114 mm grass Lower position 4 to 6 114 to 152 mm grass The...

Page 49: ...ashing Foam filled tires or solid tires will void the warranty Removal and installation of caster wheel Remove nut and caster bolt Pull the wheel out of the fork and take care of the sleeve Install in...

Page 50: ...ted twice weekly 12 12 Every year 1 52 Every Week 1 365 Every day Lubricate with grease gun Oil change Filter change Lubricate with oil can Level check Change transaxles transmission filters 8011 672...

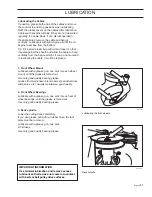
Page 51: ...ble it must be replaced 1 Front Wheel Mount Lubricate with a grease gun one zerk for each wheel mount until the grease is forced out Use only good quality bearing grease Grease from well known brand n...

Page 52: ...l is a health hazard and must not be disposed of on the ground or in nature it should always be disposed of at a workshop or appropriate disposal location Avoid skin contact wash with soap and water i...

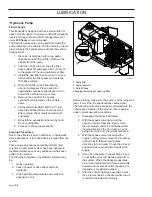
Page 53: ...approaching the ADD mark fill the oil to the FULL mark on the dipstick Never fill to above the FULL mark The oil is filled through the hole for the dipstick API class SG SH SJ or higher must be used...

Page 54: ...opriate containers and dispose of it in accordance with laws in your area Remove the cap from the pump s 5 expansion tank located on the vehicle frame Fill reservoir with SAE 10W30 oil to just 6 above...

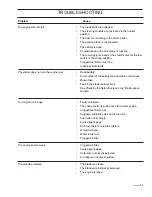
Page 55: ...r Dead battery Poor contact of the battery terminal cable connections Blown fuse Fault in the starter safety circuit See Checking the Safety System in the Maintenance Section The engine runs rough Fau...

Page 56: ...lectromagnetic coupling has loosened The blade switch is faulty or has come loose from the cable contact Blown fuse Transaxle leaks oil Damaged seals housing or gaskets Air trapped in hydraulic system...

Page 57: ...and far away from open flame Never use gasoline for cleaning Use a degreaser and warm water instead To ready the machine for storage follow these steps Thoroughly clean the machine especially 1 under...

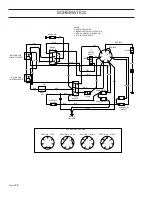
Page 58: ...SEAT SW 1 SEAT UNOCCUPIED 2 BRAKE SWITCH IN Off POSITION 3 MOTION CONTROL LEVERS OUT 4 PTO IN Off POSITION SOLENOID BLU BRN RED BLK BLK yEL yEL PUR GRN PUR WHT ENGINE PIGTAIL NOTES B S A1 A2 L M G 7...

Page 59: ...ane unleaded Max ethanol 10 Max MTBE 15 5 2 gallons 19 7 liters Champion RCY12YC 030 0 75 mm Air cooled Standard 12V Electric Hydrostatic pump Dual levers foam gripped 8 mph 12 9 km h 4 mph 6 45 km h...

Page 60: ...ght Overall Width Chute Up Overall Width Chute Down ZELKH52250 968999727 52 132cm 1 5 4 5 3 8 11 4 cm 0 3 18 457 mm Yes Standard Yes Standard Electromagnetic clutch 11 gauge fabricated 4 2 acres h 169...

Page 61: ...s smooth tread Rear tires turf pneumatic Tire pressure front Tire pressure rear ZELKH72270 968999729 Kohler Courage Pro 27 hp Pressure with oil filter 1 6 qt 1 7 liter 1 7 qt 1 9 liter 10W30 5W30 SG S...

Page 62: ...Deck Construction Productivity Productivity Overall Dimensions Weight Base Machine Length Base Machine Height Overall Width Chute Up Overall Width Chute Down ZELKH72270 968999729 72 183cm 1 5 4 5 3 8...

Page 63: ...t lb 110 Nm When this product is worn out and no longer used it should be returned to the reseller or other party for recycling In order to implement improvements specifications and designs can be alt...

Page 64: ...that the machine will fulfill the requirements This is also applicable to special requirements for any of the states California emission rules etc Do not remove any of these labels Certificates can al...

Page 65: ...k the mower deck adjustment 11 Check The safety switch for the parking brake The safety switch for the mower deck The safety switch in the seat The safety switch in the steering controls Parking brake...

Page 66: ...English 66 SERVICE JOURNAL After the First 5 8 Hours 1 Change engine oil Action Date mtr reading stamp sign...

Page 67: ...r Service 1 Check the engine air filter 2 Sharpen Replace mower blades if required 3 Check the tire pressures 4 Check battery with cables 5 Lubricate according to lubrication chart 6 Check clean the e...

Page 68: ...ign 50 Hour Service 1 Perform the 25 hour service 2 Clean replace the air cleaner s filter cartridge paper filter shorter intervals for dusty operating conditions 3 Change engine oil 4 Lubricate accor...

Page 69: ...r service 2 Perform the 50 hour service 3 Change the engine oil filter 4 Clean replace the spark plugs 5 Replace the fuel filter 6 Clean the cooling fins on the engine and transmission 7 Check V belts...

Page 70: ...our Service 1 Perform the 25 hour service 2 Perform the 50 hour service 3 Perform the 100 hour service 4 Check adjust the mower deck 5 Clean the combustion chamber and grind the valve seats 6 Check th...

Page 71: ...e air cleaner s prefilter foam 300 hours 3 Replace the air filter s paper cartridge 4 Change the engine oil 50 hours 5 Replace the engine oil filter 100 hours 6 Check adjust the cutting height 7 Check...

Page 72: ...English 72 SERVICE JOURNAL Action Date mtr reading stamp sign...

Page 73: ...English 73 SERVICE JOURNAL Action Date mtr reading stamp sign...

Page 74: ...English 74 SERVICE JOURNAL Action Date mtr reading stamp sign...

Page 75: ......

Page 76: ...P N 539 132406 R02 04 11 08...

Reviews: