Getting Started
87
3.
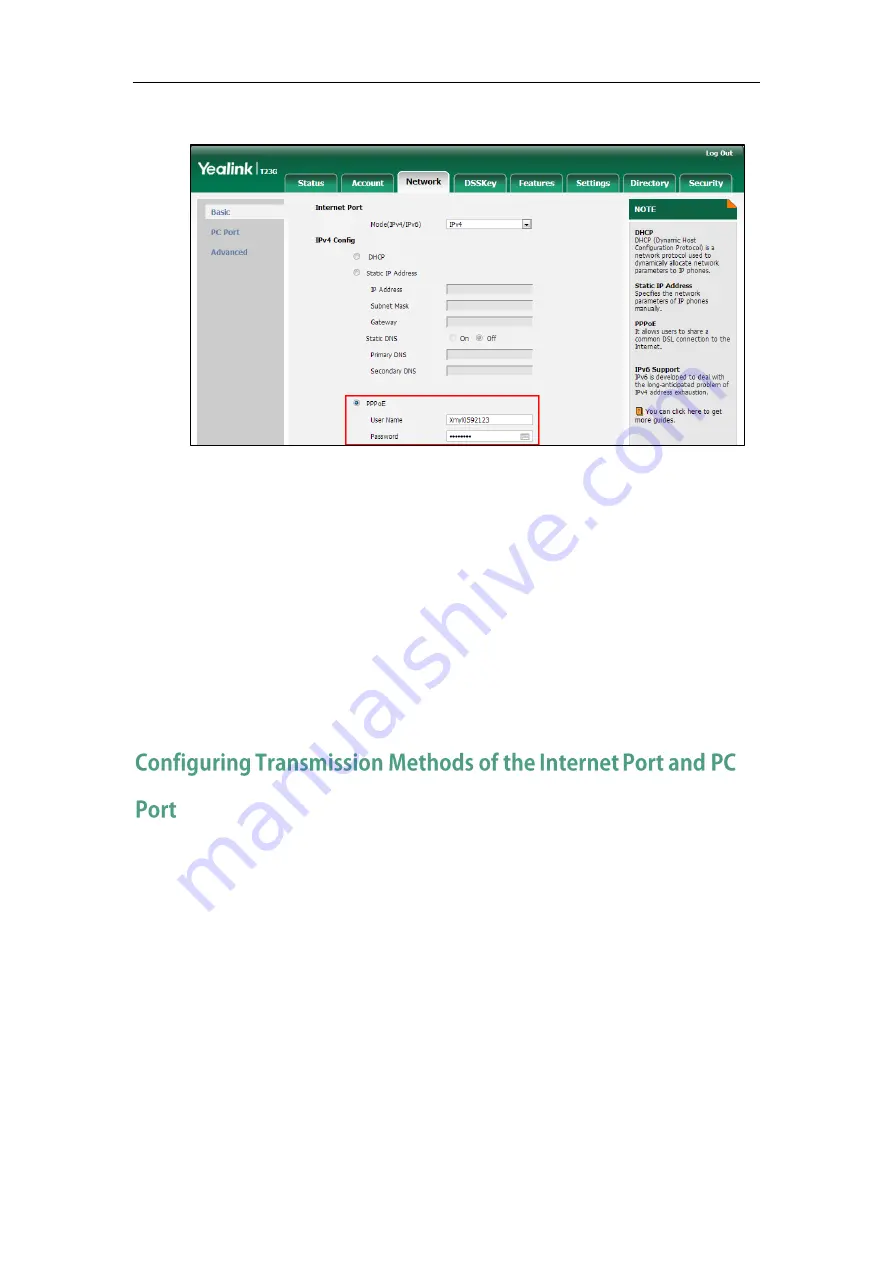
Enter the user name and password in corresponding fields.
4.
Click Confirm to accept the change.
A dialog box pops up to prompt that settings will take effect after a reboot.
5.
Click OK to reboot the phone.
To configure PPPoE via phone user interface:
1.
Press Menu->Settings->Advanced Settings (default password: admin)
->Network->WAN Port->IPv4->PPPoE IPv4 Client.
2.
Enter the user name and password in corresponding fields.
3.
Press the Save soft key to accept the change.
The IP phone reboots automatically to make settings effective after a period of time.
Yealink SIP VP-T49G/SIP-T48G/T46G/T42G/T41P/T40P/T29G/T27P/T23P/T23G/T21(P) E2/T19(P)
E2 IP phones support two Ethernet ports: Internet port and PC port. The CP860 IP phones
have Internet port only. Three optional methods of transmission configuration for IP
phone Internet or PC Ethernet ports:
Auto-negotiate
Half-duplex
Full-duplex
Auto-negotiate is configured for both Internet and PC ports on the IP phone by default.
Auto-negotiate
Auto-negotiate means that two connected devices choose common transmission
Summary of Contents for CD860
Page 1: ......
Page 45: ...Getting Started 23 For SIP T42G T41P T40P Desk Mount Method Wall Mount Method Optional ...
Page 47: ...Getting Started 25 For SIP T23P T23G Desk Mount Method Wall Mount Method Optional ...
Page 122: ...Administrator s Guide for SIP T2 Series T19 P E2 T4 Series CP860 IP Phones 100 ...
Page 840: ...Administrator s Guide for SIP T2 Series T19 P E2 T4 Series CP860 IP Phones 818 ...
Page 995: ...Appendix 973 ...


