Administrator’s Guide for SIP-T2 Series/T19(P) E2/T4 Series/CP860 IP Phones
148
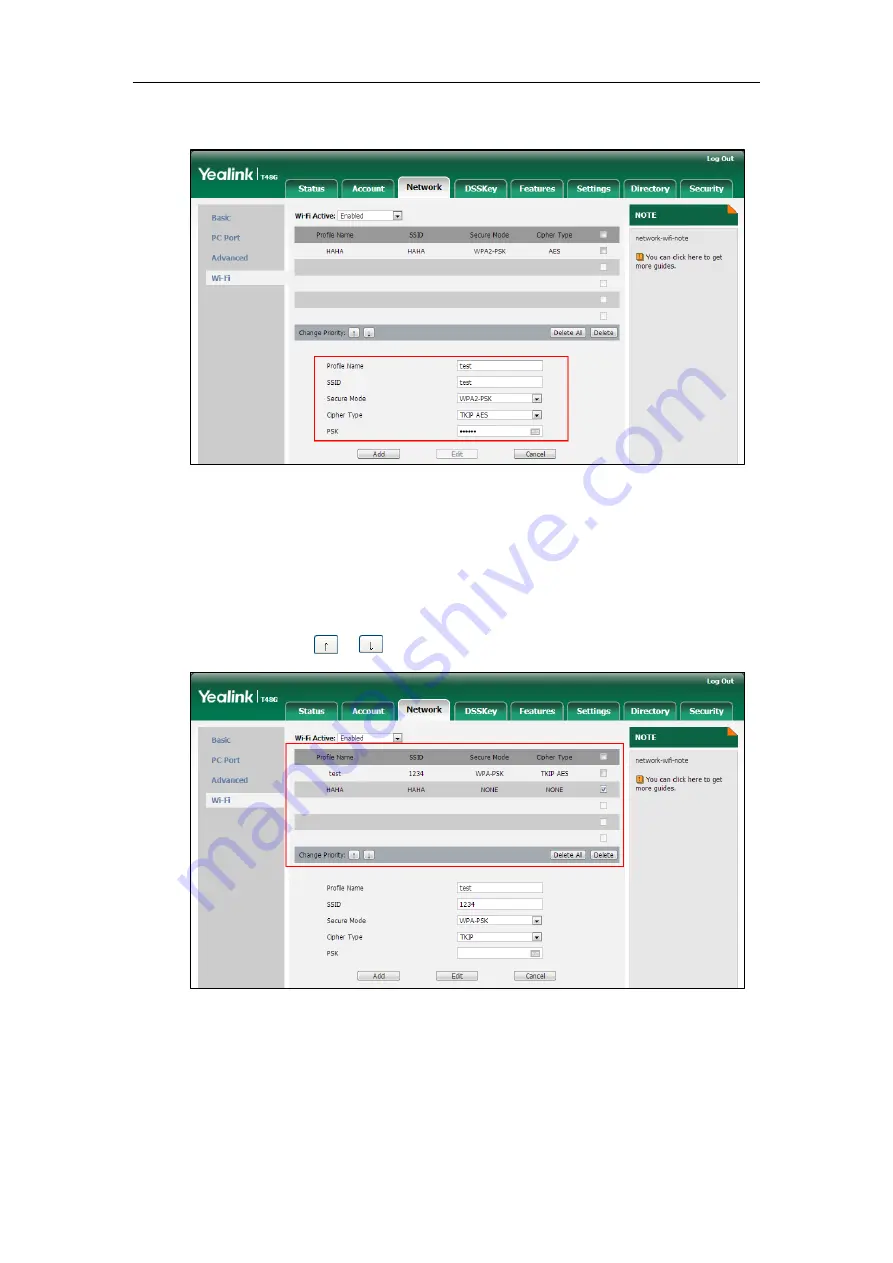
2)
Enter the desired password in the PSK field.
5.
Click Add to accept the change.
6.
Repeat steps 2 to 5 to add more wireless networks.
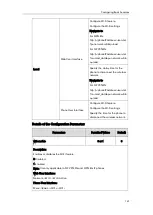
To adjust the priority of the added wireless network via web user interface:
1.
Click on Network->Wi-Fi.
2.
Click to select the desired wireless network which you want to adjust the priority,
and then click or .
3.
Repeat the step 2 to adjust the priority of more wireless networks.
To configure the time-out for Wi-Fi status detection via web user interface:
1.
Click on Network->Wi-Fi.
Summary of Contents for CD860
Page 1: ......
Page 45: ...Getting Started 23 For SIP T42G T41P T40P Desk Mount Method Wall Mount Method Optional ...
Page 47: ...Getting Started 25 For SIP T23P T23G Desk Mount Method Wall Mount Method Optional ...
Page 122: ...Administrator s Guide for SIP T2 Series T19 P E2 T4 Series CP860 IP Phones 100 ...
Page 840: ...Administrator s Guide for SIP T2 Series T19 P E2 T4 Series CP860 IP Phones 818 ...
Page 995: ...Appendix 973 ...


