Administrator’s Guide for SIP-T2 Series/T19(P) E2/T4 Series/CP860 IP Phones
226
2.
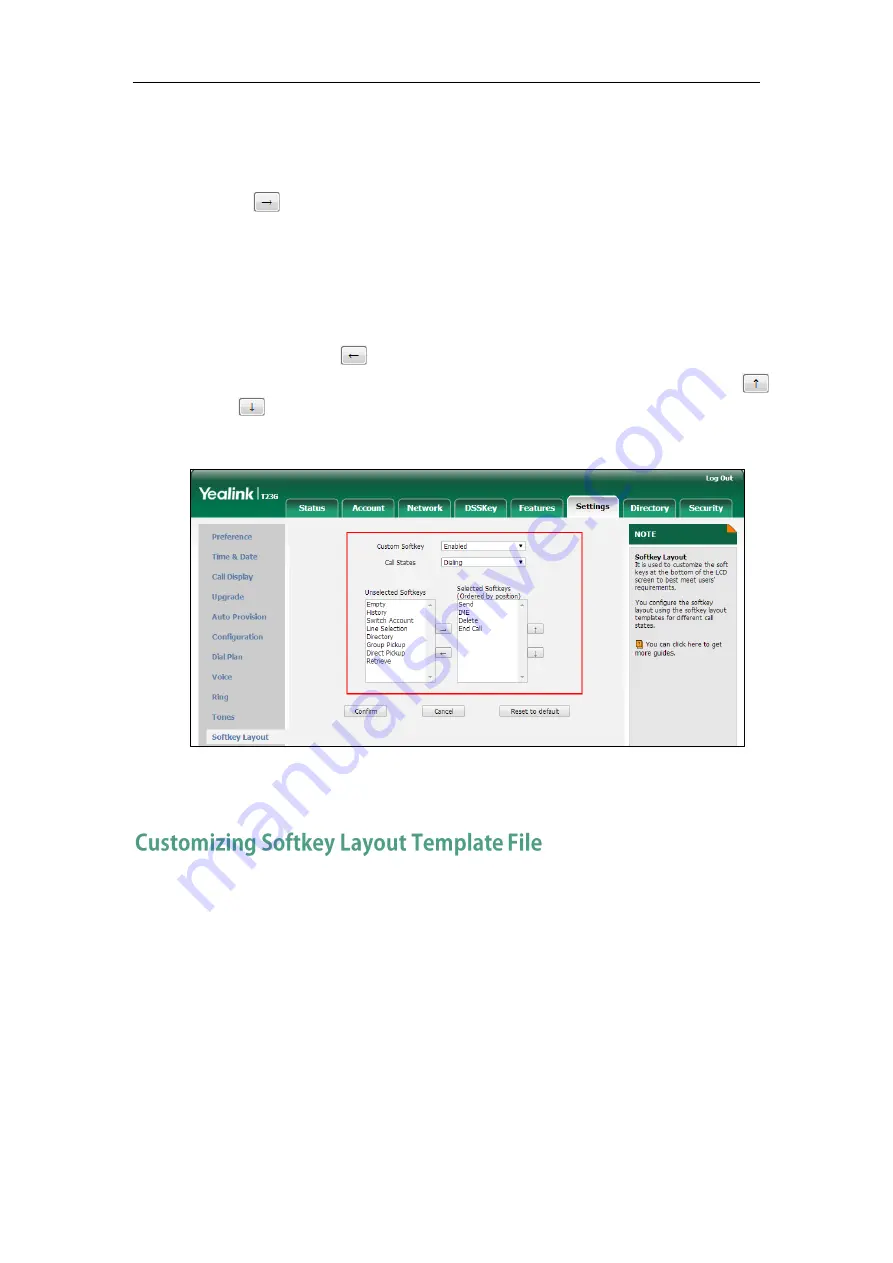
Select the desired value from the pull-down list of Custom Softkey.
3.
Select the desired state from the pull-down list of Call States.
4.
Select the desired soft key from the Unselected Softkeys column and then
click .
The selected soft key appears in the Selected Softkeys column. If more than four
soft keys are selected, a More soft key will appear on the LCD screen, and the
selected soft keys are displayed in two pages.
5.
Repeat the step 4 to add more soft keys to the Selected Softkeys column.
6.
To remove the soft key from the Selected Softkeys column, select the desired soft
key and then click .
7.
To adjust the display order of soft keys, select the desired soft key and then click
or .
The LCD screen displays the soft keys in the adjusted order.
8.
Click Confirm to accept the change.
The softkey layout template allows you to customize soft key layout for different call
states. The call states include CallFailed, CallIn, Connecting, Dialing (not applicable to
SIP VP-T49G and SIP-T48G IP phones), RingBack and Talking.
You can ask the distributor or Yealink FAE for softkey layout template. You can also
obtain the softkey layout template online:
http://support.yealink.com/documentFront/forwardToDocumentFrontDisplayPage
. For more
information on obtaining the softkey layout template, refer to
on page
Summary of Contents for CD860
Page 1: ......
Page 45: ...Getting Started 23 For SIP T42G T41P T40P Desk Mount Method Wall Mount Method Optional ...
Page 47: ...Getting Started 25 For SIP T23P T23G Desk Mount Method Wall Mount Method Optional ...
Page 122: ...Administrator s Guide for SIP T2 Series T19 P E2 T4 Series CP860 IP Phones 100 ...
Page 840: ...Administrator s Guide for SIP T2 Series T19 P E2 T4 Series CP860 IP Phones 818 ...
Page 995: ...Appendix 973 ...


