Administrator’s Guide for SIP-T2 Series/T19(P) E2/T4 Series/CP860 IP Phones
36
monitor) is as large as possible.
e)
Ensure that you insert forcibly until the camera indicator LED is solid green; and the
embossing on the camera does not need to insert into the groove on the IP phone if
you want to insert the camera back to the IP phone and do not torn the 3M Dual
Lock.
The initialization process of the IP phone is responsible for network connectivity and
operation of the IP phone in your local network.
Once you connect your IP phone to the network and to an electrical supply, the IP phone
begins its initialization process.
During the initialization process, the following events take place:
Loading the ROM file
The ROM file resides in the flash memory of the IP phone. The IP phone comes from the
factory with a ROM file preloaded. During initialization, the IP phone runs a bootstrap
loader that loads and executes the ROM file.
Configuring the VLAN
If the IP phone is connected to a switch, the switch notifies the IP phone of the VLAN
information defined on the switch (if using LLDP or CDP). The IP phone can then proceed
with the DHCP request for its network settings (if using DHCP).
Querying the DHCP (Dynamic Host Configuration Protocol) Server
The IP phone is capable of querying a DHCP server. DHCP is enabled on the IP phone
by default. The following network parameters can be obtained from the DHCP server
during initialization:
IP Address
Subnet Mask
Gateway
Primary DNS (Domain Name Server)
Secondary DNS
You need to configure network parameters of the IP phone manually if any of them is not
supplied by the DHCP server. For more information on configuring network parameters
manually, refer to
Configuring Network Parameters Manually
Contacting the provisioning server
If the IP phone is configured to obtain configurations from the provisioning server, it will
connect to the provisioning server and download the configuration file(s) during startup.
The IP phone will be able to resolve and update configurations written in the
Summary of Contents for CD860
Page 1: ......
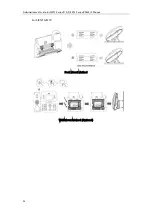
Page 45: ...Getting Started 23 For SIP T42G T41P T40P Desk Mount Method Wall Mount Method Optional ...
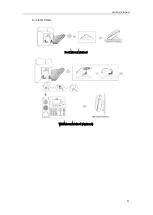
Page 47: ...Getting Started 25 For SIP T23P T23G Desk Mount Method Wall Mount Method Optional ...
Page 122: ...Administrator s Guide for SIP T2 Series T19 P E2 T4 Series CP860 IP Phones 100 ...
Page 840: ...Administrator s Guide for SIP T2 Series T19 P E2 T4 Series CP860 IP Phones 818 ...
Page 995: ...Appendix 973 ...


