background image

Regulatory Notices

Operating  Ambient Temperatures

• 

Operating temperature: +32 to 104°F (0 to 40°C)

• 

Relative humidity: 5% to 90%, noncondensing

• 

Storage temperature: -22 to +158°F (-30 to +70°C)

Warranty

Our product warranty is limited only to the unit itself, when used normally in accordance with 
the operating instructions and the system environment. We are not liable for damage or loss 
resulting from the use of this product, or for any claim from a third party. We are not liable for 

problems with Yealink device arising from the use of this product; we are not liable for financial 
damages, lost profits, claims from third parties, etc., arising from the use of this product.

DC symbol 

 is the DC voltage symbol.

Restriction of Hazardous Substances Directive (RoHS)

This device complies with the requirements of the EU RoHS Directive. Statements of 
compliance can be obtained by contacting support@yealink.com.

Safety Instructions

Save these instructions. Read these safety instructions before use!

The following basic safety precautions should always be followed to reduce risk of fire, 
electrical shock, and other personal injury.


General Requirements

•  Before you install and use the device, read the safety instructions carefully and 

observe the situation during operation.

•  During the process of storage, transportation, and operation, please always keep 

the device dry and clean.

•  During the process of storage, transportation, and operation, please avoid collision 

and crash of the device.

•  Please attempt not to dismantle the device by yourself. In case of any discrepancy, 

please contact the appointed maintenance center for repair.

•  Without prior written consent, no organization or individual is permitted to make 

any change to the structure or the safety design of the device. Yealink is under no 
circumstance liable to consequences or legal issues caused by such changes.

•  Please refer to the relevant laws and statutes while using the device. Legal rights of 

others should be respected as well.

 Environmental Requirements

• 

Place the device at a well-ventilated place. Do not expose the device under direct 

sunlight.

•  Keep the device dry and free of dusts.
•  Place the device on a stable and level platform.
• 

Please place no heavy objects on the device in case of damageand deformation 

caused by the heavy load.

• 

Keep at least 10 cm between the device and the closest object for heat dissipation.

• 

Do not place the device on or near any inflammable or fire-vulnerable object, such 

as rubber-made materials.

• 

Keep the device away from any heat source or bare fire, such as a candle or an 

electric heater.

• 

Keep the device away from any household appliance with strong magnetic field or 
electromagnetic field, such as a microwave oven or a refrigerator.


Operating Requirements

•  Do not let a child operate the device without guidance.
•  Do not let a child play with the device or any accessory in case of accidental 

swallowing.

•  Please use the accessories provided or authorized by the manufacturer only.
•  The power supply of the device shall meet the requirements of the input voltage of 

the device. Pleaseusethe provided surge protection power socket only.

•  Before plugging or unplugging any cable, make sure that your hands are completely 

dry.

•  Do not spill liquid of any kind on the product or use the equipment near water, for 

example, near a bathtub, washbowl, kitchen sink, wet basement or near a swimming 

pool.

•  Do not tread on, pull, or over-bend any cable in case of malfunction of the device.
•  During a thunderstorm, stop using the device and disconnect it from the power 

supply. Unplug the power plug and the Asymmetric Digital Subscriber Line (ADSL) 
twisted pair (the radio frequency cable) to avoid lightning strike.

•  If the device is left unused for a rather long time, disconnect it from the power 

supply and unplug the power plug.

•  When there is smoke emitted from the device, or some abnormal noise or 

smell, disconnect the device from the power supply, and unplug the power plug 

immediately. Contact the specified maintenance center for repair.

• 

Do not insert any object into equipment slots that is not part of the product or 
auxiliary product.

• 

Before connecting a cable, connect the grounding cable of the device first. Do not 

disconnect the grounding cable until you disconnect all other cables.

 Cleaning Requirements

•  Before cleaning the device, stop using it and disconnect it from the power supply.
•  Use a piece of soft, dry and anti-static cloth to clean the device.
•  Keep the power plug clean and dry. Using a dirty or wet power plug may lead to 

electric shock or other perils.

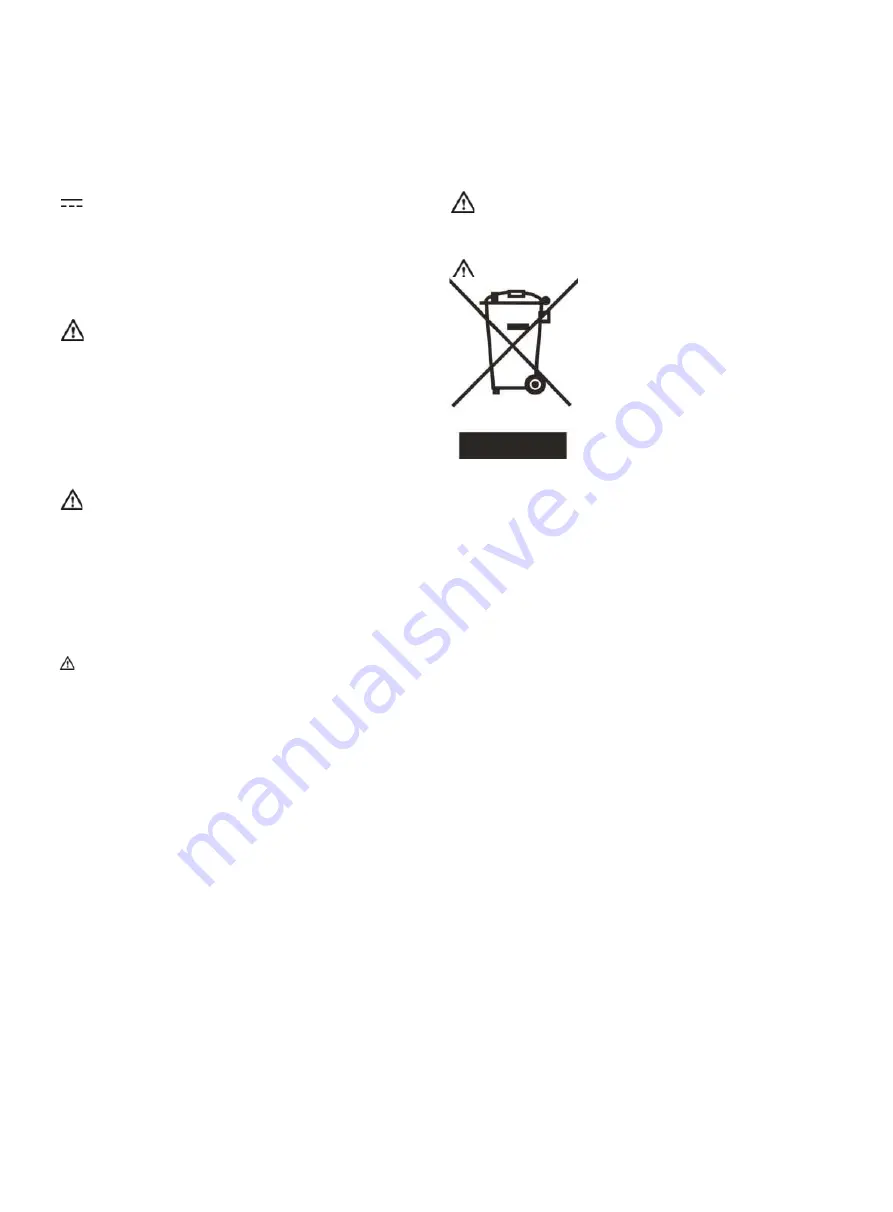
 ENVIRONMENTAL RECYCLING 

Never dispose of the device with domestic waste

Ask your Town Council about how to dispose of it in an 

environmentally friendly way. The cardboarc box, plastic 

packaging and player components may be recycled in 

accordance with prevailing recycling regulations in your 

country. 

Always adhere to prevailing regulations

Those who fail to do so may be fined or prosecuted in 

accordance with the law. The crossed out garbage can that 

appears on the device means that when it has reached the end of its useful life, it should be 
taken to a special waste disposal centre and treated separately to general urban waste.

Troubleshooting

The unit cannot supply power to Yealink device.
There is a bad connection with the plug.
1.  Clean the plug with a dry cloth.
2.  Connect it to another wall outlet.
The usage environment is out of operating temperature range.
1.  Use in the operating temperature range.
The cable between the unit and the Yealink device is connected incorrectly.
1.  Connect the cable correctly.
You cannot connect the cable properly.
1.  You may have connected a wrong Yealink device.
2.  Use the correct power supply.
Some dust, etc., may be in the port.
1.  Clean the port.
Contact your dealer or authorized service facility for any further questions.

Contact Information

YEALINK NETWORK TECHNOLOGY CO.,LTD.

No.666 Hu’an Rd,Huli District Xiamen City, Fujian, P.R.C

YEALINK (EUROPE) NETWORK TECHNOLOGY B.V.

Sir Winston Churchillln 299 k, 2288DC Rijswijk

YEALINK (USA) NETWORK TECHNOLOGY CO., LTD.
999 Peachtree Street Suite 2300, Fulton, Atlanta, GA, 30309, USA
Made in China

Summary of Contents for MVC940

Page 1: ...ooms or Skype for Business account not included Wired network environment not included 2Package Contents UVC84 Mounting Bracket φ6 30 mm white Polyamide 4 30 FAHOZN3 M3 5 8KM0ZN3 VCR20 Remote Control Quick Start Guide 1 4 20 UNC CAT5e UTP RJ45 RJ45 Cable USB 2 0 A B Cable Power Adapter 48V 0 7A 7 5m 24 60ft 2 5m 8 20ft 20 200 mm 3 5m 11 48ft 4 5 5 2 4 UVC84 Package 2 Cable Ties E N ...

Page 2: ...te Polyamide Mounting Bracket 4 30 FAHOZN3 3 6PMOZN3 2 4 4 3 2 MTouch Plus Mounting Bracket M8 60mm SUS304 Washer Wing Nuts Double Coating Tape CAT5e UTP RJ45 RJ45 Cable USB 3 1 C C HDMI Cable 7 5m 24 6ft 207 44 mm 126 99 mm L200 W62 5 T1 2mm 1 2m 3 94ft M8 φ30 T2mm SUS304 M8 SUS304 M8 SUS304 2 5 9 0FMHZN Screwdriver WH 85 3 0mm φ6 30 mm white Polyamide 4 30 FAHOZN3 4 4 4 2 2 2 ...

Page 3: ... 2 3 8PMOZN3 φ6 30 mm white Polyamide Mounting Bracket Mounting Ears 4 30 FAHOZN3 4 4 8 Quick Start Guide Quick Start Guide Lock cable buckle AVHub 2 5 8 0PAHOZN3 4 CAT5e UTP RJ45 RJ45 Cable USB 3 0 A B Cable 7 5m 24 60ft 2 5m 8 20ft 150 117 15mm Power Adapter 48V 2A 3 8m 12 47ft ...

Page 4: ...SB 3 1 Type C with USB2 0 AM to TYPE CF adapter RoomSensor φ80mm T1 55mm RoomSensor Package φ6 30 mm white Polyamide 4 30 FAHOZN3 PIR Blocking Sticker 2 2 5 Quick Start Guide 3M Adhesive Tape CR123A 3V Quick Start Guide ...

Page 5: ...ft CAT5e 1 8 m 5 91 ft HDMI 1 8 m 5 91 ft HDMI 1 2 m 3 94 ft USB 3 1 C C HDMI When starting up the system for the first time you need to connect a mouse to complete the initial configuration We recommend using the wireless mouse and keyboard kit When you connect the UVC84 UVC86 MSpeaker II directly to the AVHub the total number of connections must be no more than 4 devices If the total number of c...

Page 6: ...ness accounts 4 On the Advanced page configure the domain and tap Next 5 Tap Finish to complete the setup wizard 1 Connect the WPP30 to the USB port of the MTouch Plus When pairing the LED indicator of WPP30 is orange And the pairing is successful the LED indicator turns green breathing light 2 Connect the paired WPP30 to the USB A USB C port on your PC 3 On the WPP30 press the presentation button...

Page 7: ...ft Teams Rooms 或 Skype for Business 的账号 需自备 有线网络环境 需自备 2包装清单 UVC84 挂墙架 φ6 30 mm 白色 聚酰胺 4 30 FAHOZN3 M3 5 8KM0ZN3 VCR20 遥控器 快速入门指南 1 4 20 UNC CAT5e UTP RJ45 RJ45 线 USB 2 0 A B 线 电源适配器 48V 0 7A 7 5m 24 60ft 2 5m 8 20ft 20 200 mm 3 5m 11 48ft 4 5 5 2 4 UVC84 包装 2 束线带 C N ...

Page 8: ...re Pro 包装 φ6 30 mm 白色 聚酰胺 挂墙架 4 30 FAHOZN3 3 6PMOZN3 2 4 4 3 2 MTouch Plus 挂墙架 M8 60mm SUS304 垫片 蝶形快锁螺丝 双面胶 CAT5e UTP RJ45 RJ45 线 USB 3 1 C C HDMI 线 7 5m 24 6ft 207 44 mm 126 99 mm L200 W62 5 T1 2mm 1 2m 3 94ft M8 φ30 T2mm SUS304 M8 SUS304 M8 SUS304 2 5 9 0FMHZN 螺丝刀 WH 85 3 0mm φ6 30 mm 白色 聚酰胺 4 30 FAHOZN3 4 4 4 2 2 2 ...

Page 9: ...00mm MTouch Plus 包装 AVHub 包装 2 5 2 3 8PMOZN3 φ6 30 mm 白色 聚酰胺 挂墙架 挂耳 4 30 FAHOZN3 4 4 8 快速入门指南 快速入门指南 锁线固定扣 AVHub 2 5 8 0PAHOZN3 4 CAT5e UTP RJ45 RJ45 线 USB 3 0 A B 线 7 5m 24 60ft 2 5m 8 20ft 150 117 15mm 电源适配器 48V 2A 3 8m 12 47ft ...

Page 10: ...WPP30 包装 2 USB 3 1 Type C 带 USB2 0 AM 至 TYPE CF 转接头 RoomSensor φ80mm T1 55mm RoomSensor 包装 φ6 30 mm 白色 聚酰胺 4 30 FAHOZN3 PIR 阻挡贴纸 2 2 5 快速入门指南 3M 胶 CR123A 3V 快速入门指南 ...

Page 11: ...AT5e 1 8 m 5 91 ft HDMI 1 8 m 5 91 ft HDMI 1 2 m 3 94 ft USB 3 1 C C HDMI 首次启动时 你需要在 MCore Pro 上接一个鼠标来完成系统初始化配置 我们推荐使用无线键鼠套装 在不使用 PoE 交换机的前提下 AVHub 可以允许总数不超过 4 台的 UVC84 UVC86 MSpeaker Il 的直接连接 如果连接设备总数超过 4 个 则需要外接 PoE 交换机 PoE 交换机需使用 802 3AT PoE 标准 我们推荐 使用亿联配套的 RCH40 需自备配件要求 显示器 推荐支持 1080p 及以上分辨率且带有 HDMI 接口的显示器 PC 具备 HDMI 或 USB C 支持 DP 协议 接口 以太网线 CAT5e 及以上规格网线 HDMI 标准 HDMI 高清线 PC 需自备 MTouch Plus MC...

Page 12: ...ype for Business 账号进行登录 4 在 高级 设置界面 配置 域 用户名 可选 一般情况下保持默认无需配置 点击下一步 5 点击 完成 完成设置向导 1 将 WPP30 插到 MTouch Plus 的 USB 口上 配对时 WPP30 指示灯为橙色常亮 配对成功 指示灯变为绿色呼吸灯 2 将配对好的 WPP30 连接到电脑的 USB A USB C 接口 电脑自动开启亿联无线投屏器软件 3 按无线传屏助手上的演示键 共享整个电脑屏幕 1 MTouch Plus 切换为管理员 Admin 模式 2 打开桌面上 Yealink RoomConnect 软件 3 点击 MTouch Plus Sensor 4 点击 添加传感器 选择对应的传感器进行配对 拆下会议室传感器的后盖 你可以在其背后查看到传感器的名称 1 按 更多 进入摄像机控制界面 5初始化设置 6功能 无线投屏 控...

Page 13: ...ms oder Skype for Business nicht enthalten Kabelgebundene Netzwerkumgebung nicht enthalten 2Verpackungsinhalt UVC84 halterung φ6 30 mm weiß Polyamid 4 30 FAHOZN3 M3 5 8KM0ZN3 Mando a distancia VCR20 Kurzanleitung 1 4 20 UNC CAT5e Kabel UTP RJ45 RJ45 USB Kabel 2 0 A B Netzteil 48V 0 7A 7 5m 24 60ft 2 5m 8 20ft 20 200 mm 3 5m 11 48ft 4 5 5 2 4 Paket UVC84 2 Kabelbinder D E ...

Page 14: ...Touch Plus M8 60mm SUS304 Unterlegscheiben Flügelmuttern CAT5e Kabel UTP RJ45 RJ45 USB Kabel 3 1 C C HDMI 7 5m 24 6ft 1 2m 3 94ft M8 φ30 T2mm SUS304 M8 SUS304 M8 SUS304 2 5 9 0FMHZN Schraubendreher WH 85 3 0mm φ6 30 mm weiß Polyamid 4 30 FAHOZN3 4 4 4 2 2 2 halterung Doppelseitiges Band 207 44 mm 126 99 mm L200 W62 5 T1 2mm Klettverschluss 150 117 15mm W25 4 L50mm 3M halterung 2 ...

Page 15: ... 3 8PMOZN3 φ6 30 mm weiß Polyamid halterung Montagebügel 4 30 FAHOZN3 4 4 8 Kurzanleitung AVHub CAT5e Kabel UTP RJ45 RJ45 USB Kabel 3 0 A B 7 5m 24 60ft 2 5m 8 20ft 150 117 15mm Netzteil 48V 2A 3 8m 12 47ft Paket MTouch Plus Kurzanleitung Kabelhalterung 2 5 8 0PAHOZN3 4 ...

Page 16: ... WPP30 2 USB 3 1 Typ C mit USB2 0 Adapter Typ CF AM RoomSensor φ80mm T1 55mm Paket RoomSensor φ6 30 mm weiß Polyamid 4 30 FAHOZN3 PIR Abdeckaufkleber 2 2 5 Kurzanleitung 3M Klebeband CR123A 3V Kurzanleitung ...

Page 17: ...Netzteil 48V 2A 7 5 m 24 60 ft CAT5e 7 5 m 24 60 ft CAT5e 1 8 m 5 91 ft HDMI 1 8 m 5 91 ft HDMI 1 2 m 3 94 ft USB 3 1 C C HDMI Beim ersten Start des Systems müssen Sie eine Maus anschließen um die Ersteinrichtung vorzunehmen Wir empfehlen die Verwendung eines kabellosen Maus und Tastaturkits Verbinden Sie die UVC84 UVC86 den MSpeaker II direkt mit dem AVHub dürfen nicht mehr als vier Geräte gleich...

Page 18: ...ungen Ihre Domain und tippen Sie auf Next Weiter 5 Tippen Sie auf Finish Beenden um den Einstellungsassistenten abzuschließen 1 Schließen Sie den WPP30 am USB A Anschluss des MTouch Plus LED Anzeige des WPP30 grün leuchtet Kopplung erfolgreich 2 Schließen Sie den gekoppelten WPP30 an den USB A USB C Anschluss Ihres PCs an 3 Drücken Sie auf dem WPP30 die Präsentationstaste um den Vollbildmodus zu t...

Page 19: ...reprise non fourni Un environnement réseau câblé non fourni 2Contenu de la boîte UVC84 Support de fixation φ6 30 mm blanc polyamide 4 30 FAHOZN3 M3 5 8KM0ZN3 Télécommande VCR20 Guide de démarrage rapide 1 4 20 UNC Câble Cat5e UTP RJ45 RJ45 Câble USB 2 0 A B Adaptateur secteur 48V 0 7A 7 5m 24 60ft 2 5m 8 20ft 20 200 mm 3 5m 11 48ft 4 5 5 2 4 Pack UVC84 2 Serre câbles F R ...

Page 20: ... 3 MTouch Plus M8 60mm SUS304 Rondelle Écrous papillons Câble Cat5e UTP RJ45 RJ45 Câble USB 3 1 C C HDMI 7 5m 24 6ft 1 2m 3 94ft M8 φ30 T2mm SUS304 M8 SUS304 M8 SUS304 2 5 9 0FMHZN Tournevis WH 85 3 0mm φ6 30 mm blanc polyamide 4 30 FAHOZN3 4 4 4 2 2 2 Support de fixation Bande adhésive double face 207 44 mm 126 99 mm L200 W62 5 T1 2mm Velcro 150 117 15mm W25 4 L50mm 3M Support de fixation 2 ...

Page 21: ...upport de fixation Équerres de fixation 4 30 FAHOZN3 4 4 8 Guide de démarrage rapide AVHub Câble Cat5e UTP RJ45 RJ45 Câble USB 3 0 A B 7 5m 24 60ft 2 5m 8 20ft 150 117 15mm Adaptateur secteur 48V 2A 3 8m 12 47ft Pack MTouch Plus Guide de démarrage rapide Boucle de câble de serrure 2 5 8 0PAHOZN3 4 ...

Page 22: ...c USB2 0 AM vers TYPE CF RoomSensor φ80mm T1 55mm Pack RoomSensor φ6 30 mm blanc polyamide 4 30 FAHOZN3 Autocollant de blocage du capteur à infrarouge passif 2 2 5 Guide de démarrage rapide Bande adhésive 3M CR123A 3V Guide de démarrage rapide ...

Page 23: ... 2A 7 5 m 24 60 ft CAT5e 7 5 m 24 60 ft CAT5e 1 8 m 5 91 ft HDMI 1 8 m 5 91 ft HDMI 1 2 m 3 94 ft USB 3 1 C C HDMI Lorsque vous démarrez le système pour la première fois vous devez connecter une souris pour terminer la conguration initiale Nous vous recommandons d utiliser le kit de clavier et souris sans l Lorsque vous connectez directement l UVC84 UVC86 MSpeaker II à l AVHub le nombre total d ap...

Page 24: ...arge 4 Sur la page Advanced Avancé configurez le nom du domaine et cliquez sur Next Suivant 5 Cliquez sur Finish Terminer pour terminer l assistant de configuration 1 Conecte el WPP30 al puerto USB del MTouch Plus le voyant LED du WPP30 passe au vert et que l appairage soit réussi 2 Connectez le WPP30 couplé au port USB A USB C de votre ordinateur 3 Sur le WPP30 appuyez sur le bouton de présentati...

Page 25: ... Skype Empresarial no incluida Entorno de red cableado no incluido 2Contenido de la caja UVC84 Soporte de montaje Φ6 30 mm blanco poliamida 4 30 FAHOZN3 M3 5 8KM0ZN3 Mando a distancia VCR20 Guía de inicio rápido 1 4 20 UNC Cable Cat5e UTP RJ45 RJ45 Cable USB 2 0 A B Adaptador de corriente 48V 0 7A 7 5m 24 60ft 2 5m 8 20ft 20 200 mm 3 5m 11 48ft 4 5 5 2 4 Paquete UVC84 2 Sujetacables E S ...

Page 26: ...4 3 MTouch Plus M8 60mm SUS304 Arandela Tuercas de aleta Cable Cat5e UTP RJ45 RJ45 Cable USB 3 1 C C HDMI 7 5m 24 6ft 1 2m 3 94ft M8 φ30 T2mm SUS304 M8 SUS304 M8 SUS304 2 5 9 0FMHZN Destornillador WH 85 3 0mm Φ6 30 mm blanco poliamida 4 30 FAHOZN3 4 4 4 2 2 2 Soporte de montaje Cinta de doble cara adhesiva 207 44 mm 126 99 mm L200 W62 5 T1 2mm Velcro 150 117 15mm W25 4 L50mm 3M Soporte de montaje ...

Page 27: ...liamida Soporte de montaje Orejas de montaje 4 30 FAHOZN3 4 4 8 Guía de inicio rápido AVHub Cable Cat5e UTP RJ45 RJ45 Cable USB 3 0 A B 7 5m 24 60ft 2 5m 8 20ft 150 117 15mm Adaptador de corriente 48V 2A 3 8m 12 47ft Paquete MTouch Plus Guía de inicio rápido Grapa sujetacables 2 5 8 0PAHOZN3 4 ...

Page 28: ...o C con adaptador para USB2 0 de tipo AM a tipo CF RoomSensor φ80mm T1 55mm Paquete RoomSensor Φ6 30 mm blanco poliamida 4 30 FAHOZN3 Pegatina Bloqueo PIR 2 2 5 Guía de inicio rápido Cinta adhesiva 3M CR123A 3V Guía de inicio rápido ...

Page 29: ...8V 2A 7 5 m 24 60 ft CAT5e 7 5 m 24 60 ft CAT5e 1 8 m 5 91 ft HDMI 1 8 m 5 91 ft HDMI 1 2 m 3 94 ft Cable USB 3 1 C C HDMI Al iniciar el sistema por primera vez debe conectar un ratón para completar la configuración inicial Es recomendable utilizar el kit de teclado y ratón inalámbricos Cuando conecte UVC84 UVC86 MSpeaker II directamente al AVHub el número total de conexiones no podrá ser superior...

Page 30: ...ed Avanzado configure el dominio y toque Next Siguiente 5 Toque Finish Finalizar para completar el asistente de configuración 1 Conecte el WPP30 al puerto USB del MTouch Plus Espere hasta que el indicador LED del WPP30 se ilumine en verde Cuando se encienda significará que el emparejamiento se ha realizado correctamente 2 Conecte el WPP30 emparejado al puerto USB A USB C del ordenador 3 En el WPP3...

Page 31: ......

Page 32: ......

Page 33: ...turer only The power supply of the device shall meet the requirements of the input voltage of the device Pleaseusethe provided surge protection power socket only Before plugging or unplugging any cable make sure that your hands are completely dry Do not spill liquid of any kind on the product or use the equipment near water for example near a bathtub washbowl kitchen sink wet basement or near a sw...

Page 34: ...Eingangsspannung des Gerätes entsprechen Bitte verwenden Sie ausschließlich den bereitgestellten Überspannungsschutz an der Steckdose Achten Sie vor dem Anschließen oder Abziehen des Kabels darauf dass Ihre Hände vollständig trocken sind Verschütten Sie keine Flüssigkeiten auf das Gerät und verwenden Sie es nicht in der Nähe von Wasser beispielsweise in der Nähe einer Badewanne Waschschüssel einem...

Page 35: ...l doit satisfaire aux exigences de la tension d entrée de l appareil Veuillez uniquement utiliser la prise protégée contre les surtensions fournie Avant de brancher ou de débrancher tout câble assurez vous que vos mains sont complètement sèches Ne renversez aucun liquide sur le produit et n utilisez pas l équipement près de l eau par exemple près d une baignoire d un lavabo d un évier dans sous so...

Page 36: ... tirare strappare o piegare eccessivamente i cavi in caso di malfunzionamento del dispositivo In caso di temporale smettere di usare il dispositivo e scollegarlo dall alimentazione Scollegare la presa di corrente e il doppino della linea ADSL il cavo di frequenza radio per evitare fulmini Se non si usa il dispositivo per un periodo di tempo prolungato scollegarlo dalla corrente e staccare la spina...

Reviews: