Configuring Basic Features
67
6.
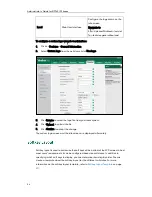
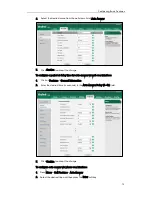
Select the desired photo from the pull-down list of Photo.
It is not applicable to SIP-T42G and SIP-T41P IP phones.
7.
Click Add to add the contact.
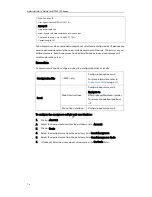
To add a group to the local directory via phone user interface:
1.
Press Menu->Directory->Local Group.
2.
Press the Add Group soft key.
3.
Enter the desired group name in the Group Name field.
4.
Press or to select the desired group ring tone from the Ring Tones field.
5.
Press the Save soft key to accept the change or the Back soft key to cancel.
To add a contact to the local directory via phone user interface:
1.
Press Menu->Directory->Local Group.
2.
Select the desired contact group and press the Enter soft key.
3.
Press the Add soft key.
4.
Enter the name and the office, mobile or other numbers in the corresponding fields.
5.
Press or , or the Switch soft key to select the desired account from the
Account field.
If Auto is selected, the IP phone will use the first available account when placing
calls to the contact from the local directory.
6.
Press or , or the Switch soft key to select the desired ring tone from the Ring
field.
7.
Press or , or the Switch soft key to select the desired photo from the Photo
field.
8.
Press the Save soft key to accept the change.
Summary of Contents for SIP-T4X
Page 1: ...T 4 XI PP h o n e A d mi n i s t r a t o r G u i d e...
Page 2: ......
Page 15: ...Administrator s Guide for SIP T4X IP Phones xiv...
Page 23: ...Administrator s Guide for SIP T4X IP Phones 8...
Page 217: ...Administrator s Guide for SIP T4X IP Phones 202...
Page 233: ...Administrator s Guide for SIP T4X IP Phones 218...
Page 245: ...Administrator s Guide for SIP T4X IP Phones 230...
Page 257: ...Administrator s Guide for SIP T4X IP Phones 242...


