background image

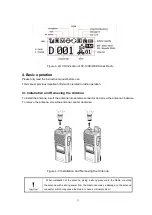
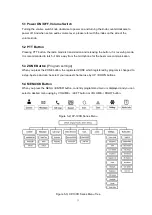
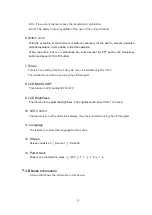
Figure 3-2) LCD Indication of XP-100D/400D


Series Radio 

4. Basic operation

Please fully read the instruction manual before use. 

This manual provides important information related to radio operation. 

4.1 Installation and Removing the Antenna   

To install the antenna, insert the antenna into antenna connector and screw the antenna clockwise. 

To remove the antenna, screw the antenna counter clockwise. 

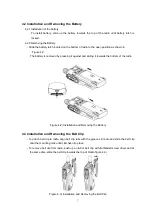
Figure 4-1) 

Installation and Removing the Antenna 

When  installation  of  the  antenna,  giving  a  strong  pressure  to  the  Radio  or  pulling 

the antenna with a strong power from the Radio can make a damage on the antenna 

connector, which may cause the Radio to have a critical problem.   

Summary of Contents for XP-100D

Page 1: ...User Manual YeonHwa M Tech Co Ltd Version 1 2016 12 15 36 Jeonpa Ro 44Beon Gil Manan Gu Anyang City Gyeongg Do Korea Tel 82 31 444 7270 VHF Transceiver XP 100D UHF Transceiver XP 400D...

Page 2: ...Series Radio 16 Zones and 32 Channels are selectable 1zone Max 32 Channels Total 512 CH can be set 1 Watt RF Power Short up to 40 characters message transmitter up to 10 sentences Encryption mode AES1...

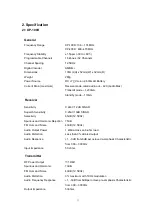
Page 3: ...istortion Audio Frequency Response Output Impedance XP 100D 136 174 MHz XP 400D 400 470 MHz 1 5ppm 30 to 60 16 Zones 32 Channels 12 5KHz AMBE 103mm H x 52mm W x 32mm D 280g DC 7 V Li ion 2 600mAH Batt...

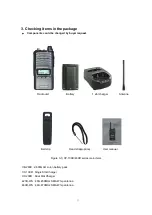
Page 4: ...unit Battery 1 slot charger Antenna Belt clip Hand strap option User manual Figure 3 1 XP 100D 400D series main items XB 2600 2 600mAH Li ion battery pack XC 100D Single Slot Charger XC 200D Dual Slo...

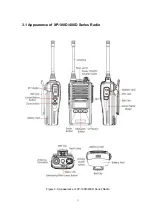
Page 5: ...3 1 Appearance of XP 100D 400D Series Radio Figure 3 1 Appearance of XP 100D 400D Series Radio...

Page 6: ...nna To install the antenna insert the antenna into antenna connector and screw the antenna clockwise To remove the antenna screw the antenna counter clockwise Figure 4 1 Installation and Removing the...

Page 7: ...ressing it against and sliding it towards the bottom of the radio Figure 4 2 Installation and Removing the Battery 4 3 Installation and Removing the Belt Clip To attach belt clip to radio align belt c...

Page 8: ...xternal speaker MIC and headset etc Please close the cover when it is used Figure 4 4 Accessory connector 5 Radio operation The definition of the various buttons of the XP 100D 400D series is the same...

Page 9: ...It is recommended to talk 5 10cm away from the microphone for the best voice communication 5 3 ZONE Button Program settings When you press the ZONE button the registered ZONE which registered by progr...

Page 10: ...CH MENU Down are to change channels and in the menu entry mode it is select the UP Down of the Menu 5 6 EAR MIC Jack Accessory connector is used to connect external speaker Mic and headset etc Please...

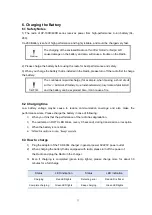
Page 11: ...ire 6 2 Charging time Low battery voltage maybe cause to reduce communication coverage and also make the performance worse Please charge the battery in case of following 1 When you think that the perf...

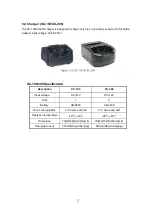
Page 12: ...voltage AC85 250V XC 100 200 Specification Description XC 100 XC 200 Input voltage DC 12V DC 12V Slot 1 2 Battery XB 2400 XB 2400 Quick charging time In 5 hours and half In 5 hours and half Operation...

Page 13: ...ng Software program When you enter in the contact menu the individual group and All Call contact list is displayed ICON Individual Contact List individual Call Sending individual message Group Contact...

Page 14: ...ox It is possible to store up to 10 inbox record and it can see the opponent ID When the inbox is more than 10 the earliest inbox record is cleared first and it is registered If you want to delete inb...

Page 15: ...power voice encryption VOX Lone walker BCL BLCO Keypad lock Sounds Backlight Contrast LED settings and Language 1 Transmission power Set the high and low of the transmission power 2 Voice Encryption T...

Page 16: ...his is a Tone setting function The main menu is available only ON OFF The detailed sound can be set using the CPS program 8 LCD BACKLIGHT This feature is LCD backlight ON OFF 9 LCD Brightness The func...

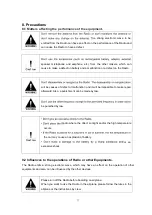
Page 17: ...ll be impossible to make repair afterward Also a punishment can be made by law be punished by law adio where the direct sunlight and or the high temperature occurs the car may cause an explosion of ba...

Page 18: ...s Please make sure to read the followings for safe and effective use of the Radio skin it may cause fire explosion and burn Especially please be careful when putting the battery in a pocket or a bag e...

Page 19: ...ganization free of charge 3 For the following cases some service fees will be charged performance failure malfunction or damage improper operation or otherwise access to sealed non user serviceable it...

Page 20: ...Output DC12V 1A...

Page 21: ......

Page 22: ......

Page 23: ......

Page 24: ......

Page 25: ......

Page 26: ......

Page 27: ......

Reviews: