background image

ENGINE OIL

i'

]

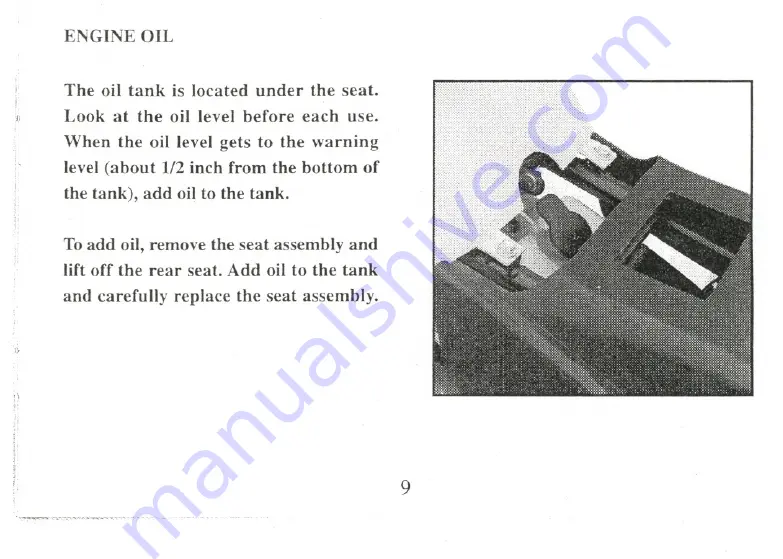
The oil tank is located under the seat.

Look at the oil level before each use.

When the oil level gets to the warning

level (about 1/2 inch from the bottom of

the tank), add oil to the tank.

;Ji

To add oil, remove the seat assembly and
lift off the rear seat. Add oil to the tank

and carefully replace the seat assembly.

i}

'~~-,'~--~.'~'--~~'~

-.--

---..--

9

Summary of Contents for W2200

Page 1: ...i a W2200 HI F i e c o Owrier sfManualc J s e e c t i 7 Yerf Dog ATV s 4012 East Broadway Suite 3 10 Phoenix AZ 85040 1 888 926 6554 DO NOT RETURN TO RETAILER 1 888 926 6554...

Page 2: ...performance and elegant style Please read this manual carefully before use It can help you understand the basic structure functions operation and maintenance of your ATV so as to let your motorcycle...

Page 3: ...tion 4 Fuel 7 EngineOil 9 Tires 10 OPERATION 11 Inspection 11 Starting Procedure 12 Break in 12 Riding 13 Parking 13 Turning 14 MAINTENANCE 15 Maintenance Schedule 15 Spark Plug 16 AirCleaner 17 Brake...

Page 4: ...pervIsion Do not operatethis vehicle while under the influenceof alcoholor drugs Thiscanimpair judgementandresultin seriousinjuryor even death Maintain a safe distance between your vehicle and other o...

Page 5: ...PARTS LOCATION 1 Fuel tank 2 Front valve 3 Front brake lever 4 Throttle lever 5 Rear brake parking brake lever 6 Engine stop switch DESCRIPTION 2...

Page 6: ...gine serial numbers for future reference The frame serial number CD is stamped on the front of the frame FRAME NO CD Frame serial number The engine serial number C2 is stamped on the left side of the...

Page 7: ...emergency switch When the switch is in the ON position the engine will operate Engine Stop Switch Throttle Lever The throttle lever is beside the right handlebar grip and is activated by the right ha...

Page 8: ...r wheels This brake also has a locking feature and allows the rear brake to be used as a parking brake To use the parking brake pun the left brake lever back and lock it Make sure the vehicle is compl...

Page 9: ...er To operate the vehicle the switch cap must be connected to the safety switch The switch cap is attached to a rope The safety switch rope should NEVER be attached to the rider A parent or supervisor...

Page 10: ...icle With the fuel valve at OFF gasoline cannot flow into the carburetor With the fuel valve at ON fuel will flow out from the tank With the fuel valve at RES fuel will flow from the reserve fuel supp...

Page 11: ...el Tank Fuel tank capacity is 4 5 liter including 0 8 liter in the reserve supply Automotive gasolinewith octane level of 91 or higher may be used After refueling be sure to tighten the tank cap firml...

Page 12: ...oil level before each use When the oil level gets to the warning level about 1 2 inch from the bottom of the tank add oil to the tank Ji To add oil remove the seat assembly and lift off the rear seat...

Page 13: ...r pressure gauge Tires should be inflated to the recommended pressure The recommended pressure 2 2 psi 15 kPa Max Pressure 2 6 psi 18 kPa Min Pressure 1 8 psi 12 kPa The pressure should be checked whe...

Page 14: ...oil tank Check fuel level in fuel tank Check brake operation Check tires condition and pressure Check drive chain condition and slack Check throttle for smooth opening and closing Check engine stop sw...

Page 15: ...it to the ON position 3 Turn the fuel valve ON 4 Move the engine stop switch to ON 5 Push the start button on the left handlebar BREAK IN During the first two weeks of riding run your new vehicle tend...

Page 16: ...uch the ground for balance 1 Start the engine 2 After the engine has been wanned up release the parking brake The vehicle is ready for riding 3 Increase engine speed by gradually opening the throttle...

Page 17: ...otation it is not enough to merely steer this vehicle into a turn To turn steer in the direction of the turn leaning your body to the inside of the turn while supporting your weight on the outer footp...

Page 18: ...rvicing I Inspect and Clean Adjust Lubricate or Replace if necessary C Clean L Lubricate 15 INITIAL SERVICE REGULAR SERVICE EVERY YEAR First week Every 30 operating days FUEL LINE I THROITLE OPERATION...

Page 19: ...4 Inspect the plug electrodes for wear If the electrodes and insulator tip appear unusually fouled or burned change to a new one 5 Discard the spark plug if there is apparent wear or if the insulator...

Page 20: ...be cleaned more frequently To clean the filter 1 Remove the air cleaner cover 2 Take out the filter from the air cleaner case 3 Wash the filter element in a non flammable or high flash point solvent...

Page 21: ...re in good condition DRIVE CHAIN The drive chain will wear with use and requires periodic adjustment Remove the chain cover measure the amount of chain slack to check the chain tension The amount of s...

Page 22: ...be made with the adjuster beside the throttle lever Loosen the lock nut and turn the adjuster The free play should be maintained at 5 10 mm BATTERY When reinstalling the battery be sure to connect the...

Page 23: ...on ratio 7 5 1 Oil tank capacity 1 0 liter TransmIssion Automatic c V T V belt XDZ50QST XDZ50QST A Overall Length 1330 mm 1430 mm Chassis Overall Width 830 mm 800 mm Overall Height 830 mm 830 mm Wheel...

Page 24: ...WIRIN G D IA GRAM Safety swnch Fuso box Resistor Enricher 8ano 1 rako swnch 1 r j Starter bunon r o l a_ c_ Igndion switch I Loft handlebar swncho assy...

Page 25: ...e the information described in this manual may be a little different from the actual status Yerf Dog will reserve the right to revise at any time The revision will be made without notice Any part of t...

Reviews: