56
Yetter Hydraulic Compressor Maintenance
WARNING:
Keep extremities out of the compressor housing when compressor is running, has potential to run, or
recently shut off as there are rotating and high temperature parts that my cause injury. Always turn tractor
off & disconnect power before performing any maintenance.
LUBRICATION:
The compressor is shipped empty of pump lubrication and needs oil added before operation. Provided is a 1 Liter bottle of
grade 111 full synthetic. Add oil until oil level is seen half way up on the sight glass & then recheck oil level on the dipstick.
Yetter part number for purchasing new bottle is 2940-550.
GUARDS:
Always ensure the housing and guards are in place during operation.
AIR FILTER CARTRIDGE:
Yetter part number 2940-549. Order as needed.
MAINTENANCE SCHEDULE GUIDE
DAILY
Check oil level and fill as needed
Check air filter cleanliness and clean/replace as needed
Check hoses for fluid leaks and replace/fix as needed
Check air lines for air leaks and replace/fix as needed
Check component parts of the compressor for damage (pressure switch, cooling fan, gauge, etc)
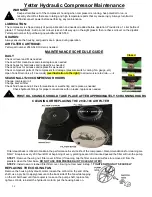
Open Tank Drain Valve (10 seconds)
(see illustration to the right)
to allow moisture to drain-----
SEASONALLY/200 COMPRESSOR HOURS
Change compressor oil
Change inlet air filter
Check fluid hoses and air lines for weakness or weathering and replace as needed.
Check hydraulic fittings for proper connections with no leaks, replace as needed.
FIRST OIL CHANGE SHOULD TAKE PLACE AFTER APPROXIMATELY 50 RUNNING HOURS
CLEANING OR REPLACING THE 2940-106 AIR FILTER
Filter cleanliness is critical to maintain the performance & service life of the compressor. Recommendations for cleaning are
DAILY & replace every 200 hours OR at beginning of every planting season. Dirt sucked passed the filter will ruin the pump.
STEP 1:
Remove the wing nut, filter cover & filter. (If cleaning, tap the filter on a solid surface to remove dirt from the
pleats & clean the filter base.
DO NOT USE COMPRESSED AIR TO CLEAN FILTER!
STEP 2:
Install new or cleaned filter,filter cover, & wing nut removed in step 1.
TIGHTEN WING NUT SECURELY
.
REPLACING THE COOLING FAN
Remove the housing & hydraulic motor, loosen the LH bolt on the end of the
shaft, use a pry bar to apply pressure to the back side of the fan while tapping
on the LH bolt head until fan coupler is loose on the pump shaft, replace fan,
tighten LH bolt, reinstall, the hydraulic motor & put the housing back on.
Closed
Open
Summary of Contents for GERMINATE UNIFORMITY 2940
Page 35: ...35 6 Row Airline Diagram 6 11 or 6 12 Split Row Airline Diagram...
Page 36: ...36 8 Row Airline Diagram 8 15 8 16 Split Row Airline Diagram...
Page 37: ...37 12 Row Airline Diagram...
Page 39: ...39 16 Row Airline Diagram...
Page 40: ...40 16 31 16 32 Split Row Airline Diagram...
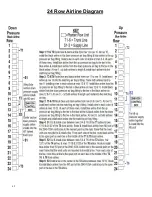
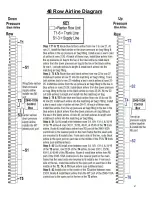
Page 42: ...42 24 Row Airline Diagram...
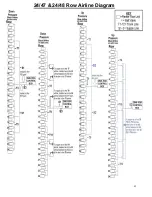
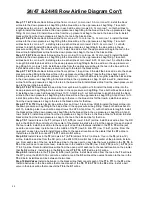
Page 43: ...43 24 47 24 48 Row Airline Diagram...
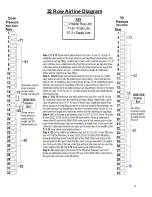
Page 45: ...45 32 Row Airline Diagram...
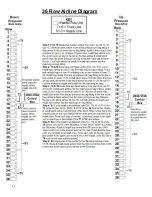
Page 46: ...46 36 Row Airline Diagram...
Page 47: ...47 48 Row Airline Diagram...
Page 48: ...48 54 Row Airline Diagram...
Page 78: ...78 HYDRAULIC PUMP 2940 545 PARTS IDENTIFICATION PART REFERENCE ONLY...
Page 82: ...82 2565 983_REV_B 09 21...

