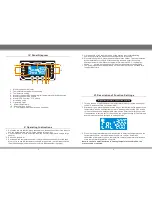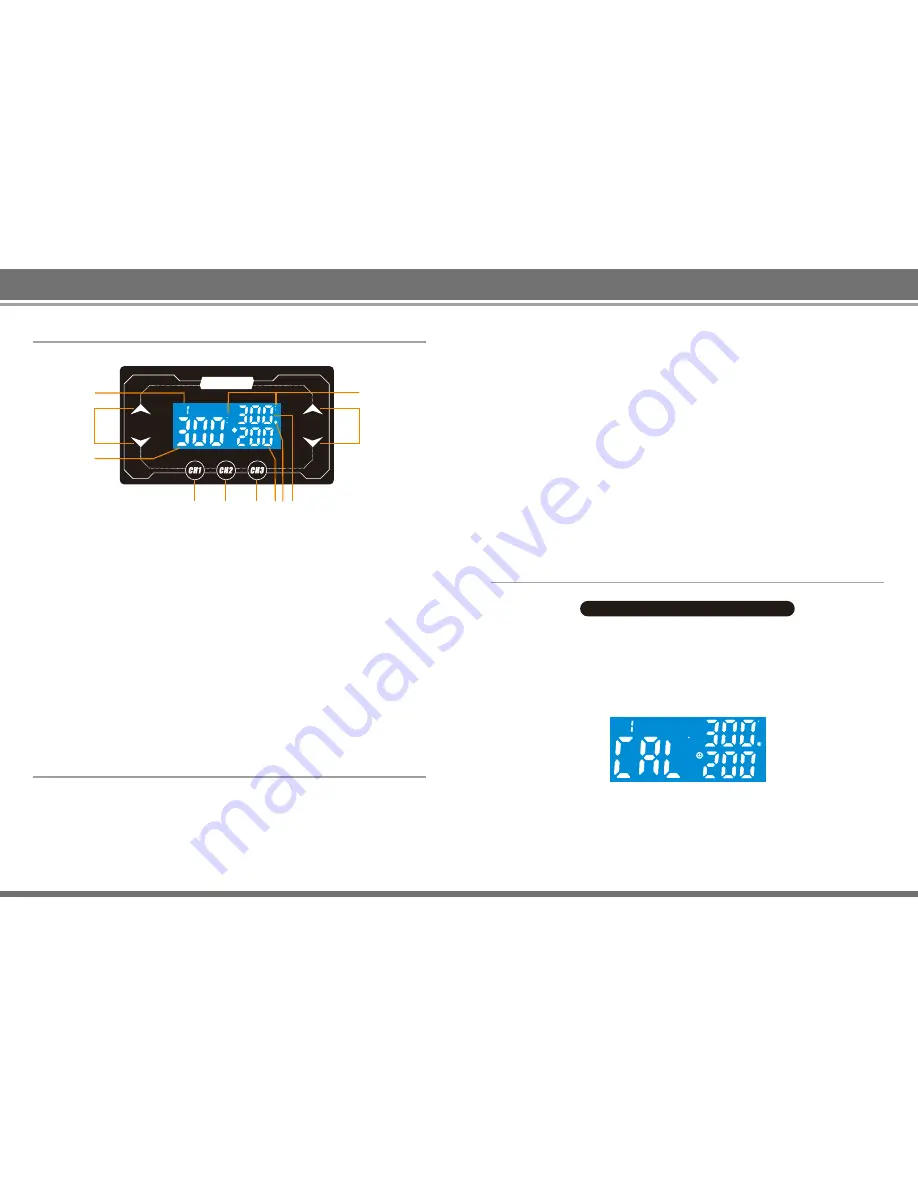
1. Memory channel indicator
2. Temperature/data plus-minus setting
3. Temperature setting
4. Memory channel CH1 setting /digital temperature calibration button
5. Memory channel CH2 button
6. Memory CH3 button/ °F \°C switch
7. Air analog value
8. Operating light
9. Actual temperature
10. Air plus-minus button
11. °C /°F display mode (displays only one mode)
IV. Panel Diagram
C
F
C
F
CH
AIR
TEMP.
1
2
3
4
5
6
7 8 9
10
11
993D
1. Set up the rework station, place the handle on the handle holder. If you want to
use the holder while working, fix the handle to the holder.
2. Connect the power cord and fit the required nozzle (recommend using a large
nozzle)
3. Switch on the power.
4. Set the desired temperature and air flow (provided requirements for the task
are met, try to use low temperatures and a large air flow in order to extend the
life of the heating element and ensure safety when desoldering chips).
V. Operating Instructions
7
8
5. Lift the handle of the rework station, so the station starts normal heating
operations; start work when constant temperature is reached.
6. On completion of work, place the handle back in the holder. The rework station
will automatically cut off power to the heating wire and enter the cooling
heating element mode. When the temperature is below 100°C, the display
shows “---”, air flow is stopped and the rework station enters standby mode.
7. The power switch should be switched off if the rework station is not used for a
long period of time.
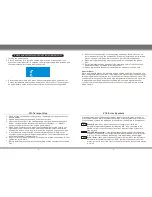
1. Turn on the power switch and set the temperature to be corrected, usually set
to 300°C, and set air flow to the maximum.
2. Start the air gun, place the handle to the air gun test instrument to measure the
temperature, when a constant temperature is measured press the CH1 button
for 3 seconds and the display below will be shown. Enter the calibration mode.
If no operation is carried out for 12 seconds, the original setting will be retained
and the rework station is returned to settings mode.
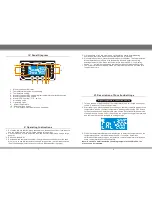
3. Press the temperature/data plus-minus button to enter the temperature on the
temperature control instrument and press CH1 to confirm. Automatic
calibration of temperature, save temperature, restore temperature calibration
state, temperature calibration complete.
Note: In case of a small deviation following temperature calibration, the
process can be repeated.
VI. Description of Function Settings
Digital temperature correction setting
C
C
CH


