background image

1

2

ASSEMBLY INSTRUCTIONS

ASSEMBLY INSTRUCTIONS

1

5

3

Reference Image 

Qty.

Item

no.

2

4

×4

×1

×1

×1

×2

Reference Image 

Qty.

Item

no.

×4

×4

×8

×12

×2

×4

×4

A

F

E

D

G

C

B

L

K

J

M

I

H

N

R

Q

P

S

T

O

Reference Image 

Qty.

Item

no.

Reference Image 

Qty.

Item

no.

×4 

×16

×4

×2

×18

×10

×2

×1

×1

×4

×1

×1

×2

Notice:
1.Follow the installation instructions. Please confirm all accessories are preset before installation.
2.Do not fully tighten the screws during initial assembly.Fully tighten screws only once all pieces 

which are correctly assembled.

3.If you encounter any problems during installation, please contact our customer service.

∅3.5*12

∅3.5*15MM

M6*40

∅5*50

∅7*50

M6*30

M4*10

Summary of Contents for FTOFBC-9006

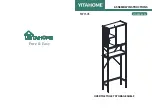
Page 1: ...Pure Easy OVER THE TOILET STORAGE SHELF FTOFBC 9006 MYH V1 ASSEMBLY INSTRUCTIONS...

Page 2: ...Image Qty Item no 4 16 4 2 18 10 2 1 1 4 1 1 2 Notice 1 Follow the installation instructions Please con rm all accessories are preset before installation 2 Do not fully tighten the screws during init...

Page 3: ...SEMBLY INSTRUCTIONS ASSEMBLY INSTRUCTIONS 6 15 13 11 Reference Image Qty Item no 7 14 12 Reference Image Qty Item no 1 1 1 1 1 1 1 1 1 1 9 10 8 1 1 2 3 4 5 5 5 5 6 7 8 9 10 11 13 14 15 12 Explosion Di...

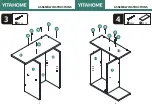
Page 4: ...2 B 4PCS 9 1PCS 10 1PCS 13 1PCS 1 D 2PCS I 1PCS 8 1PCS 5 6 ASSEMBLY INSTRUCTIONS ASSEMBLY INSTRUCTIONS I 8 9 10 13 D B B B B D...

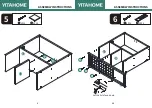
Page 5: ...4 B 6PCS 11 1PCS 3 B 6 PCS 7 8 ASSEMBLY INSTRUCTIONS ASSEMBLY INSTRUCTIONS 8 9 9 10 10 11 13 B B B B B B B B B B B B...

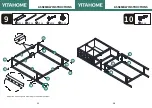
Page 6: ...6 T 4PCS 2 1PCS 5 B 2PCS 14 1PCS 9 10 ASSEMBLY INSTRUCTIONS ASSEMBLY INSTRUCTIONS 14 14 8 2 9 B T T T T B Let the hole face down...

Page 7: ...11 12 8 F 8PCS 7 E 4PCS 3 1PCS 5 2PCS ASSEMBLY INSTRUCTIONS ASSEMBLY INSTRUCTIONS 3 5 E F F F F F F F F E E E...

Page 8: ...13 14 10 F 4PCS 9 1 2PCS ASSEMBLY INSTRUCTIONS ASSEMBLY INSTRUCTIONS Adjust the mounting hole according to the actual situation 5 5 1 4 1 E E E F F F F E E N N N N E E 6PCS 4 1PCS 5 2PCS N 4PCS...

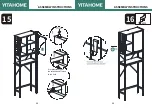
Page 9: ...15 16 12 G 4PCS 6 1PCS 11 F 4PCS 7 1PCS ASSEMBLY INSTRUCTIONS ASSEMBLY INSTRUCTIONS F F G G G G F F 7 6...

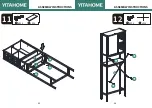
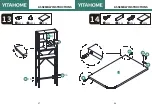
Page 10: ...17 18 14 C 2PCS H 1PCS K 2PCS 12 1PCS 13 J 4PCS O 12PCS 15 1PCS ASSEMBLY INSTRUCTIONS ASSEMBLY INSTRUCTIONS C C H K K J 4 O 6 15 12 O 6 narrow wide...

Page 11: ...19 20 16 A 4PCS 15 ASSEMBLY INSTRUCTIONS ASSEMBLY INSTRUCTIONS A 4 12 I It is important to get the rotating shaft stuck in the hole...

Page 12: ...INSTRUCTIONS Q Q P P P P R R Step 1 2 Q S P P Step 2 2 Pull to check safety Corret Step 3 2 18 Q 2PCS S 2PCS P 4PCS Notes Highly recommend you to secure the anti tip accessories to wall to prevent th...

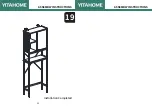
Page 13: ...23 19 ASSEMBLY INSTRUCTIONS ASSEMBLY INSTRUCTIONS Installation Completed...

Reviews: