background image

ASSEMBLY INSTRUCTIONS

ASSEMBLY INSTRUCTIONS

1

5

4

3

2

Reference Image 

Qty.

Item

no.

9

10

8

7

6

Reference Image 

Qty.

Item

no.

×2

×2

×2

×2

×2

×2

×2

×2

×1

×1

A

D

C

B

-

Reference Image 

Qty.

Item

no.

Reference Image 

Qty.

Item

no.

-

×2

×42

×42

×8

8×30

M6×12

Notice:
1.Follow the installation instructions. Please confirm all accessories are preset before installation.
2.Do not fully tighten the screws during initial assembly.Fully tighten screws only once all pieces 

which are correctly assembled.

3.If you encounter any problems during installation, refer to two solutions: Follow the installation 

video tutorial on the Amazon product page or contact our customer service.

M6

E

×2

F

G

×16

×2

M4×14

1

2

3

4

5

6

7

8

9

10

11

12

13

14

15

16

Summary of Contents for HZHCJJ-V1

Page 1: ...t 1 888 717 8084 from Mon Fri 8 00 AM 16 30 PM PST Saturday 8 00 AM 12 00 PMPST or E mail us at after sale cs hotmail com Alternative method to contact us 1 Log into your amazon account 2 Go to Your O...

Page 2: ...e 1 Follow the installation instructions Please con rm all accessories are preset before installation 2 Do not fully tighten the screws during initial assembly Fully tighten screws only once all piece...

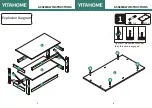
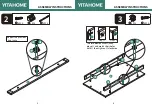
Page 3: ...1 A 4PCS 2 1PCS ASSEMBLY INSTRUCTIONS ASSEMBLY INSTRUCTIONS 1 2 3 3 5 8 7 9 10 9 10 7 8 5 6 6 4 4 Explosion Diagram A A A A 2 Tighten clockwise until all of their threads are engaged 3 4...

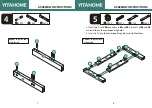
Page 4: ...4PCS ASSEMBLY INSTRUCTIONS ASSEMBLY INSTRUCTIONS B B B B 2 4 4 4 F F F F G The two boards t vertically place and match their holes with then tighten clockwise Arrow Arrow steps 1 steps 2 steps 3 B A 5...

Page 5: ...ASSEMBLY INSTRUCTIONS A A A A 6 6 7 5 5 8 A A A A B B B B C C 7 8 1 Insert two into to connect to and Ensure of and are installed in the corresponding holes 2 Insert six into the corresponding holes a...

Page 6: ...6 D 2PCS E 2PCS 9 2PCS 10 2PCS ASSEMBLY INSTRUCTIONS ASSEMBLY INSTRUCTIONS F D E 10 9 9 7 F 8PCS 10 9 9 10 Repeat the previous step twice Repeat the previous step twice...

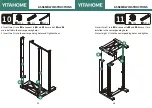
Page 7: ...ASSEMBLY INSTRUCTIONS ASSEMBLY INSTRUCTIONS B A 2 A 8 A 16PCS 9 B 6PCS 11 12 Repeat the previous step twice...

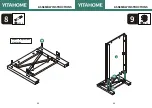
Page 8: ...5 A A 13 14 1 Insert two into to connect to and Ensure A of and are installed in the corresponding holes 2 Insert two into the corresponding holes and tighten them 1 Insert two into to connect to and...

Page 9: ...12 A 10PCS 1 1PCS ASSEMBLY INSTRUCTIONS ASSEMBLY INSTRUCTIONS 13 A A 1 1 15 16...

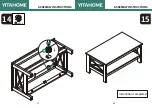
Page 10: ...14 B 10PCS ASSEMBLY INSTRUCTIONS ASSEMBLY INSTRUCTIONS 15 Installation Completed 17 18 B...

Reviews: