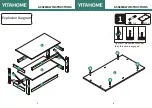
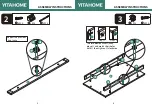
background image

2

F

4PCS

G

2PCS

4

2PCS

3

B

4PCS

F

4PCS

ASSEMBLY INSTRUCTIONS

ASSEMBLY INSTRUCTIONS

B

B

B

B

2

4

4

4

F

F

F

F

G

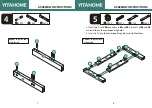
The two boards fit vertically, 

place 

 and match their holes 

with 

 then tighten 

 clockwise.

Arrow

Arrow


steps 1

steps 2

steps 3

B

A

1

2

3

4

5

6

7

8

9

10

11

12

13

14

15

16

Repeat the previous 

 step twice

Summary of Contents for HZHCJJ-V1

Page 1: ...t 1 888 717 8084 from Mon Fri 8 00 AM 16 30 PM PST Saturday 8 00 AM 12 00 PMPST or E mail us at after sale cs hotmail com Alternative method to contact us 1 Log into your amazon account 2 Go to Your O...

Page 2: ...e 1 Follow the installation instructions Please con rm all accessories are preset before installation 2 Do not fully tighten the screws during initial assembly Fully tighten screws only once all piece...

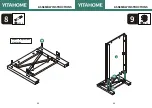
Page 3: ...1 A 4PCS 2 1PCS ASSEMBLY INSTRUCTIONS ASSEMBLY INSTRUCTIONS 1 2 3 3 5 8 7 9 10 9 10 7 8 5 6 6 4 4 Explosion Diagram A A A A 2 Tighten clockwise until all of their threads are engaged 3 4...

Page 4: ...4PCS ASSEMBLY INSTRUCTIONS ASSEMBLY INSTRUCTIONS B B B B 2 4 4 4 F F F F G The two boards t vertically place and match their holes with then tighten clockwise Arrow Arrow steps 1 steps 2 steps 3 B A 5...

Page 5: ...ASSEMBLY INSTRUCTIONS A A A A 6 6 7 5 5 8 A A A A B B B B C C 7 8 1 Insert two into to connect to and Ensure of and are installed in the corresponding holes 2 Insert six into the corresponding holes a...

Page 6: ...6 D 2PCS E 2PCS 9 2PCS 10 2PCS ASSEMBLY INSTRUCTIONS ASSEMBLY INSTRUCTIONS F D E 10 9 9 7 F 8PCS 10 9 9 10 Repeat the previous step twice Repeat the previous step twice...
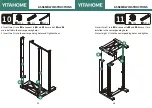
Page 7: ...ASSEMBLY INSTRUCTIONS ASSEMBLY INSTRUCTIONS B A 2 A 8 A 16PCS 9 B 6PCS 11 12 Repeat the previous step twice...

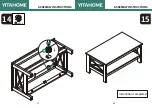
Page 8: ...5 A A 13 14 1 Insert two into to connect to and Ensure A of and are installed in the corresponding holes 2 Insert two into the corresponding holes and tighten them 1 Insert two into to connect to and...

Page 9: ...12 A 10PCS 1 1PCS ASSEMBLY INSTRUCTIONS ASSEMBLY INSTRUCTIONS 13 A A 1 1 15 16...

Page 10: ...14 B 10PCS ASSEMBLY INSTRUCTIONS ASSEMBLY INSTRUCTIONS 15 Installation Completed 17 18 B...

Reviews: