


ASSEMBLY INSTRUCTIONS
ASSEMBLY INSTRUCTIONS
3
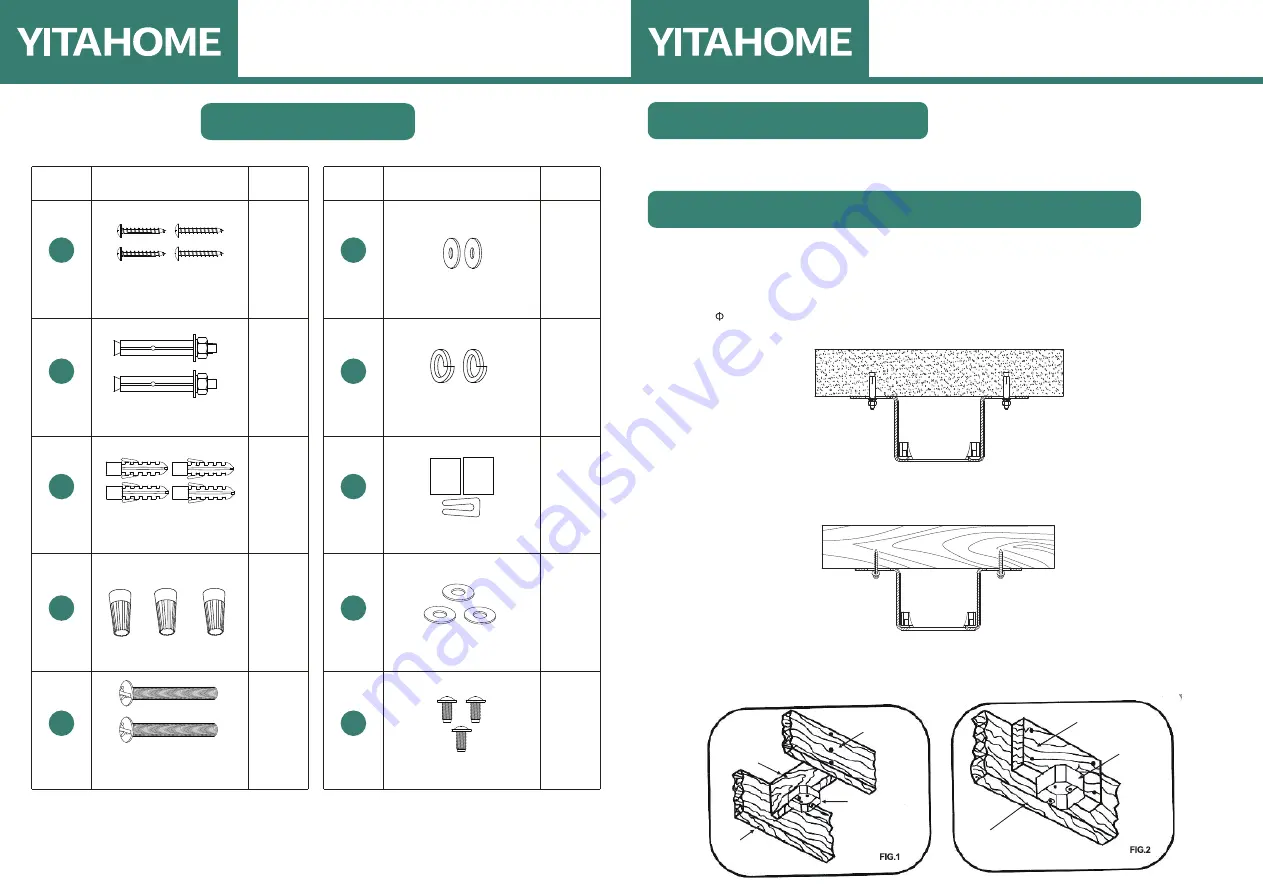
INSTALLING THE FAN
INSTALLING THE MOUNTING BRACKET
Tools Required: Phillips screwdriver, a pair of pliers, straight slot screwdriver, adjustable wrench, step ladder,
and wire cutters.
CELING JOIST
CEILING JOIST
CROSS BRACE
OUTLET BOX
PARALLEL WOOD BRACE
(MIN.2" THICK)
OUTLET BOX
CEILING JOISTOR
CROSS BRACE
4
The ceiling fan must be installed in the location where there is 12"(300mm) spacing from the tips of
all blades to the nearest objects or walls. REMEMBER to turn off the power before hanging the fan.
Follow the instruction below to hang your fan properly:
1. For concrete ceiling, drill two holes in the ceiling and secure the mounting bracket to the ceiling
with two 0.32"(8mm) (distance between the two holes should be appropriate) expansion screws,
flat washers nuts provided and tighten with a spanner.
2. For wood ceiling, secure the mounting bracket to the ceiling that is capable of carrying a load of at
least 100lbs (45kgs) with two long mounting screws and washers provided. Be sure at least
0.12"(30mm) of the screw is threaded into the support.
3. For installing the outlet box, secure it directly to the building structure. Use appropriate fasteners
and building materials. The outlet box and its support must be able to fully bear the moving
weight of the fan (at least 100lbs). Use a UL listed metal outlet box instead of plastic ones.
Figure 1& 2 show the examples of mounting the outlet box.
SCREWS BAG
ST5x35
Setscrew
Expansion
Screw
Setscrew Stopper
Wire Cap
#8-32
Setscrew
Screw
Washer
Screw Spring
Washer
Balance Pack
Fabric
Washer
Screws
for Blades
6
10
7
Reference Image
Qty.
Item
no.
×16
×2
8
×1
9
×16
×2
1
5
2
Reference Image
Qty.
Item
no.
×2
×2
3
×4
4
×3
×4


