ASSEMBLY INSTRUCTIONS
ASSEMBLY INSTRUCTIONS
13
14
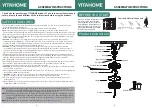
NOTE
:
CEILING FANS TEND TO MOVE DURING OPERATION DUE TO THE FACT THAT THEY ARE
MOUNTED ON A RUBBER CROMMET. IF THE FAN WAS MOUNTED RIGIDLY TO THE CEILING, IT
WOULD CAUSE EXCESS VIBRATION, MOVEMENT OF A FEW CENTIMETERS IS QUITE ACCEPTABLE
AND DOES NOT SUGGEST ANY PROBLEMS
TO REDUCE FAN WOBBLE: PLEASE CHECK THAT ALL SCREWS WHICH SECURE THE MOUNTING
BRACKET AND DOWNROD ARE SECURE
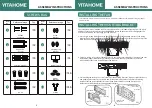
BALANCING A WOBBLING CEILING FAN
For your convenience, a balancing kit is included: please follow this procedure when balancing the
fan:
1.Check that all blades and blade arm screws are secure.
2.Most fan wobbling problems result from blade levels are unequal. Check this level by selecting a
point on the ceiling above one fan blade’s tip. Measure this distance. Rotate the fan until the next
blade is positioned for measurement. Repeat for each blade. The distance deviation should be equal
within 1/8" (0.32cm).
3.Use the enclosed blade balancing kit if the blade wobbling is still noticeable.
4.If the blade wobble is still noticeable, interchanging two adjacent
(side by side) blades can redistribute the weight and possibly result
in smooth operation.
WARNING
: TO REDUCE THE RISK OF PERSONAL INJURY, DO NOT BEND THE BLADE ARM WHILE
INSTALLING, BALANCING THE BLADES, OR CLEANING THE FAN. DO NOT INSERT OBJECTS BETWEEN
ROTATING FAN BLADES
NOISE
It’s normal to hear small occasional noises when in quiet night or days. Please allow a 24-hour
"breaking-in" period, most noises of a new fan disappear during the time.
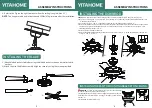
HOW TO USE BALANCING KITS
!
1. Make sure the fan is getting power.
2. Check the functionality of circuit breaker or fuse panel and wall switch.
3. Confirm fan wires are correctly connected to the house wires.
4. Make sure the blocker of the fan motor is removed.
5. Use your remote to check the power to the breaker and try to work your ceiling fan
manually from afar (Normal switch only for the fan power on/off)
1.Confirm the circuit breaker is not malfunctioning.
2.Confirm the wire connections are not frayed.
3. Confirm the app does not set the timer or schedule
4. Power off the fan for 10 minutes, then power on again.
1.Confirm the blade screws are NOT rubbing against the the motor’s round plastic part.
2.Confirm the pin wire are NOT connected against the moving part.
3. Confirm the coupling cover is NOT hitting the motor
4. Confirm the down rod is NOT slanted
5. Tighten any loose screws on the light kit, fan blades, motor coupling, down rod,
brackets and mounting hardware.
6. Confirm the hanger ball is firmly seated in the mounting bracket.
7. The ceiling beam must meet the minimum tensile test strength of 30KG for installation.
8. Make sure the airfoils and brackets are NOT bent or deformed.
9. Confirm the wire connections are not rattling against each other.
10. Confirm the fan blades are not cracked. If the fan blades are cracked, replace the
damaged blades with the set of new blades of same brand as your ceiling fan ensures
the compatibility.
11. Change fan blades’ positions.
12. Confirm the light kit is NOT slanting and hitting the motor.
13. Confirm all the blades are screwed firmly into blade holders.
Make sure the LED light kit and light bulb are connected well.
Your fan may occasionally jerk forward or backward upon starting up.
This is normal and does not affect the fan operation.
Try these troubleshooting steps before contacting customer service.
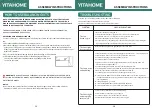
TROUBLESHOOTING
SYMPTOM
The fan
doesn’t spin
The fan’s light
does not work
The fan is noisy
and wobbling
The fan or light
automatically
turns on/off
POSSIBLE SOLUTIONS


