P4 OF 34
P3 OF 34
IMPORTANT NOTES
These precautions are essential and must be strictly observed.
DO NOT
pull on the power cord or refrigeration lines.
Install them in a secured position. A line set plastic
cover is recommended.
DO NOT
install the unit in places where there is
exposure to flammable materials or gas leakage.
DO NOT
use wire or circuit breakers that do not meet
electrical safety standards. Several circuits cannot
be connected to one breaker.
DO NOT
wire or open the unit while it is running.
Make sure to shut off all circuits prior to inspecting or
servicing the unit.
DO NOT
install unit in a damp laundry room or near
flammable gas. All units must be protected by
certified electrical circuit breakers and in accordance
with all safety codes.
DO NOT
use the unit in cool or dry mode for
prolonged periods where humidity is higher than 80%.
SAFETY WARNINGS
READ THESE SAFETY WARNINGS COMPLETELY PRIOR TO ANY USE.
DO NOT
install the indoor unit close to cooking
surfaces or ventilation systems. Poor placement
could inhibit peak performance.
DO NOT
blow cold air directly towards people for
extended periods. It may get you a bad cold.
DO NOT
use chemical solvents, flammable
insecticides, or abrasive materials. Clean the unit
only with a soft dry cloth or rag.
DO NOT
continue to operate the unit if there is any
abnormal odor, burning, scorching, or smoke. Stop
and disconnect the unit immediately.
DO NOT
use the system for anything other than what
it was designed for or any non-HVAC purposes. Do
not store near food, paint, or other chemicals.
DO NOT
operate the unit for prolonged periods
without refreshing ambient air. Opening a door or
window periodically will suffice.
Ground connection
Forbidden
Disconnect the plug
Imperative
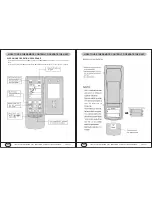
Before using the air conditioner, be sure to check and preset the following.
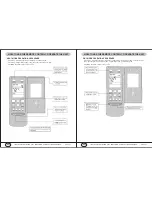
REMOTE CONTROLLER PRESETTING
The remote control is
NOT
presetting as Cooling Only Air Conditioner or Heat Pump by manufacturer. Each time
after the batteries are replaced the Cooling indicator and Heating indicator will flash alternately on LCD screen of
the remota control..
User can preset the remote controller type depending on the air conditioner type you have purchased as follows:
Press any button when flashes, Heat Pump is set.
Press any button when flashes, Cooling Only is set.
If you don't press any button within 12 seconds, the remote control is preset as Heat Pump automatically.
Note:
If the system you have purchased is a cooling only unit, there will be no response even if the remote control is
preset for heat pump. it doesn't bring any matter. But if the air conditioner you purchased is a Heat Pump one,
and you preset the remote controller as Cooling Only, then you CAN NOT preset the Heating operation with the
remote controller.
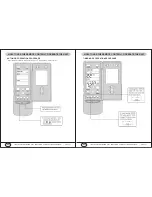
BACK-LIGHT FUNCTION (OPTIONAL)
Hold down any button of remote control for about 2 seconds, back-light turns on. When the button is released the
back light will automatically shut off within 10 seconds.
Note: Back-light is an optional function.
If you want auto restart function, let the unit energize, hold down the Emergency button (ON/OFF) on the indoor
unit for over 5 seconds, auto restart function is set with buzz sound, air conditioner is on standby.
AUTO RESTART PRESETTING
If auto restart has been set, hold down the Emergency button (ON/OFF) on the indoor unit for over 5 seconds,
auto restart function is canceled with buzz sound, air conditioner is on standby.
PREPARATION BEFORE USE
YMGI, A COMFORT MAKER, A JOY COMPANION, A SATISFACTION GUARANTOR...
YMGI, A COMFORT MAKER, A JOY COMPANION, A SATISFACTION GUARANTOR...
By Placing Your Order and Purchasing Our Products from an Authorized Distributor, or by Opening the
Carton Box, You Shall Have Read All Manuals and Instructions and Understood and Accepted and
Agreed to All the Following:
What You Will Need to Do When Receiving the
Products
Shall Check the Delivery Against the Order and Packing
List to Make Sure There is No Unit/Part/Accessory Missing
or Damage.
Shall Mark Any Unit and Part and Accessory Missing on
the Delivery Confirmation Paperwork.
Shall Report Any Freight Damage to the Carrier within 24
Hours as of Delivery.
Shall Report Any Unit and Part and Accessory Missing or
Damage to Sales/Customer Service within 24 hours as of
Delivery.
No Report after 24 Hours as of Delivery, Meaning
Units/Parts/Accessories Have Been Delivered Completely
and No Damage is Found.
What You Will Accept before Breaking the Box
Seal and Opening the Box
Due to Continuous Product/Engineering Improvement, as
Well as Viewing Angles and Background Affects, the
Contained Unit May Look Slightly Different from What is
Shown on the Carton Box or Spec. Brochures.
The Units Were Manufactured Some Time Prior to the
Shipping Date. Normally The Box is Sealed and The
Units/Parts Contained Are New and Have not Been Used.
From Time to Time, Shipper Does Select Boxes Randomly
to Check the Contained Units/Parts to Make Sure
Everything is All Right, before Shipping. But, All Units/Parts
Have not Been Used.
The Product is Designed and Manufactured and Tested to
Be Free of Defects at Manufacturer Plants, but if the Unit
Will Work Properly or Not, Only Depends upon Many other
Factors, Especially the Quality of Installation. Anything Not
Working May Not be the Product Itself. Which Could be
Power Failure, Insufficient or Wrong Wiring, Not Vacuuming,
Pipe Bending or Kinking or Leaking, Unit/Parts Dropping,
Water Damage, and So on.
If the product, for Some Uncontrolled Factors During
Transportation and Installation, Doesn't Function Properly
or Timely Due to Unexpected Failure, You Agree to Have
the Licensed Installer (HVAC or Electrician), instead of
Yourself, Call the Manufacturer Technical Support and/or
Customer Service to Walk through Some Technical Steps
Together, In Order to Find Out the Failure Reason and
What Parts Are Needed. All the Effort is To Limit the
Problems and Make the Unit Work for You As Soon As
Possible and There Will Be No Extra Charge.
What You Need to Pay Attention to at Installation
Understand to Save on Somethings but Not Everything.
In Order to Ensure Installation Quality and Validate the
Factory Warranty, You Must Hire a Currently Validly
Licensed HVAC Technician to Conduct Electricity and
Refrigerant-Related Installation and Trouble-Shooting Work
and Follow Related Local/DOE/EPA Codes and Laws.
Contact Your Licensed HVAC Technician to Determine
What Portion Can be Done Do-it-Yourself (DIY) and Save
Some Money. DIY Installation Varies Upon Many Factors.
DIY Installation May Succeed, but May Be Taking Chance
and/or Running Risks.
Do Not Pay your Technician in Full, Until at Least 30 Days
after All Installation is Finished and Unit(s) Work Properly.
What You Need to Know During Installation or
Operation
Cover the Interconnecting Pipes Before Pulling through
Structures, to Keep Dust, Debris and Other Foreign
Substances from Entering and Damaging the Refrigeration
System.
Vacuum and Conduct Leakage Check for the
Interconnecting Pipes and Indoor Unit. If There is Any
Leakage, Need to Find it and Fix It.
Must Make Sure the System is Sealed Tight without Any
Leakage Potential, before Releasing Refrigerant from the
Condensing Unit to the Interconnecting Pipes and Indoor
Unit.
For Technical Questions, In Order to Help You in a timely
manner, You Shall Have the Licensed Technician/Installer,
Instead of Yourself, Check What is Going on before Talking
to the Sales Distributor and/or Manufacturer Technical
Support from Your Job Site.
For Product Pricing and Product Availability, You Shall Talk
with Sales.
For How to Use the Unit or if You Need Any Parts, You Shall
Read the Manuals or Go Online or Contact Your
Sales/Customer Service at Distributor, if Not Available, then
Contact Customer Service/Support at Manufacturer, via the
Contact Information Printed in the Manual and/or Unit.
What You Need to Know Before Your Contractor/
Technician Finishes the Installation
Witness the Contractor/Technician Checking the System
Thoroughly and All Functions and Make Sure All Are Good.
Have the Contractor/Technician Sign on the Paperwork.
Don't Pay to the Contractor/Technician in Full Until the
Whole System Works Smoothly without Any Problem for at
Least 30 Days.
Tell the Contractor/Technician that They Need to Come to
the Job Site to Check the System, if There is Anything Not
Right, Since You Pay to Get Their Service.
Tell the Contractor/Technician that They, not the
Customer/End User, Will be the One to Talk to the Factory
Technical Support, Technically, if There is Anything Wrong
or Abnormal, In Order to Communicate Efficiently and
Productively.
What You Need to Know about Warranty
If the Units are Installed Properly, Following Manufacturer
Instructions, by Licensed HVAC Technician, the Units are
Covered with a Standard Warranty which Covers 5-year
Compressor and 1-year Other Parts Only.
In Standard Factory Warranty,
NO LABOR IS INCLUDED.
Extended Warranty shall be Purchased at Original Unit
Ordering, at Extra Cost to Cover More Years of Parts
and/or Labor.
Units/Parts Shipping is Ground Only. Expedited Express
Shipping Shall be Requested in Writing at Extra Cost.
Decision Maker's Own Risks and Is NOT Guaranteed and
Endorsed by the Manufacturer.
VERY IMPORTANT NOTES TO DEAR CUSTOMERS FOR
REFRIGERANT RELATED HVAC PRODUCTS, ESPECIALLY THE SPLIT TYPE

