YMGI, Engineered Comfort Products for A Sustainable and Efficient Green World!
YMGI: Your Modern Green Idea
22
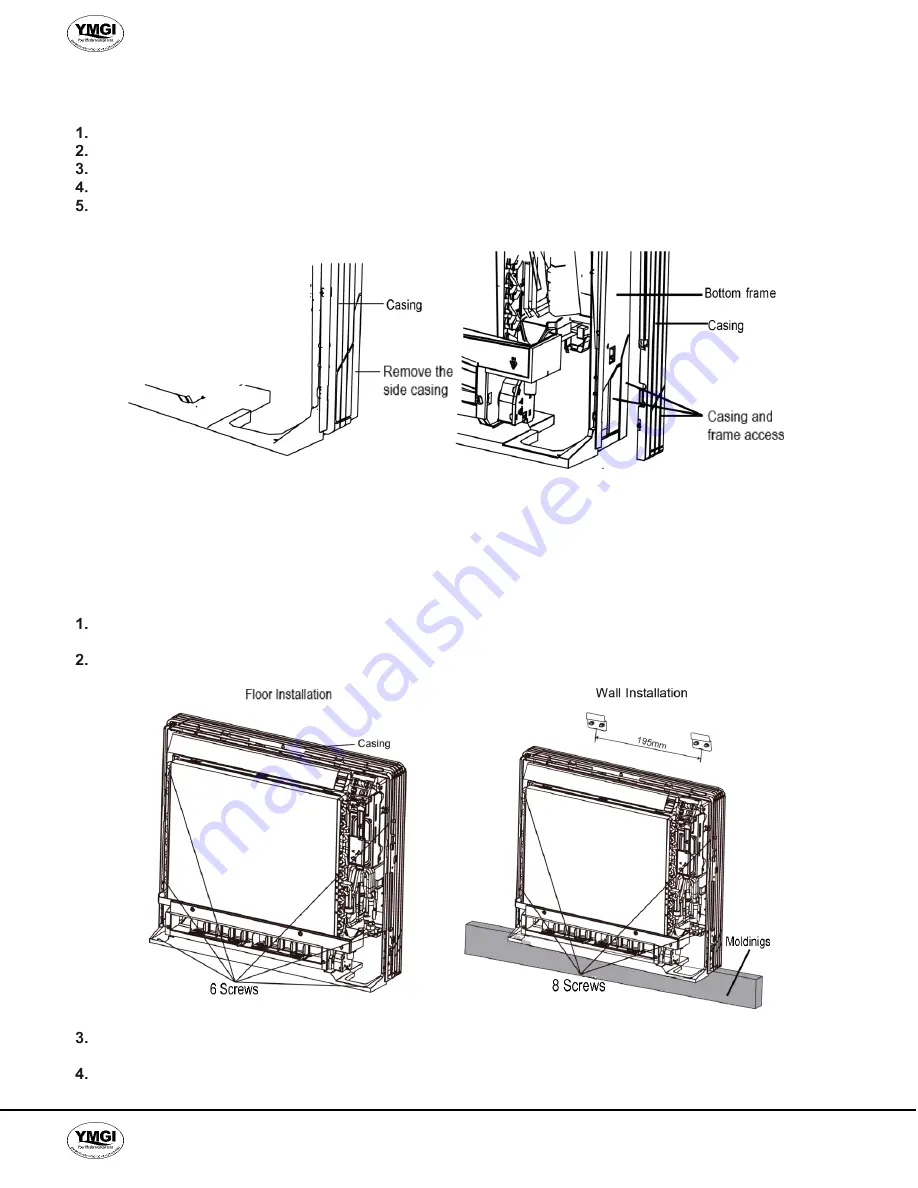
For Side Piping
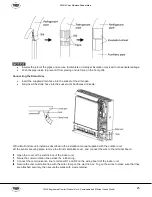
Remove the Side and Top Casings.
Remove the 9 screws securing the casings.
Remove the upper casing by depressing the 2 tabs.
Remove the left and right casings by depressing the 2 tabs on each side.
Remove the slit portions on the bottom frame, if necessary, and the appropriate casing using nippers.
Reassemble by following the above steps in reverse order (4>3>2>1).
Installation
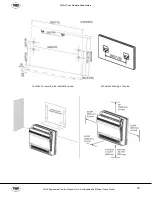
For floor installations, secure the unit to the floor using 6 screws. (Do not forget to secure the unit to the wall.) For
wall installations, secure the mounting plates using 4 screws and the indoor unit using 4 screws.
The mounting plates must be installed on a wall capable of supporting the entire weight of the indoor unit.
Temporarily secure the mounting plate to the wall, making sure the panel is completely level, and mark the drilling
points on the wall.
Secure the mounting plates to the wall with screws.
After refrigerant piping and drain piping connections are completed, fill in the gap of the through hole with putty.
A gap can lead to condensation on the refrigerant pipe and drain pipe, or allow insects to enter the building.
Attach the front panel and front grille in their original positions once all connections are complete.

