UNIT OPERA
TION
P25 OF 46
YMGI, Engineered Comfort Products for A Sustainable and Efficient Green World !
"LIGHT" BUTTON:
This allows you to turn the indoor
unit display light on and off. If the light emitted by the
display is bothersome simply press the LIGHT button
on the remote and the display will turn off. To turn the
display back on simply press the light button once
more.
REMOTE CONTROL-BUTTON NAME & FUNCTIONS
"FAN" BUTTON:
By pressing this button you can
select from fan speeds AUTO
→
Low
→
Middle
→
High.
When the unit is first powered on the default fan
speed setting is AUTO. When running the unit in
DRY mode the fan speed will only run in low speed.
"CLOCK" BUTTON:
The time function runs on a 24
hour clock. To set the time press the clock button
once. You will see a flashing clock appear on the
remote. Press the "+" button to increase the time;
press the "-" button to decrease the time until the
desired time is set. Press the clock button once more
to set the time. You will notice then, the clock symbol
is not flashing.
Note:
Under the Dry mode, the fan speed isn't
adjustable, low fan speed is imperative.
High fan
High fan
High fan
AUTO
"BLOW" BUTTON:
When the blow function is on a symbol on the remote will appear next to left hand corner of
the temp. This feature when turned on, will allow the indoor fan to continue to blow even when the unit is turned
off by the remote. This will aid in the quick drying of the indoor coil to help prevent any kind of mold build up due
to moisture. To turn this feature off simply press the BLOW button once more till you notice the blow icon
disappear from the remote display.
"TURBO" BUTTON:
When you press this button you will see a symbol of a fan appear on the remote. In either
heat or cooling mode when this button is pushed the compressor and or fan will blow at a higher speed to
achieve set temp quicker. When the indoor unit senses that the set temp is being approached the fan speed will
slow down. To turn this function off simply press the TURBO button until the fan symbol is no longer displayed on
the remote.
"+" Button:
By pressing this button the set temp will increase. If this button is pushed without releasing for over
2 seconds the temperature will increase more rapidly. In AUTO mode the temperature cannot be changed. The
O
O
temperature range for this remote is 61 F to 86 F.
"-" Button:
By pressing this button the set temp will decrease. If this button is pushed without releasing for over
2 seconds the temperature will decrease more rapidly. In AUTO mode the temperature cannot be changed. The
O
O
temperature range for this remote is 61 F to 86 F.
"TEMP" Button:
When the unit is first turned on the remote will display the last set temp. When the TEMP button
is pushed twice the indoor unit will display the room temp for approximately 5 seconds before going back to the
set temp.
TO LOCK THE REMOTE:
If you would like to lock the remote from anyone changing the settings simply press
the "+" and the "-" buttons simultaneously. When the remote is locked you will see an icon of a lock appear on the
remote. If while the remote is locked and someone pushes a button on the remote they will see the icon of the
remote flash three times. This indicates the remote is locked. To unlock the remote simply press the "-" and the
"+" once more. You will know the remote is unlocked once the icon of the lock disappears from the remote screen.
O
O
SWITCH BETWEEN F AND C :
The remote default is Fahrenheit. If you would like to switch between the remote
displaying Fahrenheit and Celsius the MODE and the "-" button simultaneously while the unit is turned off.
"TIMER ON" BUTTON:
This button allows you to set a time you would like the unit to turn on. The clock is a 24
hour clock. Press the TIMER ON button once and you will see the word "on" flashing next to a time displayed. By
pressing either the + or the button choose the time you would like the unit to turn on. Once you have the desired
time displayed on the remote press the TIMER ON button once more and the word ON will stop blinking and stay
on the remote. The time you would like the unit to turn on is now set.
"TIMER OFF" BUTTON:
This allows you to set the time that you would like the unit to shut off. Simply follow the
above steps but this time press the TIMER OFF button instead of the TIMER ON button. When the word OFF is
set on the remote screen, the time you would like the unit to turn off is now set.
UNIT OPERA
TION
P26 OF 46
YMGI, Engineered Comfort Products for A Sustainable and Efficient Green World !
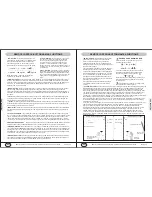
Once the U-TOUCH stars appear, the remote will send a signal of the remote-local temperature to the indoor unit,
and this remote-local temperature will supersede the return air temperature as the unit's target temperature.
Every 10 minutes such signal will be sent from the remote to the indoor unit updating the remote-local
temperature. If at any time during this process no signal is received by the indoor unit from the remote, the unit
will switch back to the previously set temperature before the U-TOUCH feature is activated. To turn the U-
TOUCH feature off, simply press the U-TOUCH button until you see the symbol disappear from the remote
screen. By doing so, the return air temperature will take place of remote-local temperature as the unit's target
temperature. U-TOUCH is what YOU WANT. U-TOUCH feature brings to you a true comfort level wherever and
whenever you want.
REMOTE CONTROL-BUTTON NAME & FUNCTIONS
"SWING" BUTTON:
Hold the swing button (symbol
shown above) for more than 2 seconds and the
indoor air louver will start to swing between the
highest and lowest limits. Once the swing button is
released the louver will stay in the last position where
the button was released.
If the swing button is pushed just once the swing icon
will appear on the remote and the louver will swing
up and down continuously between the highest and
lowest points. Push the swing button once more and
the icon will disappear on the remote and the louver
will remain at the last point the button was pushed.
When the unit is powered off by the remote the louver
will close on the indoor unit.
Press this button to set up the desired swing angle
which circularly changes as below. (Insert swing
picture)
"U-TOUCH" BUTTON:
Since the indoor unit is normally mounted high up on the wall or attached to the ceiling, the
temperature at where the return air sensor is installed inside the indoor unit is higher than what it is where the
area people stand and can feel (4 to 7 feet above the floor). If the unit uses the return air temperature as its
target control, people may feel colder than what they really want (target) in both cooling mode and heating mode.
The facts of air stratification and warm air rising and cold air dropping require users to set up, by experiments or
experience, the target temperature quite few degrees higher than what you really want , in order to reach a
satisfied or more precise indoor comfort. This is a common drawback of AC/HP units made by other manufacturers.
With YMGI's U-touch feature, this can be avoided and your comfort level can be improved.
When you press the U-TOUCH button on the remote control, the unit will use the temperature where the remote
is located as its target temperature control. Once you do so, you will notice a figure of a person surrounded by
stars appear on the remote.
"SWING UP AND DOWN" BUTTON
Press this button, to set up swing angle,
circularly changes as below:
which
This is an universal use remote control. If remote
control sends the following three kinds of status
that the swing status of main unit will be:
When the guide louver start to swing up and down, if
turn off the Swing, the air guide louver will stop at
current position.
which indicates the guide louver swings up and
down between that all five positions.
H1
T
H2
Warmer
Colder
Warm air rises
Cold air drops
T+
△
Temp sensor
Wall mount indoor unit
"U-Touch" Feature Is Activated:
"U-Touch" Feature Is NOT Activated:
Roof
Floor
Signal (communication)
Remete control
(Temp sensor)
T
H1
T
Roof
Floor
(Feel More
Comfortable)
(May Feel Colder than
You Want in Summer
and Winter)

