


33
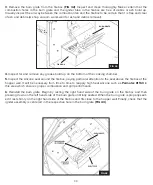
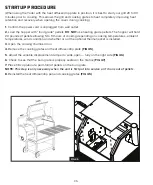
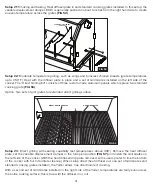
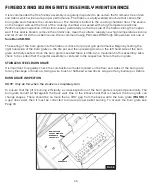
3.
Remove the burn grate from the firebox
(FIG 42)
. Inspect and clean thoroughly. Make certain that the
combustion holes in the burn grate and the igniter tube in the firebox are free of debris or ash build up.
Visually inspect the air way between the combustion fan and the firebox to be certain that it is free and clear
of ash and debris (A shop vacuum works well for ash and debris removal).
4.
Inspect for and remove any grease build up on the bottom of the cooking chamber.
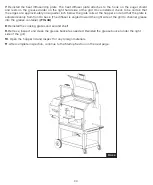
5.
Inspect the silicone seal around the firebox, paying particular attention to the seal above the firebox at the
hopper wall. It will be necessary from time to time to reapply high heat silicone such as
Permatex 81160
in
this area which ensures proper combustion and grill performance.
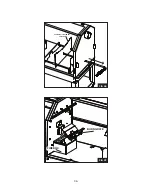
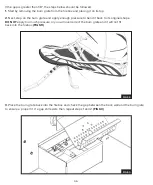
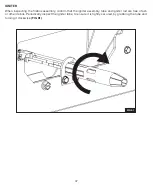
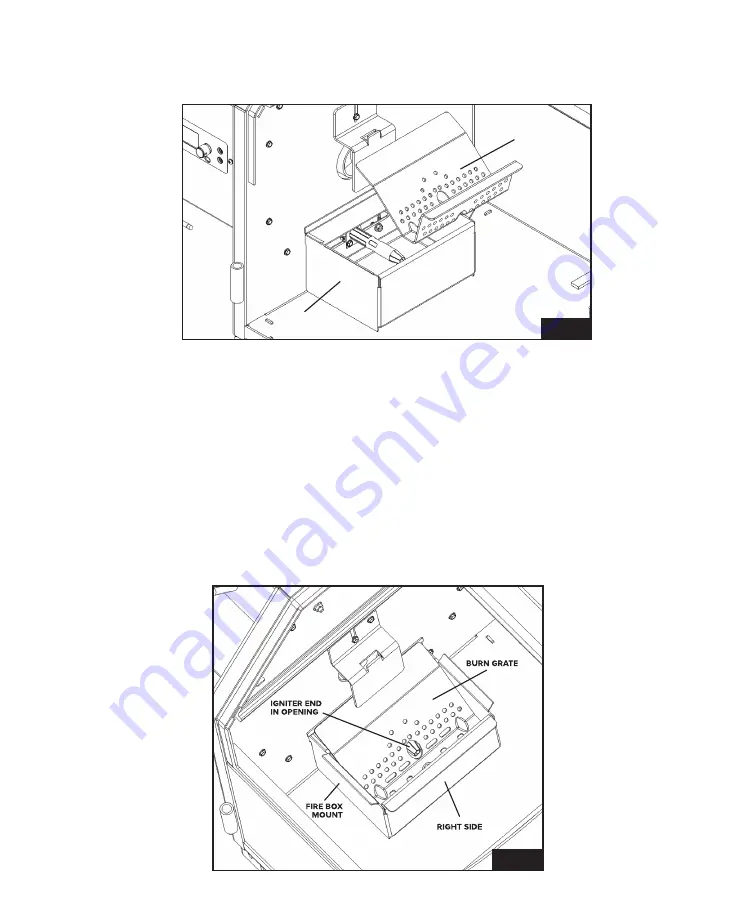
6.
Reinstall the burn grate. Begin by resting the right hand side of the burn grate on the firebox and then
pressing down on the left hand side of the burn grate until fully seated. When the burn grate is properly seat-
ed it rests firmly on the right hand side of the firebox and fits close to the hopper wall. Finally, check that the
igniter assembly is centered in the respective hole in the burn grate
(FIG 43)
.
BURN GRATE
FIRE BOX
FIG 42
FIG 43
Summary of Contents for S Series
Page 1: ...O P E R A T I O N M A N U A L...
Page 2: ...2...
Page 3: ...3...
Page 8: ...8...
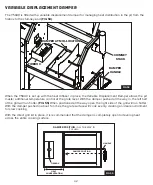
Page 36: ...36 VARIABLE DISPLACEMENT DAMPER FIREBOX BURN GRATE FIG 46 FIG 47...
Page 53: ...53 11 8 5 3 9 7 4 6 3 10 1 2...
Page 55: ...55 1 2 3...
Page 57: ...57 7 8 11 4 12 13 14 2 6 10 5 9 1...
Page 59: ...59 1 17 16 15 18 11 10 9 8 7 4 6 3 5 13 14 12 2...
Page 68: ...68 NOTES...
Page 69: ...69 NOTES...