


49
Chicken Artichoke Skillet Pizza
Ingredients
Pizza dough (recipe below)
Pizza sauce (recipe below)
Grilled artichoke
Grilled chicken breast
Cattleman’s Grill Italiano Seasoning
Baby spinach
Mozzarella, diced or grated
Olive oil
Step 1: Season your breasts with Cattleman’s Grill Italiano Seasoning and grill at 400ºF until internal
temperature reaches 160ºF. Rest
fi
ve minutes. Dice.
Step 2: Assemble pizza: Preheat your cooker to 500ºF. Stretch the dough to 14 inches. Place in an oiled
12” Lodge Cast Iron Skillet. Brush the crust with olive oil. Spread a layer of pizza sauce over the dough.
Top sauce with spinach, then mozzarella, then diced grilled artichoke and chicken breast.
Step 3: Bake at 450ºF until dough is cooked through, about 20 minutes.
Pizza Dough
Makes dough for 3-4 pizzas
Ingredients
500g Napoli Antimo Caputo 00 Flour
325g water
10g salt
5g dry active yeast
Combine all ingredients in a stand mixer. Mix until all
fl
our is incorporated, then a minute longer. Place in
an oiled bowl. Let rise until doubled in size. Divide in 3 or 4 pieces. Roll into balls. Let rest at least thirty
minutes before stretching/rolling.
Pizza Sauce
Ingredients
1 (28 oz) can Strianese San Marzano Tomatoes
2 cloves garlic, minced
2 T fresh basil, minced
1 1/2 T sugar
1 1/2 T salt
Combine ingredients. Bring to a simmer. Taste and adjust seasoning.
Grilled Artichoke
Ingredients
2 artichokes
1 lemon, wedges
olive oil
Cattleman’s Grill Italiano Seasoning
10
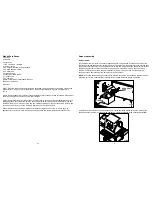
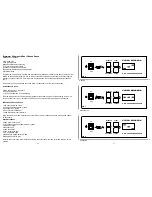
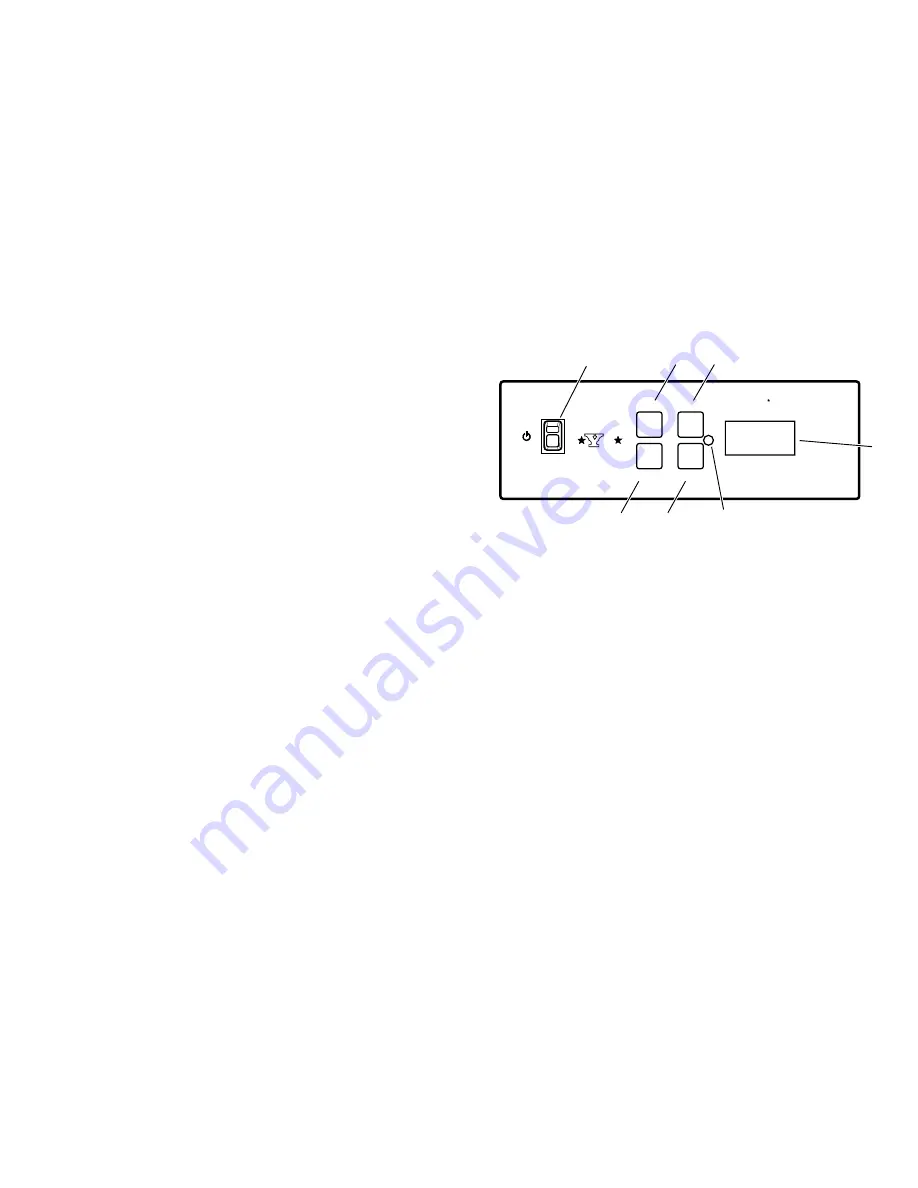
Yoder YS Series Control Panel
1.
Power Switch - turns the power to your Yoder on and o
ff
2.
Increase - increase the temperature setting (in 5-degree increments).
3.
Decrease - decrease the temperature setting (in 5-degree increments).
4.
Start - activates the startup cycle. This also accesses the “heat up” modes (see below).
5.
Prime - overrides the control system to manually feed pellets.
6.
Power LED - lights up when the power switch is in the on position.
7.
Display - provides information about how the grill is performing including: heat up mode, cool down
mode, maintenance mode, set temperature and actual temperature. Once the cooker exceeds 110° F
at start up the display alternates between the cooker temperature and the operating mode.
The controller is adjustable from 150 to 600° F in
fi
ve degree increments. The controller displays the
actual pit temperature when the set point is from 150 to 495° F. When the controller is set to 495° F or
higher, the controller will display the set point.
To access the “heat up” modes once the Yoder is running press and hold the start button until the
current heat up mode is displayed. Use the increase/decrease buttons to toggle between H1, H2 or H3.
Operating mode indicators: Heat up mode
(FIG 6)
is displayed by three dashing lines from lower left to
upper right. Maintenance mode
(FIG 7)
is displayed by three horizontal lines. Cool down mode
(FIG 8)
is
displayed by three dashing lines from the upper left to the lower right.
NOTE:
For start-up in temperatures below 50° F, see Page 14.
START
PRIME
ON
OFF
INCREASE
DECREASE
Y
S
YODER SMOKERS
C O M P E T I T I O N G R A D E B B Q P R O D U C T S
WWW.YODERSMOKERS.COM
1
2
4
3
5
6
7
Summary of Contents for YS 640
Page 1: ......


