


41
04
12
01
14
12
08
07
03
13
02
09
10
14
13
11
06
05
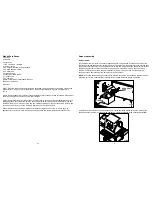
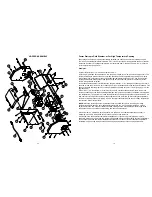
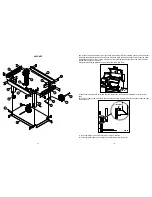
640 CART
18
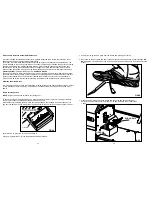
and rests on the grease divider on the right hand side of the grill. Once installed, check to be certain that
the edges are approximately one-quarter inch below the grate rails at the hopper end and that the plate
is adjusted evenly from front to back. (The di
ff
user is angled toward the right side of the grill to channel
grease into the grease container.)
8. Reinstall the cooking grates and optional second shelf (See FIG 9).
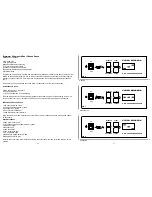
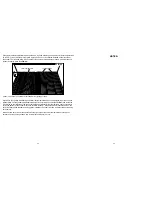
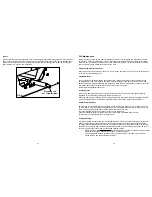
9. Inspect chimney stack to be certain that the internal end of the stack is installed even with the grill
body.
10. Remove, inspect and clean the grease bucket as needed. Reinstall the grease bucket under the right
side of the grill.
11. Open the hopper lid and inspect for any foreign materials.
12. After complete inspection, continue to the Startup Section. (Page 19)
FIG 13
END OF STACK FLUSH
WITH BODY.
END OF STACK FLUSH
WITH BODY.
FIG 14
Summary of Contents for YS 640
Page 1: ......


