background image

21

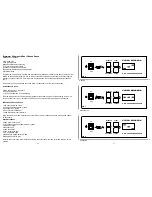
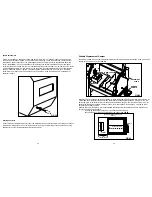
10. Turn the power switch “on.” This starts the combustion air fan and illuminates the power light. Press 

the “start” button on the control panel to activate the auger feed system. (The default temperature set 

point is 350° F). If a higher or lower temperature setting is desired, use the increase/decrease buttons 

to set the temperature. This can be adjusted at any time after the start cycle is activated. (For cool/cold 

season or high temperature cooking see the Selectable Heat Up Modes [Page 11]).

Once the start cycle is activated, three lines will appear on the display panel from lower left to upper right 

indicating “heat up” mode. Once the grate temperature reaches 

110° F, the actual grate temperature is displayed, alternating with the mode lines. 

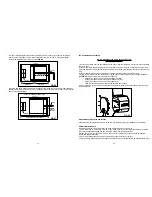
If the grate temperature range is exceeded during the “heat up” mode, dashing lines will appear from 

upper left to lower right indicating “cool down” mode. Once the target temperature range is attained, the 

lines will 

 ash horizontal indicating “maintenance mode”. The controller will display grate temperatures 

when the set point is between 150 and 495° F When the set point is between 500 and 600° F, the display 

will show the set point and not the actual grate temperature.

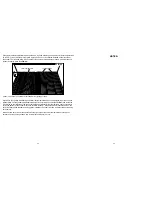
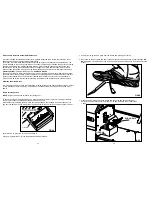
11. Flames should be visible on the burn grate within 3 to 4 minutes. (The igniter is active for 2 minutes. 

When you hit “start”, the auger turns continuously for 45 seconds to prime the burn grate. At 46 

seconds, the igniter is powered on; within 2 minutes, the heat from the igniter and the combustion air 
from the fans will have a small smoldering 

 re started.


NOTE:


The only way to reactivate the igniter is to turn the cooker o

  and let it go through the cool down 

cycle, or simply pull the plug for a hard reset at which point you can restart the cooker. Before restarting 

the Yoder, remove the grates and heat di

 user and inspect the burn grate for any pellet over

 ow. Remove 

all pellets from the burn grate area and from the pit 

 oor if present.

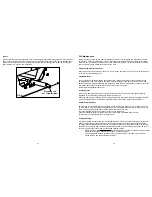
12. Once the temperature reaches the set point, open the cooking chamber and carefully oil the grates 

with vegetable oil. You are ready to cook!

Shutting Down The Smoker

When 

 nished cooking, push the power switch to the “o

 ” position. The controller will begin its automatic 

shutdown procedure.

• 

The auger feed system will stop feeding fuel.

• 

The combustion cooling fan will continue to run until the 

 re is burned clean.

• 

The fan will continue to run until the grill temperature reaches 125° F or 18 minutes, whichever 

occurs 

 rst.

• 

When the procedure is complete, the fan and power LED will turn o

 .

• 

Disconnect the Yoder from its power source. When the grill is completely cool, cover the grill to 

protect your investment and keep the pellets dry.

38

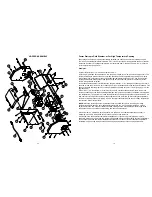
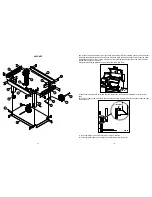
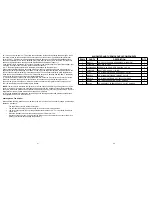
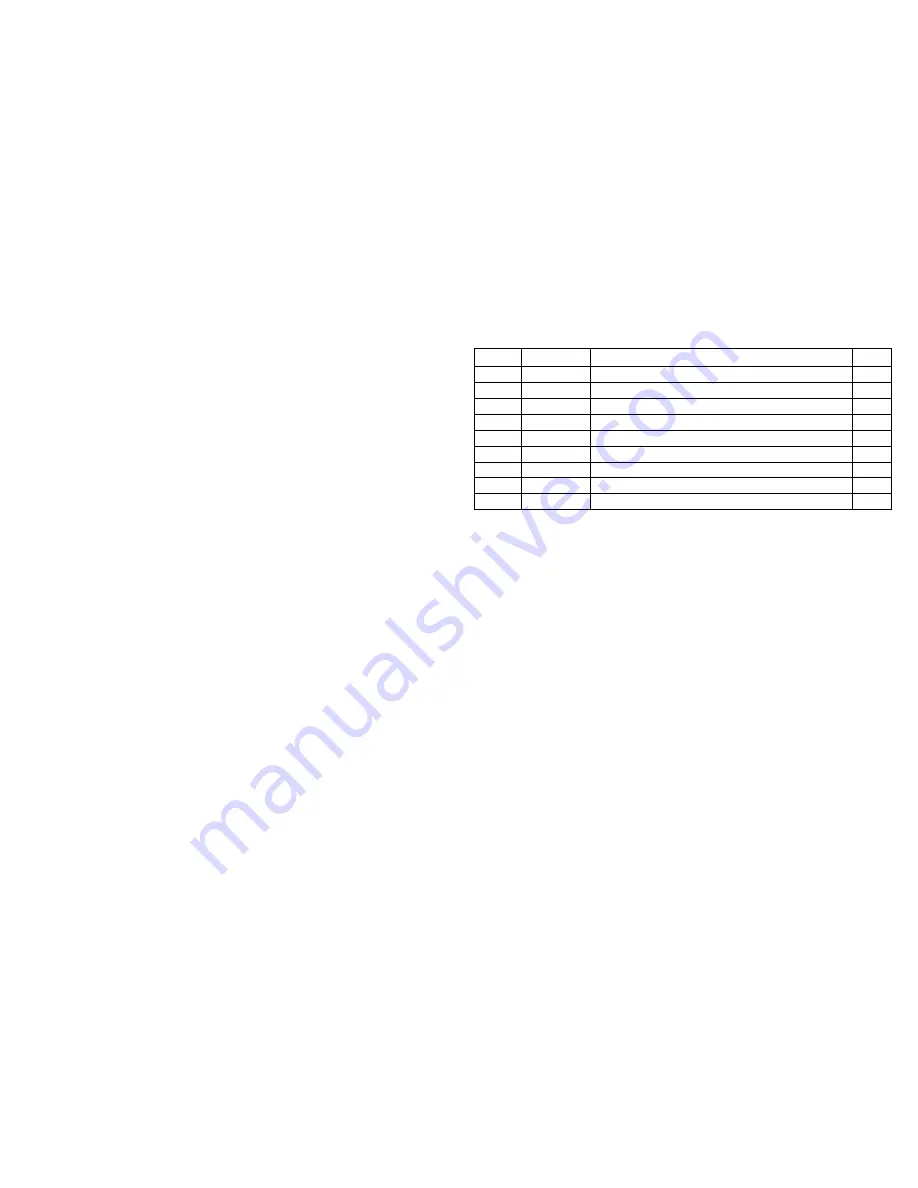
640 IGNITER AND THERMOCOUPLE COMPONENTS

ITEM #

PART #

DESCRIPTION

QTY.

1

W90777

YS, PELLET, 640 SMOKE CHAMBER, WELDMENT

1

2

1420WHN

NUT, WHIZ, 1/4-20

1

3

10X34HHSDS

SCREW, HEX HEAD, SELF DRILLING, 10 X 3/4

6

4

1420X1HB

BOLT, HEX, 1/4-20 X 1” LONG

1

5

91713

YS, WELDMENT, AUGER COVER BRKT, PELLET

1

6

W90812

YS, WELDMENT, FIREPOT MOUNT, PELLET

1

7

W91078

YS, WELDMENT, BURN POT, PELLET SMOKER

1

8

A90423

YS, IGNITER ASSEMBLY, PELLET SMOKER

1

9

A91413

YS, ASSEMBLY, THERMOCOUPLE, PELLET SMOKER

1

Summary of Contents for YS 640

Page 1: ......

Page 2: ...t Usage 9 Yoder YS Series Control Panel 10 Selecting Heat Up Modes 11 Selecting Fahrenheit or Celcius 11 The Controller In Depth 13 How Heat Up Modes Work 13 Faster Startup in Cold Weather or For High...

Page 3: ...ring the Grill For Season 28 PaintedSurfaces 28 CookingGrates 28 Heat Di user Drip Plate 28 Cooking Chamber 28 Firebox and Burn Grate Assembly Maintenance 29 Stainless Steel Burn Grate 29 Burn Grate I...

Page 4: ...re is out If the Yoder fails to initially light after pressing the START button or goes out during operation due to a power surge or power failure do not restart the Yoder without removing the cookin...

Page 5: ...e temperature inside the cooking chamber falls below 125 F whichever occurs rst During this period the cooking chamber door must remain closed Failure to do so can cause burn back in the hopper Longer...

Page 6: ...the breast to make a at even piece of meat Marinate in Smoke on Wheels BBQ Marinade for one hour Meanwhile over low heat cook the shallots in a tablespoon of oil with a pinch of salt until lightly bro...

Page 7: ...stu ed dust with John Henry Pecan Rub Step 3 Grill the chops on medium high heat for about 6 minutes on each side Turn each chop 45 degrees after 3 minutes to mark Remove from the grill when the inte...

Page 8: ...rubs to the pork Cover the meat with equal parts Cattleman s Grill Steakhouse and Cattleman s Grill Tri tip Rest meat for 10 minutes Cook at 325 F until internal temperature reaches 140 F 145 F Remove...

Page 9: ...ing Serve with Chipotle Aioli Chipotle Aioli Ingredients 1 egg yolk 1 chipotle in adobo sauce 1 2 tsp adobo sauce 1 clove garlic chopped 1 Tbsp lime juice 1 2 cup grape seed or vegetable oil don t use...

Page 10: ...temperatures ambient air temperature wind and whether or not the Yoder is equipped with a thermal jacket Generally usage is about 2 pounds per hour at grilling temperatures 350 to 450 F At smoking te...

Page 11: ...Yoder YS Series Control Panel 1 Power Switch turns the power to your Yoder on and o 2 Increase increase the temperature setting in 5 degree increments 3 Decrease decrease the temperature setting in 5...

Page 12: ...nto the bowl of a stand mixer Combine the salt bread our all purpose our and 2 tablespoons of melted butter then add to the bowl Mix on low for about 5 6 minutes Dough should be pulled away from the s...

Page 13: ...il soft and browning about 45 minutes IPA Jalape o Cheese Sauce 1 cup heavy whipping cream 6 oz white american cheese grated 6 oz pepper jack grated 6 oz your favorite IPA beer 1 Tbsp Grannie s Hickor...

Page 14: ...startup the program automatically begins in H1 8 minutes into the start up cycle the program calculates the di erence between the set point and the actual cooker temperature and changes the H mode if...

Page 15: ...ieve set point It is simply doing it in a less aggressive way When H2 or H3 is selected it is common for the pit to overshoot the set temperature How much overshoot depends on the startup initial pell...

Page 16: ...T DESCRIPTION QTY 1 A90491 YS PELLET CHAMBER ASSEMBLY 640 1 2 W90551 YS WELDMENT 640 COMP CART BASE 1 3 90725 YS CASTER FLATFREE TIRE 8 DIA RIGID MARATHON 2 4 90724 YS CASTER FLATFREE TIRE 8 DIA SWIVE...

Page 17: ...ove the heat di user drip plate remove and discard previously used protective foil cover if foil has been applied Install a new layer of protective foil Select heavy duty foil that is wide enough to w...

Page 18: ...de of the burn grate on the rebox and then pressing down on the left hand side of the burn grate until fully seated When the burn grate is properly seated it rests rmly on the right hand side of the r...

Page 19: ...de of the grill to channel grease into the grease container 8 Reinstall the cooking grates and optional second shelf See FIG 9 9 Inspect chimney stack to be certain that the internal end of the stack...

Page 20: ...eceptacle If an extension cord is required see caution notes Page 3 3 Load the hopper with food grade pellets DO NOT use heating grade pellets The hopper will hold 20 pounds of pellets allowing 5 to 1...

Page 21: ...e rebox 8 Place 1 8 cup about a palm full of pellets on the burn grate NOTE This step is only necessary when the unit is rst put into service or if it runs out of pellets 9 Reinstall the heat di user...

Page 22: ...he igniter and the combustion air from the fans will have a small smoldering re started NOTE The only way to reactivate the igniter is to turn the cooker o and let it go through the cool down cycle or...

Page 23: ...apply if the igniter has developed a dead short and is tripping the GFCI or blowing the fuse 1 Be sure the unit power cord is unplugged Remove the cooking grates di user plate and burn grate 2 Reach...

Page 24: ...ng to touch any hot surfaces TO CONTROL BOX TO IGNITER IN COOKING CHAMBER FIG 21 36 ITEM PART DESCRIPTION QTY 1 90737 HINGE STAINLESS 2 2 1024X12FHMSSS FLATHEAD MACHINE SCREW STAINLESS 8 3 1024WHN 12...

Page 25: ...re management is not important when you are doing short cooks where you are opening and closing the pit frequently Find a set temperature that works well for the type of food you are grilling for inst...

Page 26: ...egrees Remove the heat di user plate set the variable displacement damper in the full open position See FIG 27 and install the Grill Grates on the left side of the cooker With the heat di user drip pl...

Page 27: ...to the touch before moving it inside Inspect the hopper and cooking chamber for any remaining embers before storing the unit FIG 33 26 Variable Displacement Damper The YS640 is tted with a variable di...

Page 28: ...metal auger area and remove any debris or sawdust that may have built up 4 Using a 5 16 socket you can remove the 11 screws securing the end panel to the hopper assembly See FIG 32 This will allow yo...

Page 29: ...r place back in the smoker and lightly coat with vegetable oil Condition the grates during the burn o process When you begin the next cooking session bring the grill up to the desired cooking temperat...

Page 30: ...rate It is important to regularly check the combustion air holes located on the oor and sides of the burn grate for any blockage or build ups Using a wire brush or at head screwdriver scrape o any bui...

Reviews: