


23
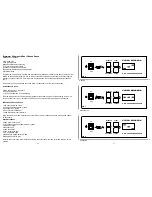
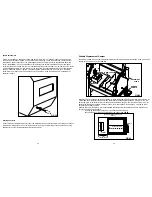
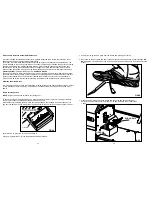
3. Unplug the igniter’s weather tight connection and then push the wires back into the hopper cavity.
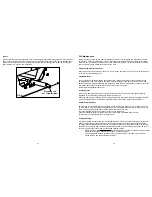
4. Reinstall the burn grate and place a small handful of pellets onto the grate.
5. Light the pellets with a torch, starter gel or starter stick.
6. Once lit, plug the power cord into an outlet and turn the power switch to the “on” position and press
the start on the control panel:
•
The feed system begins the prime cycle before defaulting to the set temperature feed rate.
•
Set the desired cooking temperature (default set point is 350° F).
•
Your smoker will begin to produce a smoke during “startup” within approximately 3 to 5
minutes. To check if the pellets ignited, open the smoker and a
fl
ame should be visible in the
burn pot area. You will be able to view this without having to touch any hot surfaces.
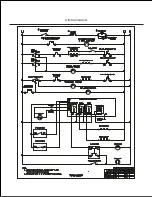
TO CONTROL BOX
TO IGNITER IN
COOKING CHAMBER
FIG 21
36
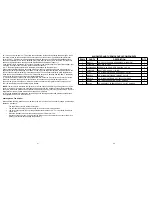
ITEM #
PART #
DESCRIPTION
QTY.
1
90737
HINGE, STAINLESS
2
2
1024X12FHMSSS
FLATHEAD MACHINE SCREW, STAINLESS
8
3
1024WHN
12-24 WHIZ NUT
8
4
22860
SERIAL NUMBER TAG
1
5
236-2489-02
POP RIVET
4
6
W90780
640 DOOR
1
7
41435
HANDLE, ROD
1
8
22866
HANDLE, SPRING
2
9
22924
PUSH CAP, 3/8”
2
10
90901
UNIVERSAL CHROME COOKING GRATE, 8”
4
11
W91641
HEAT DIFFUSER
1
12
W90813
ADJUSTABLE BAFFLE
1
13
1213HN
NUT, HEX, 1/2-13
2
14
90429-02
BAFFLE HANDLE
1
15
W90348
640 SECOND SHELF
1
16
23108
PUSH CAP, 1/2”
1
17
90377
THUMBSCREW, 5/16-18 X 3/4
1
18
W90067
CHIMNEY
1
19
1420X58WHB
SOCKET HEAD SCREW, 1/4-20 X 5/8
1
20
1420WHN
NUT, WHIZ, 1/4-20
3
21
90117-01
HOPPER MOUNTING BRACKET
1
22
1420X58WHB
BOLT, WHIZ, 1/4-20 X 5/8” LONG
2
23
90460
BUCKET
1
24
W90779
32” SMOKE CHAMBER
1
25
90896
SIDE SHELF
1
26
90895
FRONT SHELF, 32”
1
27
90352
LEFT ANGLE 2ND SHELF
1
28
90353
RIGHT ANGLE 2ND SHELF
1
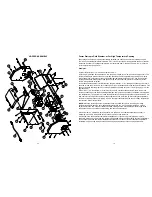
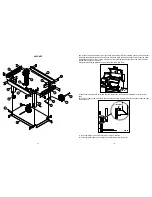
640 COOKING COMPONENTS
Summary of Contents for YS 640
Page 1: ......